EasyManua.ls Logo

Mitsubishi Electric MUZ-GE25VA-a1 User Manual

Mitsubishi Electric MUZ-GE25VA-a1
96 pages
To Next Page IconTo Next Page
Page #1 background imageLoading...
Page #1 background image
SERVICE MANUAL
CONTENTS
1. TECHNICAL CHANGES ··································· 3
2. PART NAMES AND FUNCTIONS ····················· 4
3. SPECIFICATION ················································ 6
4. NOISE CRITERIA CURVES ·····························11
5. OUTLINES AND DIMENSIONS ······················ 13
6. WIRING DIAGRAM ·········································· 15
7. REFRIGERANT SYSTEM DIAGRAM ············· 27
8. PERFORMANCE CURVES ····························· 31
9. ACTUATOR CONTROL ··································· 63
10. SERVICE FUNCTIONS ···································· 64
11. TROUBLESHOOTING ····································· 65
12. DISASSEMBLY INSTRUCTIONS ···················· 86
SPLIT-TYPE AIR CONDITIONERS
NOTE:
RoHS compliant products have <G> mark on the spec name plate.
HFC
utilized
R410A
OUTDOOR UNIT
Indoor unit service manual
MSZ-GE•VA Series (OBH531)
PARTS CATALOG (OBB532)
MUZ-GE25VA
MUZ-GE25VAD
MUZ-GE33VA
MUZ-GE35VA
MUZ-GE35VA2
MUZ-GE35VAD
MUZ-GE42VA
MUZ-GE42VAD
Models
MUZ-GE25VA
-
A1
MUZ-GE50VA
-
A1
MUZ-GE25VA
-
A2
MUZ-GE50VA2
-
A1
MUZ-GE25VAD
-
A1
MUZ-GE50VAD
-
A1
MUZ-GE33VA
-
A1
MUZ-GE60VA
-
A1
MUZ-GE35VA
-
A1
MUZ-GE60VAD
-
A1
MUZ-GE35VA2
-
A1
MUZ-GE71VA
-
A1
MUZ-GE35VA2
-
A2
MUZ-GE71VAD
-
A1
MUZ-GE35VAD
-
A1
MUZ-GE80VA
-
A1
MUZ-GE42VA
-
A1
MUZ-GE80VA2
-
A1
MUZ-GE42VAD
-
A1
MUZ-GE80VAD
-
A1
No. OBH532
REVISED EDITION-E
Please void OBH532 REVISED EDITION-D.
Revision E:
MUZ-GE25VAD-
A1
, MUZ-GE35VAD-
A1
, MUZ-GE42VAD-
A1
,
MUZ-GE50VAD-
A1
, MUZ-GE60VAD-
A1
, MUZ-GE71VAD-
A1
and MUZ-GE80VAD-
A1
have been added.
Question and Answer IconNeed help?

Do you have a question about the Mitsubishi Electric MUZ-GE25VA-a1 and is the answer not in the manual?
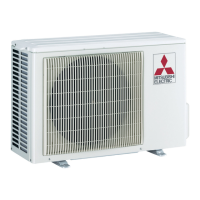
Mitsubishi Electric MUZ-GE25VA-a1 Specifications

General IconGeneral
BrandMitsubishi Electric
ModelMUZ-GE25VA-a1
CategoryAir Conditioner
LanguageEnglish

Summary

Technical Changes

Part Names and Functions

Specification

Noise Criteria Curves

Outlines and Dimensions

Wiring Diagram

Refrigerant System Diagram

Max. Refrigerant Piping Length and Max. Height Difference

Details maximum refrigerant piping length and height difference specifications.

Additional Refrigerant Charge (R410A: g)

Table showing additional refrigerant charge required based on piping length.

Performance Curves

8-1. Capacity and Input Curves

Graphs showing cooling/heating capacity and input vs. temperature.

8-2. Capacity and Input Correction by Operational Frequency of Compressor

Correction factors for capacity and input based on compressor frequency.

8-3. Test Run Operation (How to operate fixed-frequency operation)

Procedure for performing a test run of the unit.

8-4. Outdoor Low Pressure and Outdoor Unit Current

Charts showing low pressure and current under various conditions.

Heat operation

Performance data specifically for the heating operation mode.

Actuator Control

9-1. Outdoor Fan Motor Control

Controls the fan motor ON/OFF, interlocking with the compressor.

9-2. R.V. Coil Control

Describes the 4-way valve reversal for compressor start-up.

9-3. Relation Between Main Sensor and Actuator

Details how sensors affect compressor, LEV, fan, and R.V. coil.

Service Functions

10-1. Change in Defrost Setting

Instructions for changing the defrost finish temperature.

10-2. Pre-Heat Control Setting

Explains the pre-heat control to prevent compressor issues.

Troubleshooting

11-1. Cautions on Troubleshooting

Important checks and precautions before performing troubleshooting.

11-2. Failure Mode Recall Function

Step-by-step guide to recall failure modes for unit diagnosis.

3. Outdoor Unit Failure Mode Table

Lists outdoor unit failure modes, LED indications, conditions, and remedies.

11-3. Troubleshooting Check Table

Table linking symptoms, LED indications, conditions, and remedies for troubleshooting.

11-4. Trouble Criterion of Main Parts

Provides criteria for testing major components like thermistors and motors.

11-5. Troubleshooting Flow

Guided troubleshooting steps for diagnosing various unit failures.

M How to check miswiring and serial signal error

Guides on checking for communication errors and proper wiring.

N Electromagnetic noise enters into TV sets or radios

Steps to diagnose and mitigate electromagnetic interference issues.

Test Point Diagram and Voltage

Disassembly Instructions

1. Removing the cabinet

Step-by-step guide to remove the outer cabinet panels.

2. Removing the inverter assembly, inverter P.C. board

Instructions for removing the inverter assembly and its P.C. board.

3. Removing R.V. coil

Procedure for removing the R.V. coil.

5. Removing outdoor fan motor

Guide to removing the outdoor fan motor and its components.

6. Removing the compressor and 4-way valve

Steps for removing the compressor and the 4-way valve.

1. Removing the cabinet

Cabinet removal steps for models MUZ-GE50VA series.

2. Removing the inverter assembly, inverter P.C. board

Instructions for removing the inverter assembly and its P.C. board.

3. Removing R.V. coil

Procedure for removing the R.V. coil.

5. Removing outdoor fan motor

Guide to removing the outdoor fan motor and its components.

6. Removing the compressor and 4-way valve

Steps for removing the compressor and the 4-way valve.

1. Removing the cabinet

Cabinet removal steps for models MUZ-GE60 to MUZ-GE80.

2. Removing the inverter assembly, inverter P.C. board

Instructions for removing the inverter assembly and its P.C. board.

3. Removing R.V. coil

Procedure for removing the R.V. coil.

5. Removing outdoor fan motor

Guide to removing the outdoor fan motor and its components.

6. Removing the compressor and 4-way valve

Steps for removing the compressor and the 4-way valve.

Related product manuals