Do you have a question about the Mitsubishi Electric PLK-J-CU-20 and is the answer not in the manual?
| Brand | Mitsubishi Electric |
|---|---|
| Model | PLK-J-CU-20 |
| Category | Sewing Machine |
| Language | English |
Read all technical manuals carefully before operation.
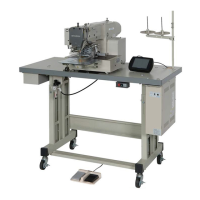
Control unit designed for specific sewing machine; avoid other uses.
Guidelines on suitable and unsuitable environments for operation.
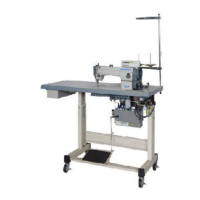
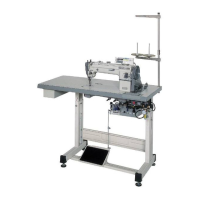
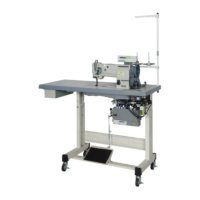
Procedures for installing control box, accessories, cables, and grounding.
Procedures for safely removing the control box and its components.
Information on CE conformity marking and EU region usage.
Guidelines for proper maintenance, inspection, and repair.
Additional safety precautions for machine operation and handling.
Explanation of hazard symbols and their meanings.
Warning against placing foot on the switch during power-up.
Instruction to power off the machine when not in use.
Caution against using testers on control circuits to prevent damage.
Safety procedure for maintenance tasks involving the sewing head.
Importance of grounding the equipment for safety.
Warning against using excessive or improper wiring.
Safety warning about high voltage inside the control box.
Caution regarding hot components like radiation fins.
Explains machine behavior on power loss during operation.
Instruction for proper connector insertion.
Describes automatic motor shutoff for detector issues or machine lock.
Recommendation to operate away from electrical noise sources.
Guideline for connecting external switches to minimize signal wire length.
Procedure for fuse replacement after identifying the cause.
Precautions for turning the power supply on again after it was turned off.
Warning about collision risks when altering sewing area limits.
Detailed instructions and diagram for installing the control box.
Identifies components visible on the front panel of the control box.
Identifies connectors and ports on the back panel of the control box.
Instructions for connecting the main power connector.
Guidelines for connecting a 3-phase power supply.
Information on required power capacity and fuse ratings.
Instructions for using the control box with single-phase power.
Checks to perform before powering on the system.
Checks to perform after powering on the system.
Timing details for thread trimming operations.
Timing chart for clamp output delay settings.
Timing chart illustrating clamp priority logic.
Timing chart for clamp link settings.
Timing chart for pneumatic pressure two-step selection.
Details on clamp setting divisions and related parameters.
Clamp setting divisions when using clamp step input.
Details on oil lubrication output timing and settings.
Diagram illustrating the custom input/output configuration.
Explanation of input/output customization modes.
Steps for customizing virtual input and output signals.
Block diagram of the input control section.
Explanation of how the input control section operates.
Block diagram of the output control section.
Explanation of how the output control section operates.
Explanation of B point ON delay settings.
Explanation of C point OFF delay settings.
Explanation of D point logic settings.
Explanation of E point chopping settings.
Table detailing input signals and their functions.
Table detailing output signals and their functions.
Troubleshooting steps for no power on the operation panel.
Troubleshooting for incorrect screen display on the operation panel.
Troubleshooting for machine not running when foot pedal is pressed.
Troubleshooting for no screen and warning LED off.
Troubleshooting for blinking red LED on the control unit.
Procedure for reinstalling the system using a USB flash drive.
Installation process with LED indication and model set initialization.
Instructions for installing PAL system upgrades.
Procedure for upgrading picture, font, and language data.
Instructions for installing the I/F board (MIF).
Steps for initializing system settings.
Power supply connection for 3-phase AC 200-240V.
Power supply connection for single-phase AC 200-240V (Europe).
Power supply connection for 3-phase AC 380-415V (Europe).
Power supply connection for single-phase AC 200-240V (Europe).
Layout of connectors on the control box front panel.
Layout of connectors on the I/F unit.
Layout of connectors on the PAL unit.
Layout of connectors on the TE1 board.
Layout of connectors on the TE2 board.
Pin assignments for the I/F Board power supply connector.
Pin assignments for the LCD Panel connector.
Pin assignments for the Main Servo Motor connector.
Pin assignments for the I/F Board signal connector.
Pin assignments for the Main Servo Encoder connector.
Pin assignments for Option Input connector S.
Pin assignments for the Sub Servo Encoder connector.
Pin assignments for Option Output connector T.
Pin assignments for the XY Encoder connector.
Pin assignments for the PF Encoder connector.
Pin assignments for the PENC connector.
Pin assignments for connector 16.
Pin assignments for the TE1 board.
Pin assignments for output signals.
USB connector usage for PAL and MIF boards.
Ratings for solenoid valve output, display light, and analog signals.
Specifications for the power unit.
Specifications for the noise filter unit.
Specifications for the main servo motor.
Specifications for the sub servo motor.
Specifications for the control box.