10 - 15
MELSEC-A
10 ADVANCED POSITIONING CONTROL
10.3.8 Repeated start (FOR condition)
In a "repeated start (FOR condition)", the data between the "start block data" in which
"6: FOR condition" is set in "
Da.12 Special start command" and the "start block data"
in which "7: NEXT start" is set in "
Da.12 Special start command" is repeatedly
executed until the establishment of the conditions set in the "condition data".
(The "condition data" designation is set in "
Da.13 Parameter" of the "start block data"
in which "6: FOR condition" is set in "
Da.12 Special start command".)
Section (2) shows a control example where the "start block data" and "positioning data"
are set as shown in section (1).
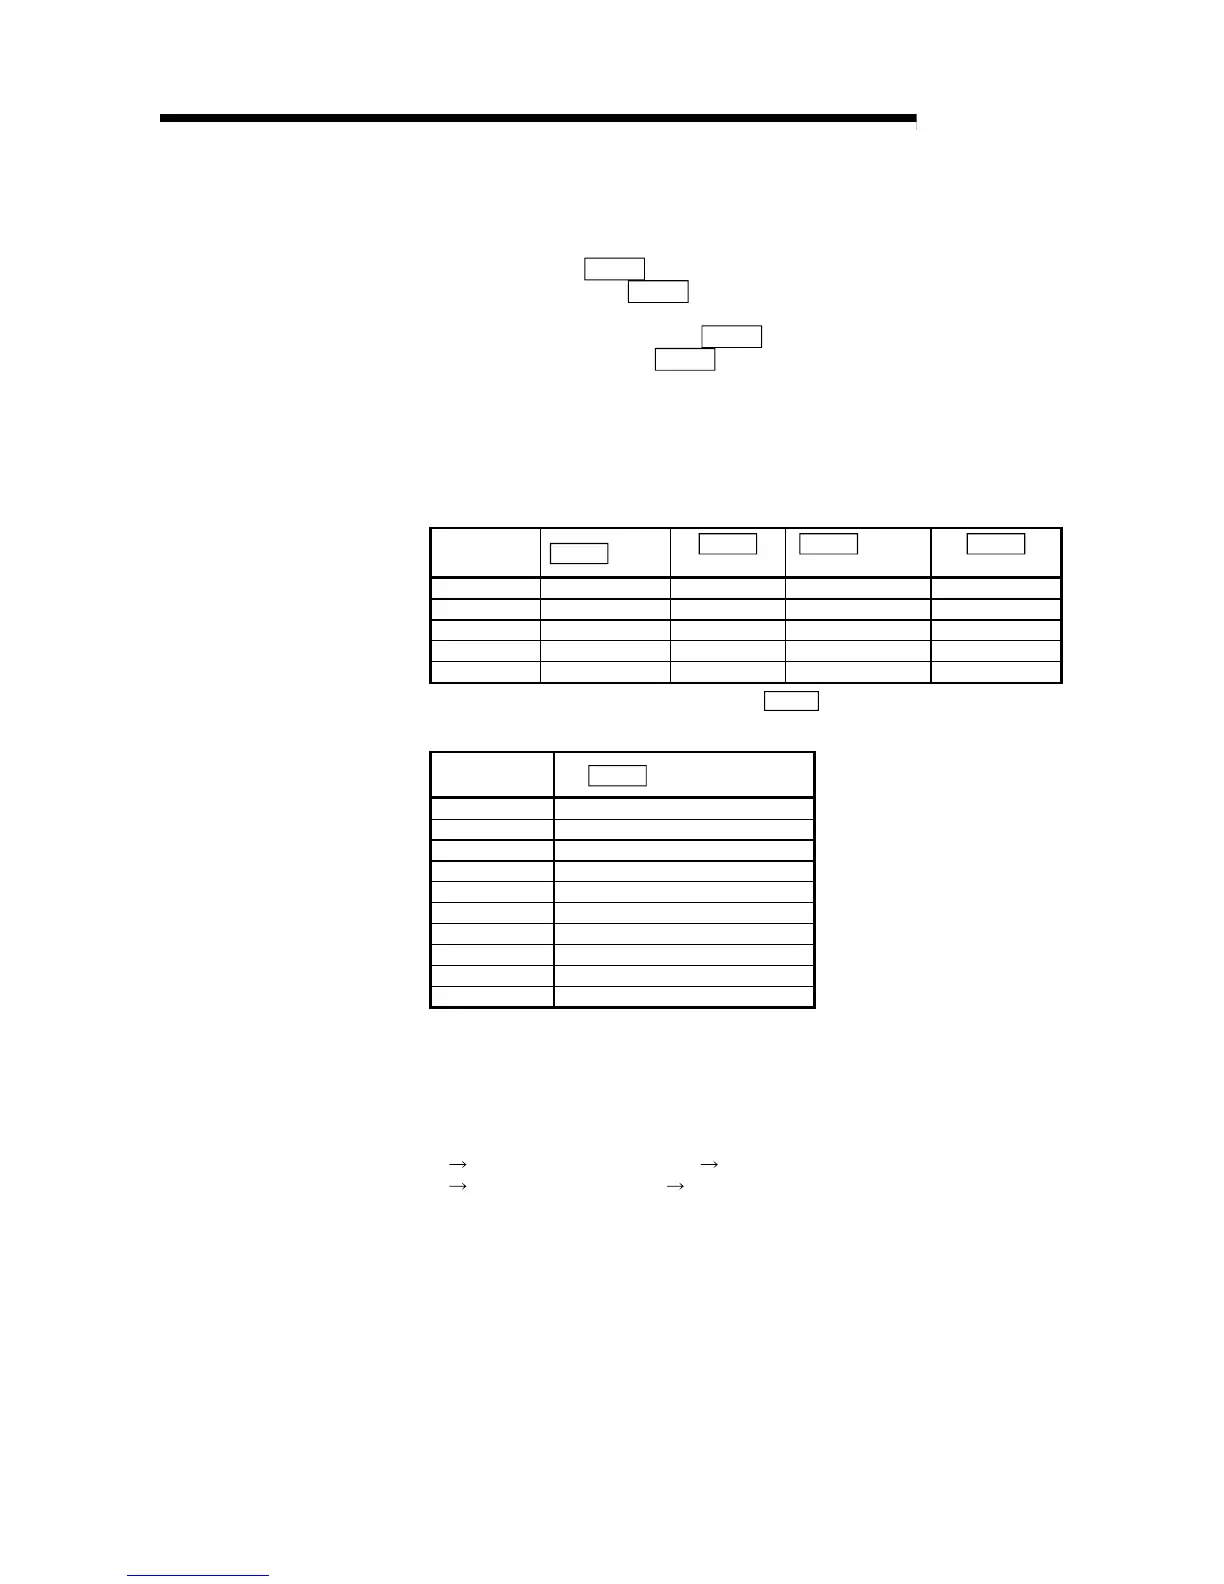
(1) Setting examples
(a) Start block data setting example
Axis 1 start
block data
Da.10
Shape
Da.11
Start data No.
Da.12
Special
start command
Da.13
Parameter
1st point 1: Continue 1 6: FOR condition 5
2nd point 1: Continue 10 0: Normal start –
3rd point 0: End 50 7: NEXT start –
•
•
* The "condition data Nos." have been set in "
Da.13
Parameter".
(b) Positioning data setting example
Axis 1 position-
ing data No.
Da.1
Operation pattern
1 01: Continuous positioning control
2 01: Continuous positioning control
3 00: Positioning complete
•
10 11: Continuous path control
11 00: Positioning complete
•
50 01: Continuous positioning control
51 00: Positioning complete
•
(2) Control examples
The following shows the control executed when the "start block data" of the 1st
point of axis 1 is set as shown in section (1) and started.
<1> Carry out the conditional judgment set in "condition data No. 5" for the axis 1
"positioning data No. 1".
Conditions not established
Go to <2>.
Conditions established
Go to <3>.
<2> Execute axis 1 "positioning data No. 1, 2, 3, 10, 11, 50, and 51", then go to
<1>.
<3> Execute axis 1 "positioning data No. 1, 2, 3, 10, 11, 50, and 51", then stop
the control.
 Loading...


