Do you have a question about the Mitsubishi M800S series and is the answer not in the manual?
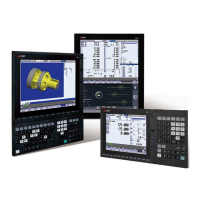
| Type | CNC Control Unit |
|---|---|
| Display Type | LCD |
| Manual Feed | Yes |
| Manual Data Input (MDI) | Yes |
| High-Speed Machining | Yes |
| Custom Macros | Yes |
| Graphic Simulation | Yes |
| Number of Control Axes | Up to 8 axes |
| Axis Control | Simultaneous control |
| Interpolation | Linear, Circular, Helical |
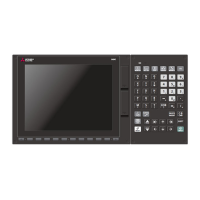
| Display Size | 10.4 inches |
| Interface | Ethernet, RS-232 |
| Communication Interface | Ethernet |
| Automatic Tool Changer (ATC) | Yes |
| Pallet Changer | Yes |
| Operating Temperature | 0-45°C |
| Humidity | 20-80% (non-condensing) |
Illustrates the basic configuration drawing of the system, showing connections between units.
Provides a general connection diagram for M800S series, detailing operation panel I/O unit connections.
Details the general connection diagram for M80 series, including operation panel I/O unit.
Illustrates the general connection diagram for E80 series, focusing on spindle drive unit.
Explains the connection procedure for a spindle drive unit, referencing manuals for details.
Describes how to connect a pulse-controlled inverter to the control unit via RIO1 and RIO2 connectors.
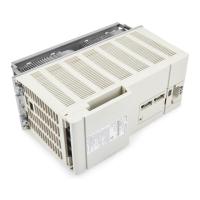
Lists the classification, type, components, and remarks for M800S control units.
Lists the classification, type, components, and remarks for M80 control units.
Lists the classification, type, components, and remarks for E80 control units.
Details the specifications and types of display units for M800S.
Details the specifications and types of display units for M80.
Details the specifications and types of display units for E80.
Lists the keyboard units for M800S, including types and remarks.
Lists the keyboard units for M80, including types and remarks.
Lists the keyboard units for E80, including types and remarks.
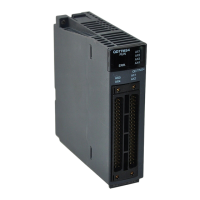
Lists the units for operation panel I/O, detailing classification, type, components, and remarks.
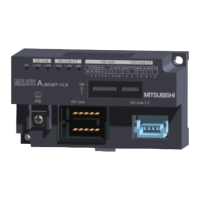
Lists the remote I/O units for M800S/M80, detailing signals, components, and remarks.
Lists the remote I/O units for E80, detailing signals, components, and remarks.
Details the function expansion units for M80, including type, components, and remarks.
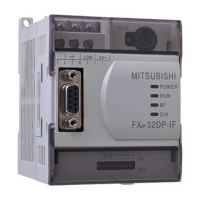
Lists various communication expansion units like CC-Link, PROFIBUS-DP, EtherNet/IP, and FL-net.
Lists manual pulse generators, including type, components, and remarks.
Details synchronous feed encoders, including type, components, and remarks.
Lists MITSUBISHI CNC machine operation panel components for M800S/M80.
Lists MITSUBISHI CNC machine operation panel components for E80.
Provides details on the handy terminal, including classification, type, and components.
Lists various cable connector sets used for NC, drive units, and operation panels.
Details thermistor sets, including classification, type, and components.
Lists genuine memory cards compatible with MITSUBISHI CNC, including capacity.
Identifies durable parts, such as batteries for control units.
Lists replacement parts such as fuses and covers, along with their manufacturers.
Provides a list of cables relating to NC, including type, application, and length.
Lists system types for M800S, M80, and E80 series, including model names and control/display units.
Specifies installation environment conditions for M800S control and display units.
Details ambient temperature, humidity, vibration, shock resistance, and altitude for installation.
Provides criteria for selecting a 24VDC stabilized power supply, including voltage and ripple noise.
Specifies installation environment conditions for M80 control and display units.
Details ambient temperature, humidity, vibration, shock resistance, and altitude for installation.
Provides criteria for selecting a 24VDC stabilized power supply, including voltage and ripple noise.
Specifies installation environment conditions for E80 control and display units.
Details ambient temperature, humidity, vibration, shock resistance, and altitude for installation.
Provides criteria for selecting a 24VDC stabilized power supply, including voltage and ripple noise.
Details the outline dimensions and connector assignments for M800S control units.
Provides outline dimensions and connector details for specific M800S control units.
Details the outline dimensions and connector assignments for M80 control units.
Provides outline dimensions and connector details for specific M80 control units.
Details the outline dimensions and connector assignments for E80 control units.
Provides outline dimensions and connector details for specific E80 control units.
Details the outline dimensions and panel cut dimensions for M800S display units.
Provides outline dimensions and panel cut dimensions for 10.4-type M800S display units.
Provides outline dimensions and panel cut dimensions for 15-type M800S display units.
Offers precautions for handling touchscreens and LCD spot defects.
Details the outline dimensions and panel cut dimensions for M80 display units.
Provides outline dimensions and panel cut dimensions for 8.4-type M80 display units.
Provides outline dimensions and panel cut dimensions for 10.4-type M80 display units.
Provides outline dimensions and panel cut dimensions for 15-type M80 display units.
Details the outline dimensions and panel cut dimensions for E80 display units.
Provides outline dimensions and panel cut dimensions for 8.4-type E80 display units.
Offers precautions for LCD spot defects.
Lists keyboard units for M800S, M80, and E80 series, including initial rotary switch values.
Details the outline and panel cut dimensions for the FCU8-KB026 keyboard.
Details the outline and panel cut dimensions for the FCU8-KB028 keyboard.
Details the outline and panel cut dimensions for the FCU8-KB029 keyboard.
Details the outline and panel cut dimensions for the FCU8-KB041 keyboard.
Details the outline and panel cut dimensions for the FCU8-KB046 keyboard.
Details the outline and panel cut dimensions for the FCU8-KB047 keyboard.
Details the outline and panel cut dimensions for the FCU8-KB048 keyboard.
Details the outline and panel cut dimensions for the FCU8-KB083 keyboard.
Details the outline and panel cut dimensions for the FCU8-KB024 keyboard.
Details the outline and panel cut dimensions for the FCU8-KB025 keyboard.
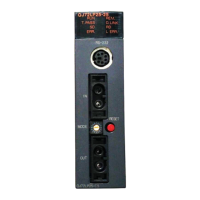
Lists operation panel I/O units, including classification, type, components, and remarks.
Provides a list of operation panel I/O units with their specifications and remarks.
Details outline dimensions for various operation panel I/O units.
Lists remote I/O units for E80 series, including classification, type, components, and remarks.
Details the function expansion units for M80, including type, components, and remarks.
Lists various communication expansion units like CC-Link, PROFIBUS-DP, EtherNet/IP, and FL-net.
Details the outline dimensions and connector for CC-Link communication.
Details the outline dimensions for PROFIBUS-DP communication unit.
Details the outline dimensions for CC-Link IE Field communication unit.
Details the outline dimensions for EtherNet/IP communication unit.
Details the outline dimensions for FL-net communication unit.
Details the outline dimensions for Option Relay Unit FCU8-EX702.
Details the outline dimensions for Option Relay Unit FCU8-EX703.
Lists manual pulse generators, including type, specifications, and remarks.
Details the 5V manual pulse generator, including outline dimensions and panel cut dimensions.
Details the 12V manual pulse generator, including outline dimensions and panel cut dimensions.
Lists synchronous feed encoders, including type, components, and remarks.
Details the synchronous feed encoder, including outline dimensions and connector pin assignment.
Lists MITSUBISHI CNC machine operation panels, including types and remarks.
Details main panels A and B, including outline and panel cut dimensions.
Details sub panels A, including outline and panel cut dimensions.
Provides specifications for the handy terminal, including environmental conditions and power.
Details specifications for thermistors, including outline dimensions and ambient temperature.
Provides outline dimensions and specifications for the PT3C-51F-M2 thermistor.
Lists exclusive SD cards for MITSUBISHI CNC, including capacity and ambient conditions.
Covers specifications and precautions for USB, SD, and LAN interfaces.
Details specifications and precautions for the USB interface and memory cards.
Provides specifications and precautions for the SD interface and memory cards.
Specifies LAN interface details for the control unit, including standards and cable selection.
Provides methods for heat radiation countermeasures, including procedures for heat design and verification.
Details methods for noise countermeasures, including frame grounding and cable shielding.
Explains how to connect the frame ground (FG) to the control unit and operation panel I/O unit.
Describes methods for connecting shield cables to grounding plates using lead wires or clamp fittings.
Explains how to connect spark killers (CR composite element) to eliminate noise from coils or contacts.
Details methods for lightning surge protection, including surge absorber and circuit protector installation.
Provides instructions for installing various units, including display units and keyboard units.
Details installation procedures for display units, including fixing methods.
Provides instructions for installing keyboard units, including fixing methods.
Details installation procedures for operation panel I/O units, including fixing methods.
Provides instructions for installing remote I/O units, including fixing methods.
Explains the installation procedure for the functional safety expansion unit.
Describes the installation procedure for communication expansion units.
Details installation procedures for MITSUBISHI CNC machine operation panels.
Provides precautions for wiring, including connecting/disconnecting cables and using optical/Ethernet cables.
Explains safe procedures for connecting and disconnecting various types of cables and connectors.
Details special precautions for handling and laying optical communication cables.
Warns about potential welding on contacts due to rush current when connecting 24V power supply.
Describes the correct sequence for turning the power ON and OFF for drive units, I/O units, and control units.
Illustrates the overall system drawing for connecting the control unit to various devices.
Explains how to connect a general-purpose 24VDC stabilized power supply to the control unit.
Describes how to connect the emergency stop switch to the EMG connector of the control unit.
Explains how to connect the operation panel I/O unit to the CJ71 connector of the control unit.
Details how to connect the remote I/O unit to the RIO1 or RIO2 connector of the control unit.
Explains how to connect optical communication cables from the NC to each drive unit.
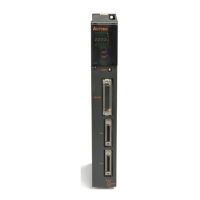
Provides connection details for MDS-E/EH series drive units, including optical communication.
Details the connection of optical communication cables for MDS-E/EH series drive units.
Provides procedures for arranging drive units based on nominal current and clearance.
Explains how to connect MDS-EM/EMH series drive units, including power supply and optical cables.
Details the connection of MDS-EJ/EJH series drive units with optical communication cables.
Describes connecting a pulse-controlled inverter to the RIO1 and RIO2 connectors of the control unit.
Explains how to connect an RS-232C device to the SIO connector of the control unit.
Details connecting skip signals to the SKIP connector of the control unit for high-speed signals.
Explains how to connect a 5V manual pulse generator to the ENC connector of the control unit.
Describes automatic and arbitrary assignment methods for handle numbers.
Explains how to connect the synchronous feed encoder to the ENC connector of the control unit.
Describes mounting communication expansion units onto the dedicated slot of the control unit.
Explains how to connect I/O devices via CC-Link using dedicated cables and terminators.
Details connecting I/O devices via PROFIBUS-DP, including master/slave functions and cable requirements.
Explains connecting I/O devices via CC-Link IE Field using Ethernet cables.
Describes connecting I/O devices via EtherNet/IP using Ethernet cables.
Explains connecting I/O devices via FL-net using Ethernet cables.
Illustrates the connection system drawing for the keyboard unit.
Explains how to connect the operation panel I/O unit to the keyboard unit's connector.
Shows the connection system drawing for operation panel I/O units.
Details connecting the 24VDC power supply to the operation panel I/O unit.
Explains how to connect the frame ground for FCU8-DX731 and FCU8-DX750/FCU8-DX760/FCU8-DX761.
Describes connecting the control unit to the CJ71 connector of the operation panel I/O unit.
Explains how to connect the keyboard unit to the NCKB connector of the operation panel I/O unit.
Details connecting the remote I/O unit to the RIO3EXT connector of the operation panel I/O unit.
Explains how to connect manual pulse generators (5V and 12V) to the MPG connector.
Describes automatic and arbitrary assignment methods for handle numbers for MPG.
Explains how to connect the machine operation panel to various connectors of the operation panel I/O unit.
Provides wiring details for 24V common input for FCU8-DX731.
Provides wiring details for 0V common input for FCU8-DX731.
Details wiring for source type output for FCU8-DX731.
Provides a wiring example for CJ42 connector on FCU8-DX760.
Explains connection for scan input signals using FCU8-DX834.
Details connection for scan output signals using FCU8-DX834.
Explains connecting analog output signals to the AO connector of FCU8-DX731.
Details connecting analog input/output signals to the AIO connector of FCU8-DX761.
Illustrates the connection system drawing for remote I/O units.
Details connecting the 24VDC power supply to remote I/O units.
Explains frame ground connections for various remote I/O units.
Describes connecting remote I/O units to RIO1 or RIO2 connectors of the control unit.
Details connecting remote I/O units to the RIO3EXT connector of the operation panel I/O unit.
Explains connecting machine control signals for various FCU8 units.
Details connecting safety machine control signals for FCU8-DX651.
Explains connecting analog I/O signals to the AIO1 connector of FCU8-DX202.
Details connecting analog input/output signals to the AIO connector of FCU8-DX761.
Explains connecting the thermistor with the THERMISTOR connector of FCU8-DX408.
Details connecting multi-analog input signals to the AI connector of FCU8-DX409.
Illustrates the connection system drawing for manual pulse generators to control and operation units.
Explains how to connect manual pulse generators to the ENC connector of the control unit.
Details connecting manual pulse generators to the MPG connector of the operation panel I/O unit.
Illustrates the connection system drawing for synchronous feed encoders.
Explains how to connect the synchronous feed encoder to the ENC connector of the control unit.
Shows the connection system drawing for MITSUBISHI CNC machine operation panels.
Details connecting the 24VDC power supply to the main panel of the machine operation panel.
Explains frame ground connections for MITSUBISHI CNC machine operation panels.
Describes connecting the operation panel I/O unit to the control unit and remote I/O units.
Explains how to connect the emergency stop switch to the EMG connector.
Details connecting the sub panel to the main panel of the machine operation panel.
Describes the software interface for machine operation panels, including switches and LEDs.
Illustrates the connection system drawing for the handy terminal.
Explains how to connect the handy terminal to SIO and ENC connectors of the control unit.
Explains symbols used in cable drawings, including twisted pair and shield treatment.
Lists cables relating to the NC unit, including type, application, and length.
Details the FCUA-R050/R054 cable for synchronous encoder to control unit connection.
Provides details on the G071 cable for 24VDC relay connection to MITSUBISHI CNC machine operation panel.
Describes the G123 cable for emergency stop release.
Details the G430 cable for connection to the handy terminal.
Explains the J395 cable for optical communication between drive units (outside panel).
Details the J396 cable for optical communication between drive units (inside panel).
Explains the J395 cable for optical communication between drive units (outside panel).
Details the J020/J021/J022 cable for 12V manual pulse generator connection.
Explains the J023/J024/J025 cable for 5V manual pulse generator connection.
Details the J026/J027 cable for 5V manual pulse generator connection.
Explains the J303 cable for RS232C I/F connection.
Details the J070/J071 cable for 24VDC power supply connection.
Explains the J100 cable for skip signal connection.
Details the J120 cable for emergency stop connection.
Explains the J121 cable for emergency stop connection to the machine operation panel.
Details the J210 cable for Remote I/O 2.0 communication.
Explains the J221 cable for analog input/output connection (for remote I/O unit).
Details the J224 cable for analog input/output connection (for operation panel I/O unit).
Explains the J225 cable for analog output cable (for operation panel I/O unit).
Details the J303 cable for LAN straight connection.
Explains the J350 cable for DI/DO connection.
Details the J351 cable for DI/DO connection.
Explains the J460 cable for DI/DO connection to operation panel I/O unit.
Details the J461 cable for DI/DO connection to operation panel I/O unit.
Describes the R2-TM terminator connector for OPI interface.
Details specifications of wire and assembly for cables relating to drive units.
Provides specifications for cable wire and assembly procedures.
Details the CNP2E-1 cable for motor side PLG and spindle side accuracy encoder.
Explains the CNP3EZ-2P/CNP3EZ-3P cable for spindle side encoder connection.
Details the CNV2E-8P/CNV2E-9P cable for motor side encoder connection.
Explains the CNV2E-D cable for MDS-B-SD unit connection.
Details the CNV2E-HP cable for MDS-B-HR unit connection.
Explains the DG30 cable for battery connection.
Details the G380 cable for optical communication between drive units.
Explains the J395 cable for optical communication between drive units (outside panel).
Details the J396 cable for optical communication between drive units (inside panel).
Explains the MR-BKS1CBL cables for brake connection.
Details the MR-BT6V2CBL cable for battery connection.
Explains the MR-D05UDL3M-B cable for STO connection.
Details the MR-PWS1CBL cables for power cable connection.
Explains the SH21 cable for power supply communication and power backup communication.
Shows the hardware names used in the manual, with examples of 15-type unit.
Presents a flowchart illustrating the procedures for initial setup.
Explains setting the rotary switch for MDS-E/EH series drive units.
Details setting the axis number using the rotary switch for MDS-E/EH series.
Provides standard settings for DIP switches, recommending they be turned OFF.
Explains setting the rotary switch for MDS-EM/EMH series drive units.
Details setting the axis number using the rotary switch for MDS-EM/EMH series.
Explains setting the rotary switch for MDS-EJ/EJH series drive units.
Details setting the axis number using the rotary switch for MDS-EJ/EJH series.
Provides standard settings for DIP switches, recommending they be turned OFF.
Explains procedures for setting axis data without connecting motor/drive units.
Details the connection of batteries for control units and servo drive units.
Describes connecting the lithium battery to the control unit before startup.
Explains connecting batteries for servo drive units, especially for absolute position detection.
Details connecting and setting up remote I/O units.
Provides an outline of remote I/O units, listing types and their machine control signals.
Explains how to connect and set station numbers for multiple remote I/O units.
Details setting station numbers for multiple remote I/O units using slide and rotary switches.
Explains how to assign digital signals (DI/DO) to PLC devices using fixed or arbitrary assignment.
Describes the fixed device assignment method for PLC devices.
Explains setting PLC devices for DI/DO using parameters for arbitrary device assignment.
Guides on selecting the NC system type and displayed language for lathe systems.
Details setting parameters for system specifications, including SYS_ON and axis numbering.
Explains setting parameters for machine specifications, like initial plane and axis device assignment.
Provides instructions for setting the date and time on the integrated time screen.
Describes saving and writing sequence programs to NC using external file operations on PLC.
Explains how to set up Ethernet communication, including confirming and setting IP addresses.
Details how to confirm the IP address set for the CNC.
Guides on setting the IP address for the PC side when using GX Developer or GX Works2.
Explains how to connect the control unit to a personal computer with GX Developer or GX Works2.
Provides procedures for setting communication with GX Developer.
Details setting parameters using GX Works2, covering project data and parameter screens.
Explains how to display and set parameters on the GX Works2 parameter setting screen.
Guides on setting the number of device points required for a project in GX Works2.
Explains how to set the number of common pointer points for multi-program method sequence programs.
Details setting the execution method and order for sequence programs in multi-program method.
Provides procedures for writing sequence programs to RAM using GX Works2.
Explains how to write sequence programs to ROM using GX Developer.
Guides on setting communication parameters in GX Works2 for connecting to CNC.
Details setting parameters using GX Works2, covering project data and parameter screens.
Explains how to display and set parameters on the GX Works2 parameter setting screen.
Guides on setting the number of device points used in a project in GX Works2.
Explains setting the common pointer number for sequence programs in multi-program method.
Details setting the execution method and order for sequence programs in multi-program method.
Provides procedures for writing sequence programs to RAM using GX Works2.
Explains how to write sequence programs to ROM using GX Works2.
Guides on setting PLC parameters using bit selection on the Mainte screen.
Explains how to check input/output signals and alarms on the Diagn screen.
Guides on confirming manual operation using the manual pulse generator and JOG feed.
Details steps for confirming manual operation using the manual pulse generator.
Explains how to confirm manual operation using JOG feed.
Describes servo simplified adjustment procedures to reduce vibration.
Guides on performing the first measure against vibration to reduce it.
Explains how to use NC Analyzer2 for servo parameter adjustment and machine analysis.
Details the four types of absolute position zero point initialization methods.
Explains basic position alignment method I, focusing on aligning marks and grid points.
Details basic position alignment method II, focusing on mark alignment and reproducibility.
Describes automatic initialization using machine end stoppers.
Explains manual initialization using machine end stoppers.
Details the dog-type method for position detection return.
Guides on setting grid interval and reference encoder parameters.
Provides common precautions for initialization operations.
Offers common precautions for dogless-type absolute position encoders.
Explains setting stroke end (H/W OT) using limit switches.
Details setting stored stroke limits (S/W OT) for prohibited ranges.
Provides an outline of stored stroke limits I, II, IIB, and IB.
Explains setting stored stroke limit I using parameters for boundary definition.
Details setting stored stroke limit II, defining prohibited ranges inside or outside boundaries.
Explains setting stored stroke limit IB for prohibited ranges within boundaries.
Details setting stored stroke limit IC for machine movement valid range.
Explains checking movable range during inclined axis control using stored stroke limits.
Details setting stored stroke limits I and II for rotation axis prohibited ranges.
Explains how to change the range of stored stroke limit I using R register values.
Provides precautions for setting stored stroke limits, including handling of same values and IC limits.
Details memory-type pitch and relative position error compensation methods.
Provides an outline of memory-type pitch error compensation.
Explains setting compensation data using absolute and incremental amount methods.
Details setting methods for compensation, including linear and rotary axes.
Guides on setting compensation data for linear axes as the basic axis.
Explains setting compensation data for rotary axes as the basic axis.
Details bidirectional pitch error compensation for movement in positive and negative directions.
Provides an outline of bidirectional pitch error compensation.
Explains the setting method for bidirectional pitch error compensation.
Guides on setting bidirectional pitch error data for a linear axis.
Explains setting bidirectional pitch error data for a rotary axis.
Introduces position switches (PSW) used as alternatives for dog switches.
Provides setting and operation examples for dog1 and dog2 on rotary axes.
Explains how to cancel position switches by entering a number and pressing INPUT.
Explains backlash compensation, a function to add compensation for axis reversal errors.
Details backlash compensation II for reducing quadrant error in semi-closed loop control.
Lists the conditions required to enable backlash compensation II.
Guides on setting backlash compensation II parameters, including acceleration rates and quadrant projection sizes.
Explains how to set the acceleration rate for backlash compensation II.
Details setting the compensation amount based on projection size at axis direction reversal.
Provides precautions for setting backlash compensation II parameters, including ascending order.
Guides on confirming spindle operation in manual mode.
Explains how to confirm spindle operation in MDI mode.
Details how to check the spindle motor rotation speed.
Explains the function of deceleration check for reducing machine shock.
Describes deceleration check methods: command, smoothing, and in-position.
Explains deceleration check for opposite direction movement reversal in successive blocks.
Details parameters related to deceleration check, such as inpos and G0Ipfg.
Explains the relation of deceleration check with other functions like tool compensation and synchronization.
Provides precautions for deceleration check, including in-position check and movement reversal.
Details preparations for spindle analog output adjustments.
Guides on performing automatic adjustment of spindle analog output.
Explains how to perform manual adjustments for ch0 0V offset and ch0 + gain.
Details display items like Parameter No., Device allocation, Data type, and Number of data.
Details display items for SRAM open area: Parameter No., Data type, Number of data, and Display format.
Explains the procedure for backing up NC data to a memory card in a batch.
Details the procedure to restore NC data from a memory card in a batch.
Guides on setting the encryption key file to enable the system lock function.
Explains how to set the system lock expiration date by inputting a decryption code.
Describes warnings and alarms related to the system lock expiration date.
Provides cautions regarding system lock, encryption keys, and software version upgrades.
Details the protect setting screen, including display items and menus.
Explains how to clear the password for operation level 4.
Guides on changing the protection level for data items.
Explains how to save the protection level settings.
Details specifications for the logo file, including storage location and size.
Introduces EMC Directives and their importance for machine tool control.
Explains the two main items regulated by EMC Directives: Emission and Immunity.
Lists main items for EMC measures, including device storage, grounding, and cable shielding.
Highlights the importance of panel design for EMC measures.
Provides measures for the control panel body, focusing on metal members and screw fixing.
Details measures for the panel door, including gasket use and EMI gasket contact.
Explains measures for the power supply section, including shielding and filter insertion.
Lists EMC countermeasure parts, including shield clamp fittings and ferrite cores.
Details shield clamp fittings for connecting cable shields to grounding plates.
Provides information on ferrite cores for noise suppression.
Explains the selection and installation of surge absorbers.
Guides on selecting a stabilized power supply based on characteristics and standards.
Details restrictions for packing and transporting lithium batteries according to UN Regulations.
Lists Mitsubishi NC products that use lithium batteries.
Provides handling guidelines for lithium batteries according to international regulations.
References materials for regulations regarding lithium battery transportation.
Provides information on ER batteries, including hazard outlines and handling precautions.
Details regulations on transporting lithium batteries by passenger aircraft in the US.
Covers California regulations for products containing primary lithium batteries with perchlorate.
Explains restrictions related to the EU Battery Directive (2006/66/EC).
Provides important notes for shipping products incorporating MITSUBISHI devices with batteries.
Provides information for end-users regarding battery disposal symbols and recycling.
Guides on selecting an external 24VDC power supply unit compliant with UL Standards.
Specifies that the NC system complies with UL Standards if used below maximum ambient temperature.