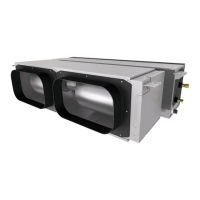
This manual describes the installation methods for OA spacer (TC-OAS-E2) and the duct joint (TC-OAD-E).
◎This OA spacer is designed for assembling on the indoor unit (FDTC Series), not for be using independently.
◎Prepare the duct (size: ø75) and the booster fan at site.
◎For the installation of indoor unit, refer to the installation manual attached to the indoor unit.
● Read the “SAFETY PRECAUTIONS” carefully first of all and then strictly follow it during the installation work in order to protect yourself.
● Installation should be performed by the specialist.
If you install the unit by yourself, it may lead to serious trouble such as water leakage, electric shock, fire, and injury due to overturn of the unit.
● Install the system correctly according to these installation manuals.
Improper installation may cause explosion, injury, water leakage, electric shock, and fire.
● Use the genuine accessories and the specified parts for installation.
If parts unspecified by our company are used it could cause water leakage, electric shock, fire, and injury due to overturn of the unit.
● Turn off the power source during servicing or inspection work.
If the power is supplied during servicing or inspection work, it could cause electric shock and injury by the operating fan.
● Shut off the power before electrical wiring work.
It could cause electric shock, unit failure and improper running.
● Do not install and use the unit where corrosive gas (such as sulfurous acid gas etc.) or flammable gas (such as thinner, petroleum etc.) may be
generated or accumulated, or volatile flammable substances are handled.
It could cause the corrosion of heat exchanger, breakage of plastic parts etc. And inflammable gas could cause fire.
WARNING
CAUTION
Application model FDTC15-56KXZE1
FDTC25-60VG
PJZ012D125
● Confirm the following parts are included:
OA spacer (TC-OAS-E2)
Spacer
1
Bracket 1
2
Bracket 2
2
12 3 4
Bracket 3
2
Bracket 4
2
Bolt
8
Duct Joint
1
Screw
6
Insulation 1
(120 × 54)
1
Insulation 2
(40 × 60)
2
Duct joint (TC-OAD-E)
Remove the lid and then install two pieces of duct joint.
When installing two duct joints
Lid
Duct joint
Screw
Spacer
To install the duct joint,
screw it in as shown at left.
Install OA spacer at either one of two installation places on the duct joint.
When installing one duct joint
Lid
Duct joint
Screw
Spacer
Lid
·There are two places where the duct joint can be installed.
When installing the duct
joint at the lid side, remove
the lid and reinstall it at the
other end before installing
the duct joint.
Duct joint
Screw
Spacer
Provided at site
Indoor unit
(FDTC)
OA Spacer
(TC-OAS-E2)
Duct joint
(TC-OAD-E)
OA
Dumper
Duct Booster fan
Filter
Panel
Indoor Outdoor
100
50
0
150
0.0 0.5 1.0 1.5 2.0 2.5 3.0
Pressure loss at duct joint [Pa]
Introduced outdoor air volume [m
3
/min]
Two sets of duct jointsOne set of duct joint
(1) Temperature conditions for OA spacer
•
Adjust the temperature conditions of mixed air with outdoor air and indoor air within the
usage range of suction air temperature for the air-conditioner.
•
The usage temperature conditions of intake outdoor air and indoor air around the ducts are
shown in the following table.
•
If the temperature conditions of intake outdoor air do not meet, process the outdoor air
before intaking.
(2) Intake outdoor air volume
•
Intake outdoor air volume is 3.0 m
3
/min at the maximum (when two sets of duct joints are used).
Up to two sets of duct joint can be installed on OA spacer.
In case one set of duct joint is installed: 1.5 m
3
/min max.
In case two sets of duct joint is installed: 3.0 m
3
/min max.
(3) Selection of booster fan
•
Select the booster fan based on the duct resistance plus the pressure loss at the duct joint.
(See the figure)
(4) Other conditions
•
Determine the capacity of air conditioner based on the calculation of air-conditioning load
including the heat load of intake outdoor air.
•
Install the filter for the intake outdoor air and the reverse flow prevention dumper during the
duct work at site.
•
Insulate the duct and duct joint in order to prevent dewing.
•
Interlock the operation of booster fan with ON/OFF operation of the indoor unit. (See Section 7.)
Usage temperature conditions
Operation mode
In heating
In cooling
5ºC DB or higher
29ºC DB or lower and
80% RH or lower
18.5ºC WB or lower and
60% RH or lower
20ºC DB or higher
Intake outdoor air Indoor air around the ducts
124
182
530
(Suspension bolts pitch)
467
325
35430010
530
(Suspension bolts pitch)
225 185
175
1
Before installation
3
Installation of duct joint (TC-OAD-E) onto OA spacer
2
Prior study before installation (Usage limitation)
SAFETY PRECAUTIONS
Hanger plate for
suspension bolt
Ø75
Control box
Duct joint
(TC-OAD-E)
OA spacer
(TC-OAS-E2)
102 or more
 Loading...
