REASSEMBLY OF BASIC ENGINE
7-5
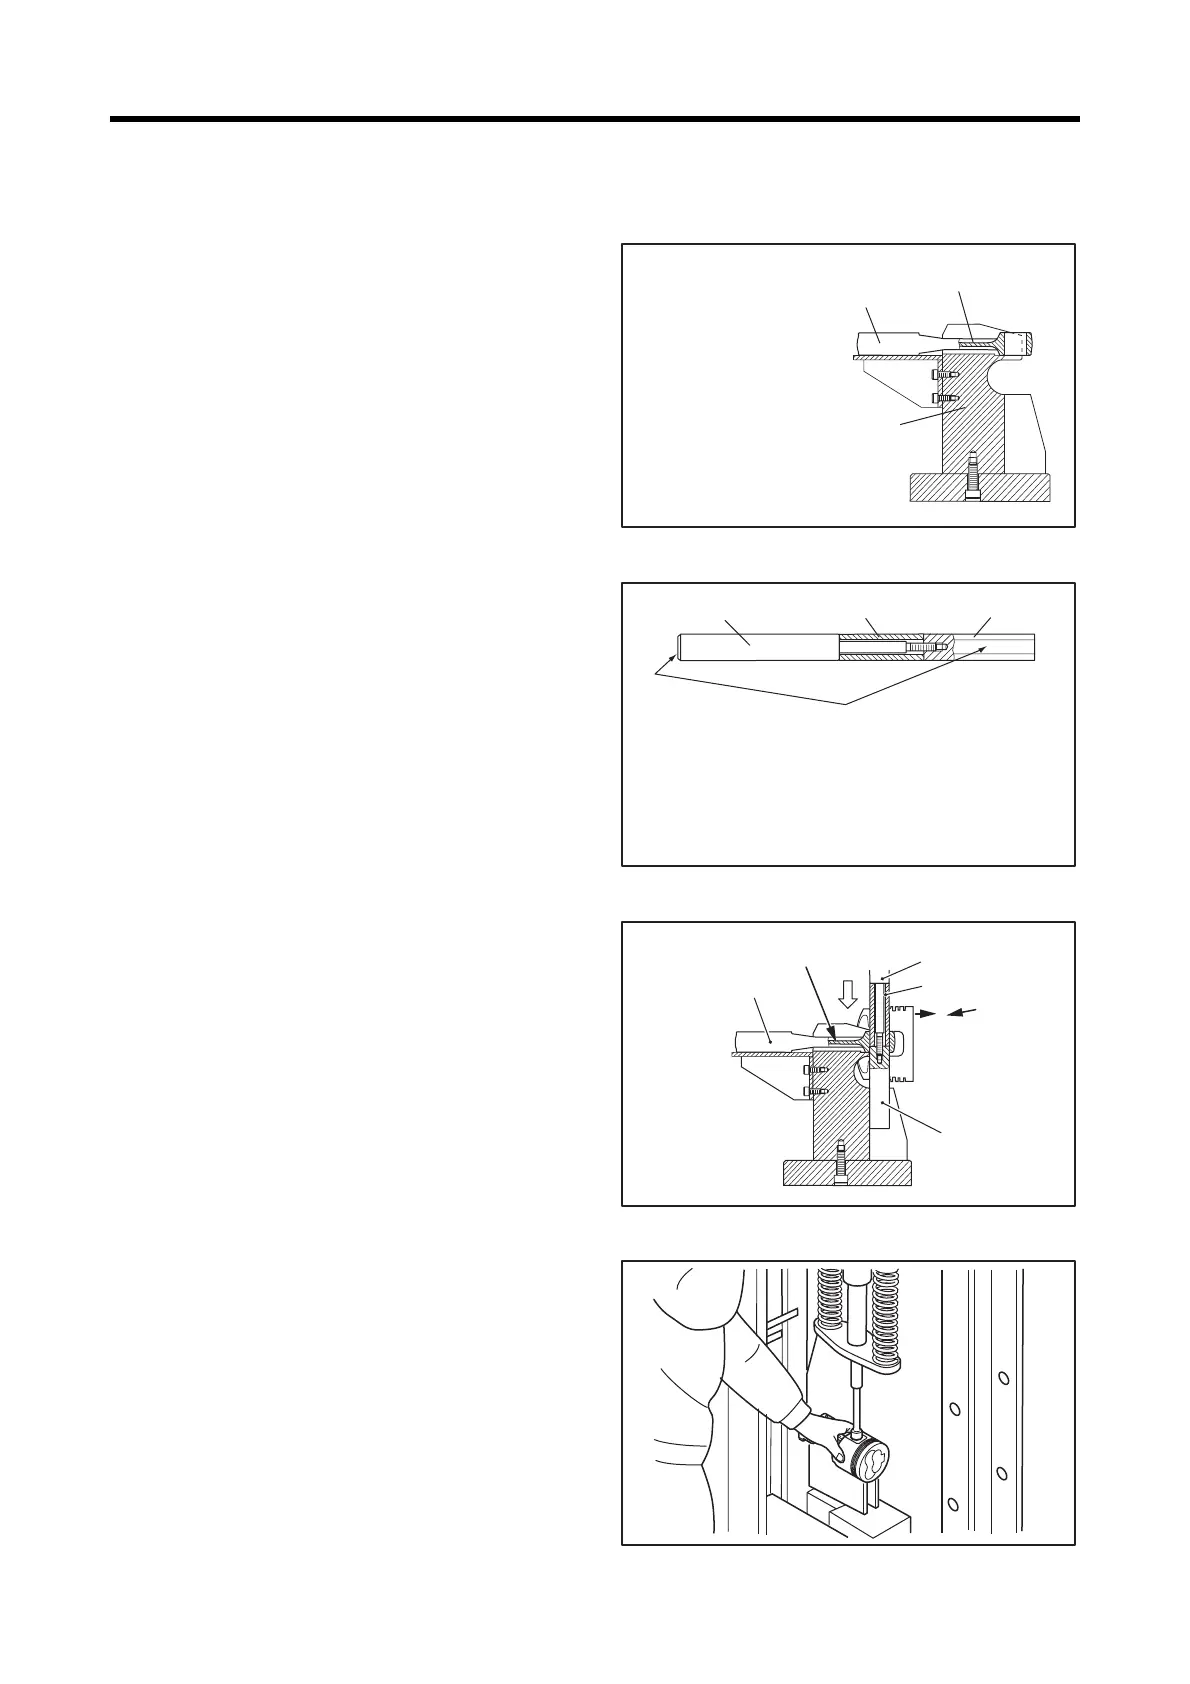
1.7 Reassembling piston and connecting rod
(1)
With the identification mark of connecting rod facing
upward, place the rod on the piston pin setting tool.
(2) Set the piston pin push rod and guide to the piston pin.
(3) Reassemble the piston to the connecting rod with the
front mark (Δ) on the piston top and the identification
mark of the connecting rod facing upward.
Install the piston pin from the piston pin guide.
(4) Press-in the piston pin with the push rod using
hydraulic press (pin press-in load 9807±4903 N
{1000±500 kgf} [2205±1102 lbf]) until the guide
contacts the piston setting tool.
(5) After reassembling, make sure that the piston and the
connecting rod move lightly on the piston pin.
Reassembling piston and connecting rod (1)
Reassembling piston and connecting rod (2)
Reassembling piston and connecting rod (3)
Reassembling piston and connecting rod (4)
Connecting rod
Identification mark
Piston pin setting tool
P/N: 30L91-00030 for L2A, L3A
ޓޓ 30L91-00020 for L2C, L3C
ޓޓ 30L91-10010 for L2E, L3E
Pushrod
Piston pin Guide
ޓޓޓޓޓޓޓޓStamped identification mark
㨯Pushrod D18: For Ǿ18 mm [0.71 in.] piston pin
D21: For Ǿ21 mm [0.83 in.] piston pin
㨯GuideLE D21 :L2E㨮L3E For Ǿ18 mm [0.83 in.] piston pin
LCE D18:L2C㨮L3C For Ǿ18 mm [0.71 in.] piston pin
LޓAޓ :L2A㨮L3A For Ǿ18 mm [0.71 in.] piston pin
Connecting rod
Identification mark
Pushrod
Piston pin
Guide
Front mark
ٌ
 Loading...