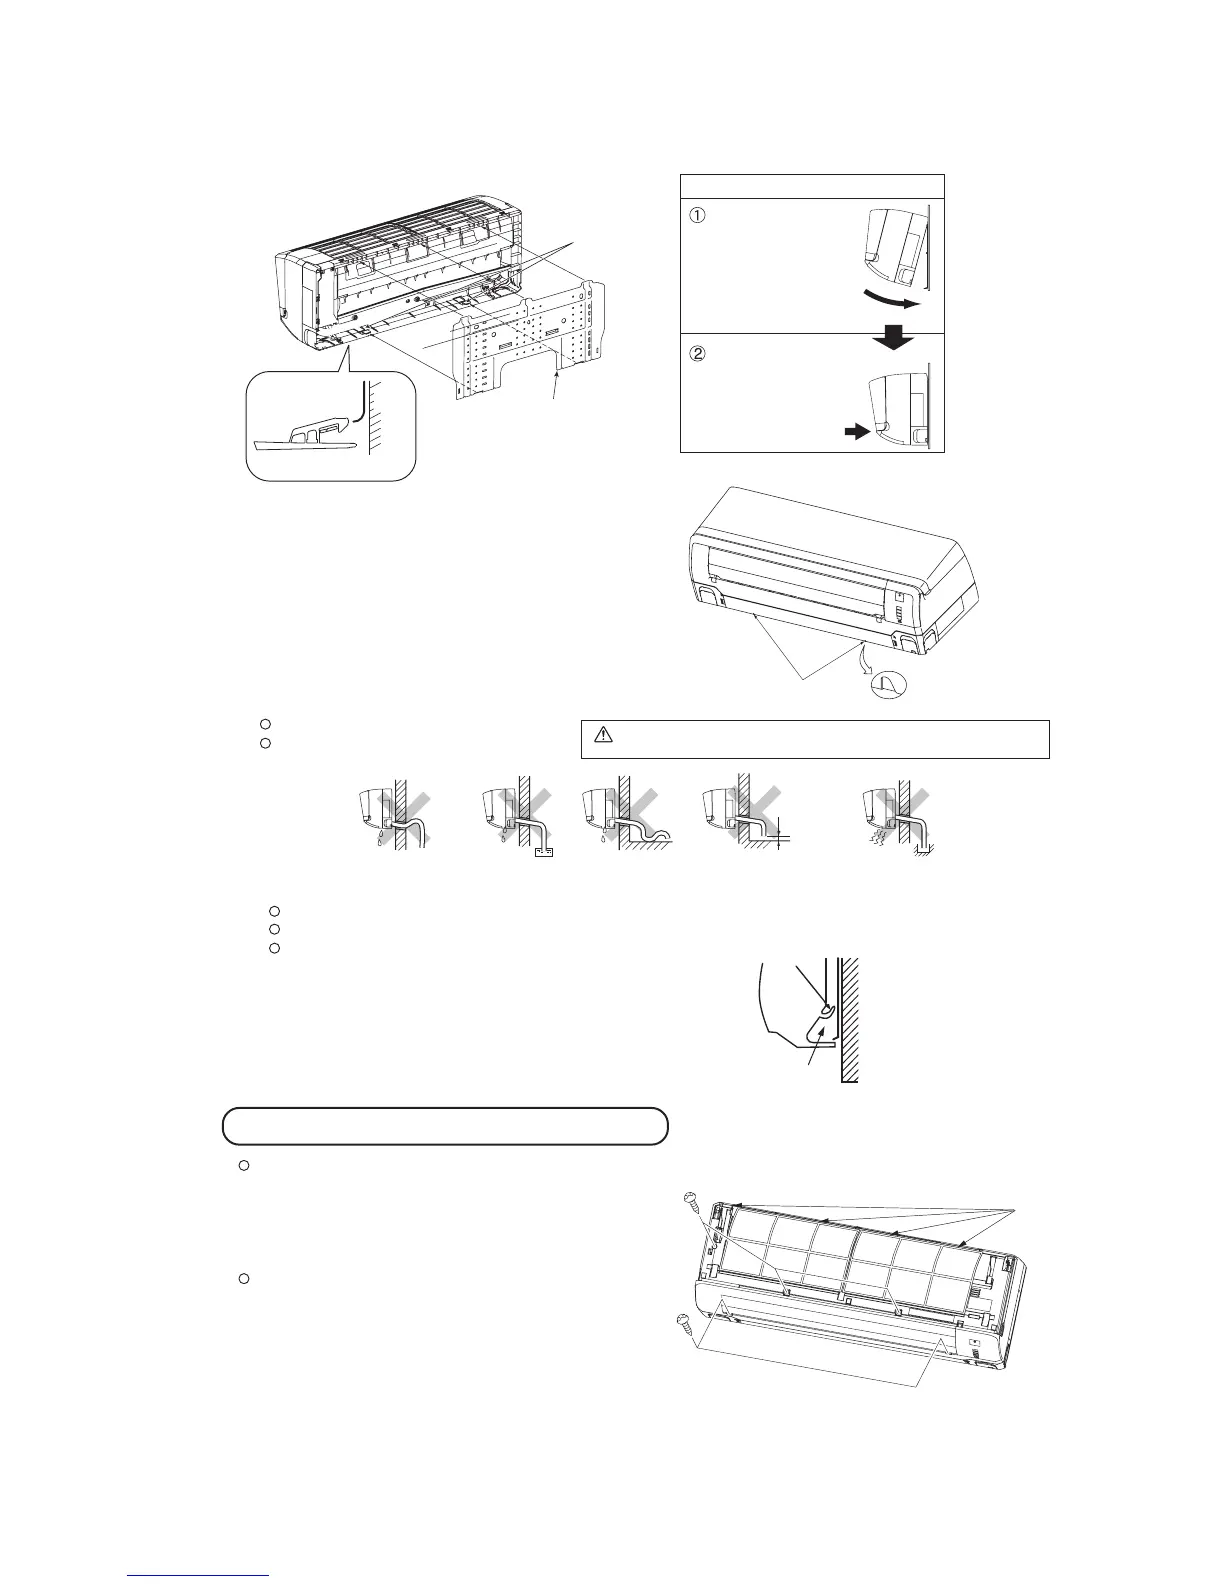
⑤ Securing the indoor unit to the installation plate
•
How to remove the indoor unit from the installation plate
ⓐ Push up at the marked portion of the indoor unit
base lower latch, and slightly pull it toward you.
(both right and left hand sides)
(The indoor unit base lower latch can be removed
from the installation plate)
ⓑ Push up the indoor unit upward. So the indoor unit
will be removed from the installation plate.
The marked portion of the
Indoor unit bese lower latch
Removal and installation of the front panel
Removing
① Remove the air inlet panel.
② Remove the 5 set screws.
③ Remove the 4 latches in the upper section.
④ Move the lower part of the panel forward and puch
upwards to remove.
Installing
① Do remove the air filter.
② Cove the body with the front panel.
③ Install the 4 latches in the upper section.
④ Tighten the 5 set screws.
⑤ Install the air filter.
⑥Install the air inlet panel.
Indoor unit
Latch
(2 locations)
Installation
plate
Installation plate
Wall
Indoor unit base lower latch
Installation Steps
Pass the pipe through
the hole in the wall,
and hook the upper
part of the indoor unit
to the installation plate.
Gently push the lower
part to secure the unit.
⑥ Drainage
Arrange the drain hose in a downward angle
Avoid the following drain piping.
Go through all installation steps and check if the drainage is
all right. Otherwise water leak may occur.
CAUTION
Pour water to the drain pan located under the heat exchanger, and ensure that the water is discharged outdoor.
When the extended drain hose is indoor, securely insulate it with a heat insulator available in the market.
Higher than specified The drain hose
tip is in water.
Wavy The drain hose
tip is in the gutter.
Odor from
the gutter
The gap to the ground
is 5 cm or less.
Since this air conditioner has been designed to collect dew drops
on the rear surface to the drain pan, do not attach the power cord
above the gutter.
Wall
Gutter
Pipe accommodating section
Set screws
latch
 Loading...