EasyManua.ls Logo

Mitutoyo 700 Series User Manual

Mitutoyo 700 Series
2 pages
To Next Page IconTo Next Page
Page #1 background imageLoading...
Page #1 background image
No.99MAN001B1
SERIES No. 700
ミニデプス/タイヤデプスゲージ 取扱説明書
安全に関するご注意
商品のご使用に当たっては、記載の仕様・機能・使用上の注意に従ってご使用ください。
それ以外でご使用になりますと安全性を損なうおそれがあります。
注意
・万一、電池を飲み込んだ場合には、直ちに医師に相談してください。
ご使用上の注意
重要
・電池を取り扱う際には、充電や分解などのショートのおそれがあることはしないでください。
・3ヶ月本器をご使用にならない場合、電池の液漏れによる機器の破損のおそれがありますので、電池
を取り外して別々に保管してください。
・本器は電子機器ですので、落下させると破損する場合があります、取り扱いには十分気を付けてください。
・本器を直射日光の当たる場所や炎天下の車中、火のそばなどに放置しないでください。
・本器を水や油のかかるところでは使わないでください。
・本器を分解しないでください。
1.各部の名称
2.仕様
◆測れる長さ(測定範囲):0-25mm ◆測れる単位(最小表示量):0.1mm
◆保証精度:±0.2mm ◆電源:市販ボタン形電池(SR44)1個 ◆電池寿命=約2年
3.電池のセット
お買上げ時には、電池がセットされておりません。
電池フタを外す時は、親指で a 方向へスライドしてください。
電池フタをはめる時は、b の方向へ押さえながら a と反対方向へ
スライドしてください。
電池はプラス側を上にしてセットしてください。
電池は必ずSR44の性能を満たした電池を使用してください。
注記 1
万一、各スイッチの操作で不具合が解除できない場合は、
一度電池を取り外して再度セットし直してください。
4.使用方法
[原点セット]-はじめに本尺③を右に引き、止まったところで、電源 ON/ZEROスイッチ①を
押します。液晶表示部⑥に「0.0mm」の表示がでたら測定可能です。
[測定] -測定基準面⑤が浮かないよう、測定力のかけすぎにご注意ください。
[測定終了] -電源 OFFスイッチ②を押すと電源が切れます。
注記 2
・本尺を右に引き 原点セット後 、ガラス・鏡・平らな机上等でゼロ点を確認し 表示値が
±0.3mm 以上ある場合には使用を中止し販売店等に修理のご相談をお願いします。
・より正確な測定を行う場合には、ガラス・鏡・平らな机上等に測定子を当てて原点
セット後ご使用ください。
※万一当製品使用により生じた損傷、逸失利益などは、弊社では一切その責任を
負いかねますのであらかじめご了承ください。
※その他トラブルと思われたときやご不明な点がございましたら、下記に記載して
あります弊社担当までご連絡ください。
株式会社 ミツトヨ お客様相談課
〒213-8533 神奈川県川崎市高津区坂戸1-20-1
電話044(822)5151 FAX044(813)1691
[測定]
ご使用になる前に下記をお読みのうえ、正しくお使いください
電源 ON/ZEROスイッチ
電源 OFFスイッチ
本尺
測定子
測定基準面
液晶表示部
お客さまご相談窓口
b
a
測定物
測定値
[電池のセット]
[原点セット]
[注記 2]
ガラス・鏡・平ら
な机上等
Question and Answer IconNeed help?

Do you have a question about the Mitutoyo 700 Series and is the answer not in the manual?

Mitutoyo 700 Series Specifications

General IconGeneral
BrandMitutoyo
Model700 Series
CategoryMeasuring Instruments
LanguageEnglish

Summary

Safety Precautions

Caution on Battery Ingestion

Warning to consult a doctor immediately if a battery is accidentally swallowed.

Notes on Usage and Handling

Battery Handling and Storage

Do not recharge, disassemble, or short batteries. Remove and store separately if not used for 3 months.

General Handling Precautions

Handle with care to prevent breakage. Avoid direct sunlight, heat, water, oil, and disassembly.

Product Overview and Specifications

Parts Identification

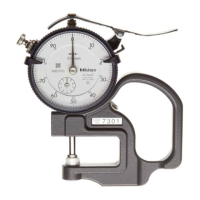
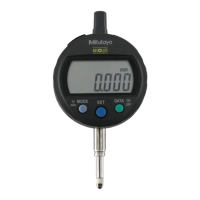
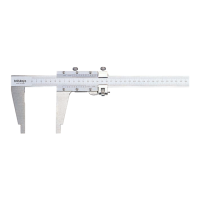
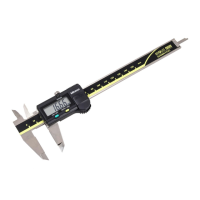
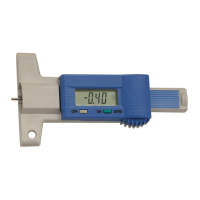
Identifies key components such as the power switch, beam, contact point, and display.

Technical Specifications

Details measuring range (0-25mm), resolution (0.1mm), accuracy (±0.2mm), battery type (SR44), and battery life (approx. 2 years).

Operation and Setup Guide

Battery Installation

Instructions for opening the compartment, inserting the battery with the correct polarity, and closing the lid.

Switch Operation Troubleshooting

If switches fail, remove and reinsert the battery to reset the device.

Setting the Origin (Zero Point)

Pull the beam, press ON/ZERO switch to display "0.0mm" for measurement readiness.

Taking Measurements

Push the beam against the workpiece, ensuring the measuring face is flat and not overtightened.

Measurement Accuracy Check

Verify zero point on a flat surface. If deviation is ±0.3mm or more, stop use and consult.

Related product manuals