3
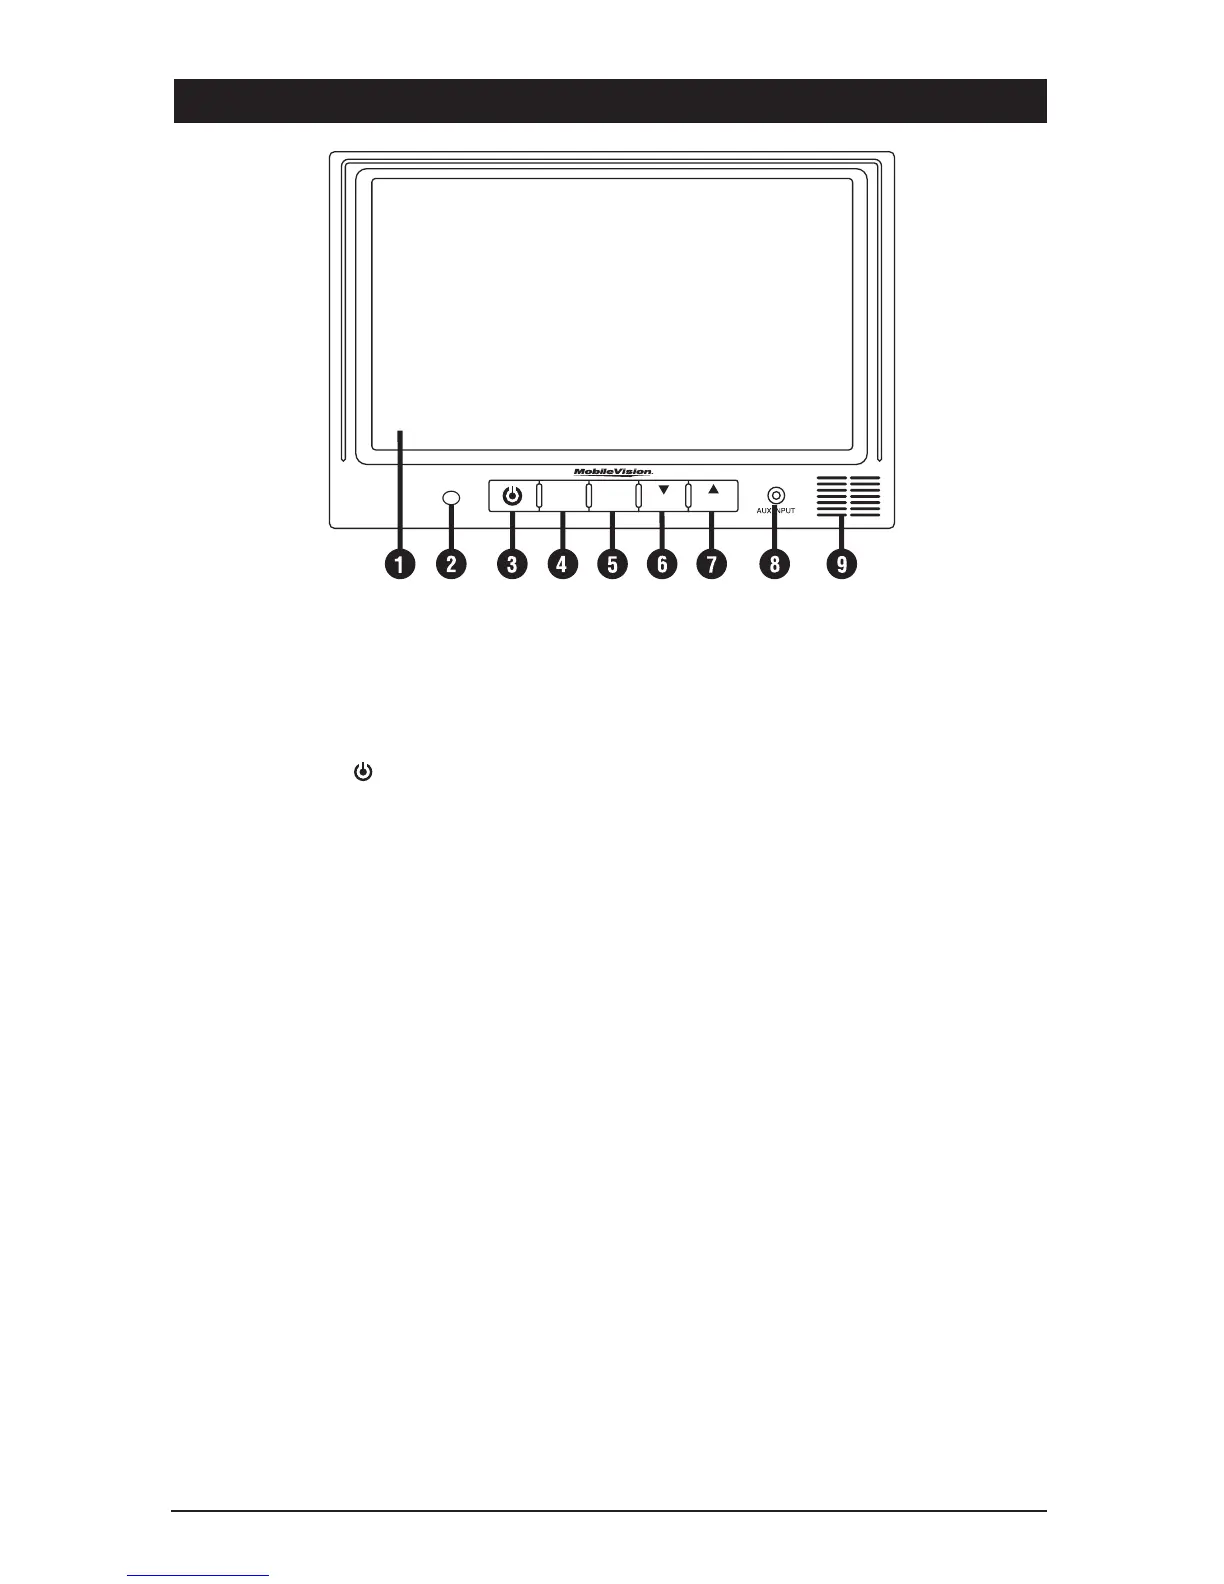
Monitor Features and Controls
1. LCD Screen
2. IR Sensor: Receives signal from the
remote control.
3. Power Button (
): Press this button to
turn the unit “On” or “Off”.
Note: The ignition key must be in the
“On” position.
4. Source (SRC): Press this button to select
a video source (AUX, LEFT CAM, RIGHT
CAM and REAR CAM).
Note 1: When the left turn signal is acti-
vated, LEFT CAM (left side view camera)
is selected automatically.
Note 2: When the right turn signal is
activated, RIGHT CAM (right side view
camera) is selected automatically.
Note 3: When the vehicle is put into
reverse, REAR CAM (rearview camera) is
selected automatically.
Note 4: When in reverse, you can use
the LEFT or RIGHT button to select the
left and right side cameras as needed.
5. Menu Button (MENU): Press this button
to select a desired menu screen.
6. Volume Down / Menu Item Adjustment
Button: Press this
button to decrease the
monitor’s volume.
Note: When the menu is displayed, press
this button to adjust the selected menu
item.
7. Volume Up / Menu Item Adjustment
Button: Press this
button to increase the
monitor’s volume.
Note: When the menu is displayed, press
this button to adjust the selected menu
item.
8. Auxiliary Audio/Video Jack:
Accepts 1 video and 1 audio (mono)
input. Optional HAR-M130-AUX
cable required.
9. Speaker The speaker is automatically
activated.
Note: The rear camera must have a built-
in microphone for proper operation.
LEFT
RIGHT
MENU
SRC
REAR