Connect the From Lamp Holder to V2:
1) Cut two pieces of green wire (about 8.5” each) and connect one end of each to the lamp holder
solder lugs.
2) Twist these two wires together and fasten, but do not solder, one wire to V2(4) and the other to
V2(5).
3) Cut two more pieces of green wire (about 5.5” each) and connect one wire’s end to V2(4) and the
other wire’s end to V2(5). Now solder all connections at V2(3), V2(4) and V2(5).
4) Twist these two wires together and connect one wire to V1(9) and the other wire to both V1(4)
and V1(5).
Double check your work:
1) At this point, most people will feel anxious to start playing through their amp; however, it’s
important to always double check your work before applying power. Everyone makes mistakes and
it’s easy to forget things. Take some time now to thoroughly double check your work with Drawings
7 & 9. Make sure all solder connections are good and that polarized components are connected the
right way.
1) Use the four self-tap screws to fasten the chassis cover onto the amp.
2) Cut the four rubber bumpers apart from each other, remove their backing and stick them to the
cover to serve as feet. A good place to put them would be near each self-tap screw.
Put the tubes in their sockets:
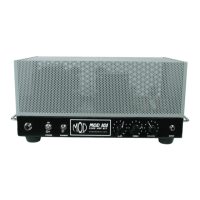
Attach the Chassis Cover and Rubber Bumpers:
1) Flip the amp over and place the tubes into their respective sockets. The EL84 goes in V2 with
the retainer holding it down.
2) The 12AX7 goes in the V1 socket with the tube shield holding it down.
16
SECTION 9 – Finishing Up
Step 7 – Turn It On and Play
Visit www.modkitsdiy.com if you have any problems when first turning on your amp for
troubleshooting help. If you smell or see smoke, hear something pop, or the chassis becomes too
hot to touch, turn off power and unplug immediately.
The MOD 102 has a single-ended (class A) output stage. There is no need to check the bias, just
plug the amp in, connect the output to a proper 8 ohm load, let the tubes heat up for at least 10
seconds and it’s ready to play.
Remember, that once the amp has been turned on, there will be high voltage (about 260 VDC) on
the filter caps. If the amp has been assembled correctly, it takes about 2 ½ minutes for the voltage
on these caps to drain to less than 1 VDC after the power is turned off.
Always use the one hand rule when working on an amp that has been plugged in (see page 5).