Phase / Off
22
Final Assembly
Part 3: Attach the Jack PCB to the Enclosure
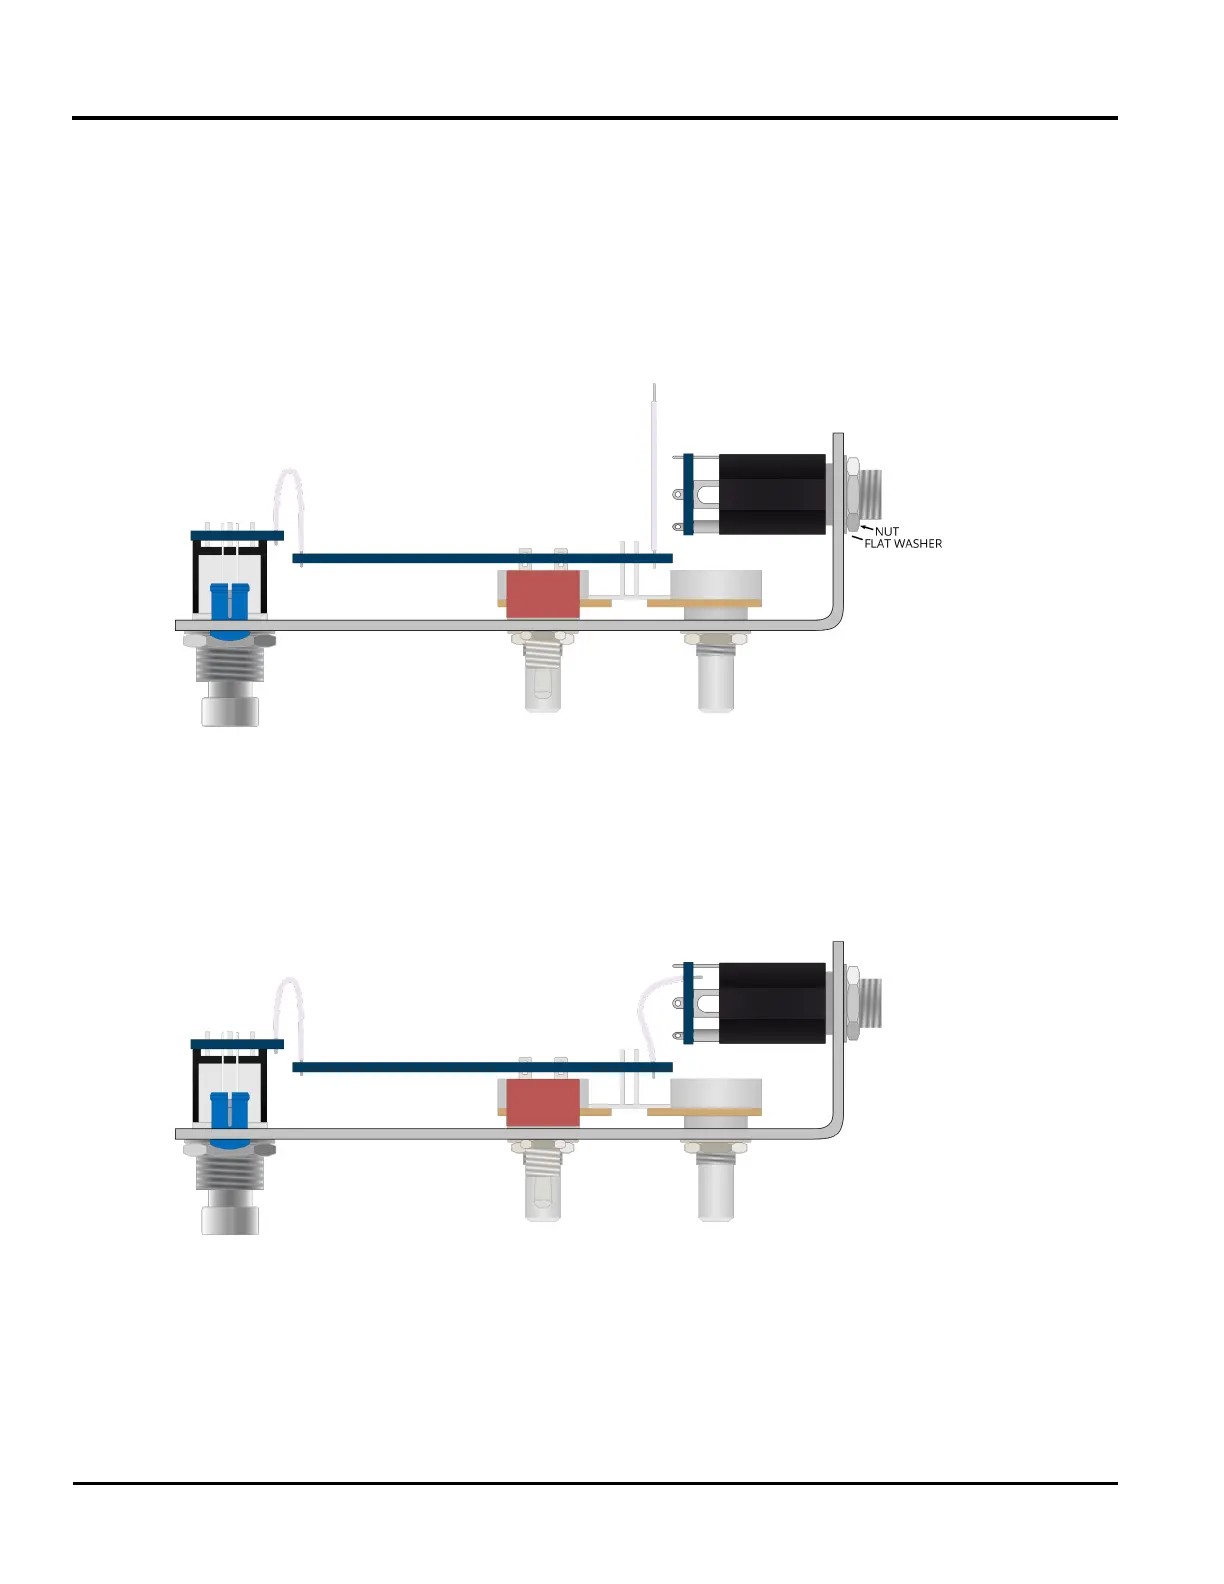
88: Mount the DC jack to the center hole of the top side of the enclosure. Orient the jack so the
large center pin lug is to the left and the ring lug is to the right. Tighten down the mounting nut.
89: Now secure the jack PCB to the enclosure. Make sure it is oriented the same way as when the
jacks were soldered. Use the at washer rst and then secure the nut to each 1/4" jack. Make sure
that the 4 conductor ribbon cable does not get caught beneath the PCB.
Part 4: Connect the Jack PCB to the Main PCB
90: With the jack PCB fully secured to the enclosure, insert the loose side of the 4 conductor ribbon
cable through the four holes at the middle of side 1 of the jack PCB. Solder these four connections
now. Be careful not to burn the black and white wires attaching the PCB to the DC jack.
All soldering is completed. Now is a good time to check over the build to make sure no steps were
missed and that all connections have been made.

 Loading...