7
Before proceeding with additional work it is
best to mount the hull. This step will help
prevent details from becoming damaged dur-
ing handling and will allow you to make any
alignments that require a true waterline. Prop-
er mounting of the hull is very important and
will allo
w the accurate building and aligning
of the remainder of the model. The kit does
not include any parts for mounting. However,
the following mounting is suggested.
Mounting Board with Two Pedestals - A
common mounting for ship models is a
wooden baseboard with two wooden or brass
pedestals. For a homemade board, a nice
looking hardwood such as cherry, walnut,
and maple would be ideal. You can round
the top edges of the baseboard, or cut a sim-
ple chamfer. If you own a router, or can
borr
ow one, you will be able to cut a nice
fancy edge on the baseboard. Stain the base
if necessary and give it a few coats of varnish
or finish like Minwax.
The pedestals could be wood or brass. One
pedestal needs to be longer than the other
because you should have the model mounted
with the waterline parallel to the baseboard.
If you decide on this type mounting you
should already have drilled pilot holes for the
screws as noted earlier. For
Newsboy, the
pedestals should be located near station 5
and 11. I
f something went awry and the
waterline is not level, you can add a brass
shim under one pedestal to correct it.
B
aseboar
ds and pedestals are available from
Model Shipways web site,
www.modelexpo-online.com.
1. General Notes
Don’t forget to file off any flash on Britannia
metal fittings, clean the fittings and then prime
them with grey primer before final paint.
M
ar
k the positions of fittings and str
uctur
es.
D
rill holes for the fittings or for locating-pins or
dowels. Before permanent installation, paint the
parts according to the
Newsboy color scheme or
your choice of color. If wooden parts are not
painted prior to installation, at least make sure
y
ou hav
e the par
t sanded and r
eady for painting
in place. U
se as little glue as necessary on parts.
Watch out for that glue squeeze-out. It’s hard to
r
emo
v
e if left to har
den.
2. Completing the Bulwark Details
B
efor
e installing anything on the deck, com
-
plete all the remaining details at the bulwarks
while ther
e ar
e no obstacles to contend with.
Knightheads & hawse timbers - Figure D-1
illustrates the details at the bow on each side
of the bowsprit.
Catheads - The catheads are laser-cut parts.
C
ut a hole in the bulwarks for the parts. You
pr
obably will need to shape the bottom of the
catheads to fit flush against the carved bul-
war
k. D
rill the sheav
e holes for the anchor
tackle lines, add the cleat, and the eyebolt for
the jibboom shr
oud (F
igur
e D-2).
Doublers for fore sheet sheave holes and
mooring pipes, and hawse pipe and moor-
ing pipe lips
- Fit the doublers, then drill the
holes thr
u the doublers and the bulwar
k. An
actual sheave need not be used for the sheet
unless y
ou desire the additional detail. A sim-
ple hole should suffice. D
rill the holes for the
hawse pipes thru the waterway. The lips for
the mooring and hawse pipes are Britannia
castings and fit on both the outboar
d and
inboard side. See Figure D-3 for some details.
Cavils & pin rails - There are three cavils on
each side. Make these from stripwood. The
pin rails need to be cut to fit ar
ound the bul
-
STAGE C: MOUNTING THE HULL
STAGE D: ADDING THE HULL DETAILS
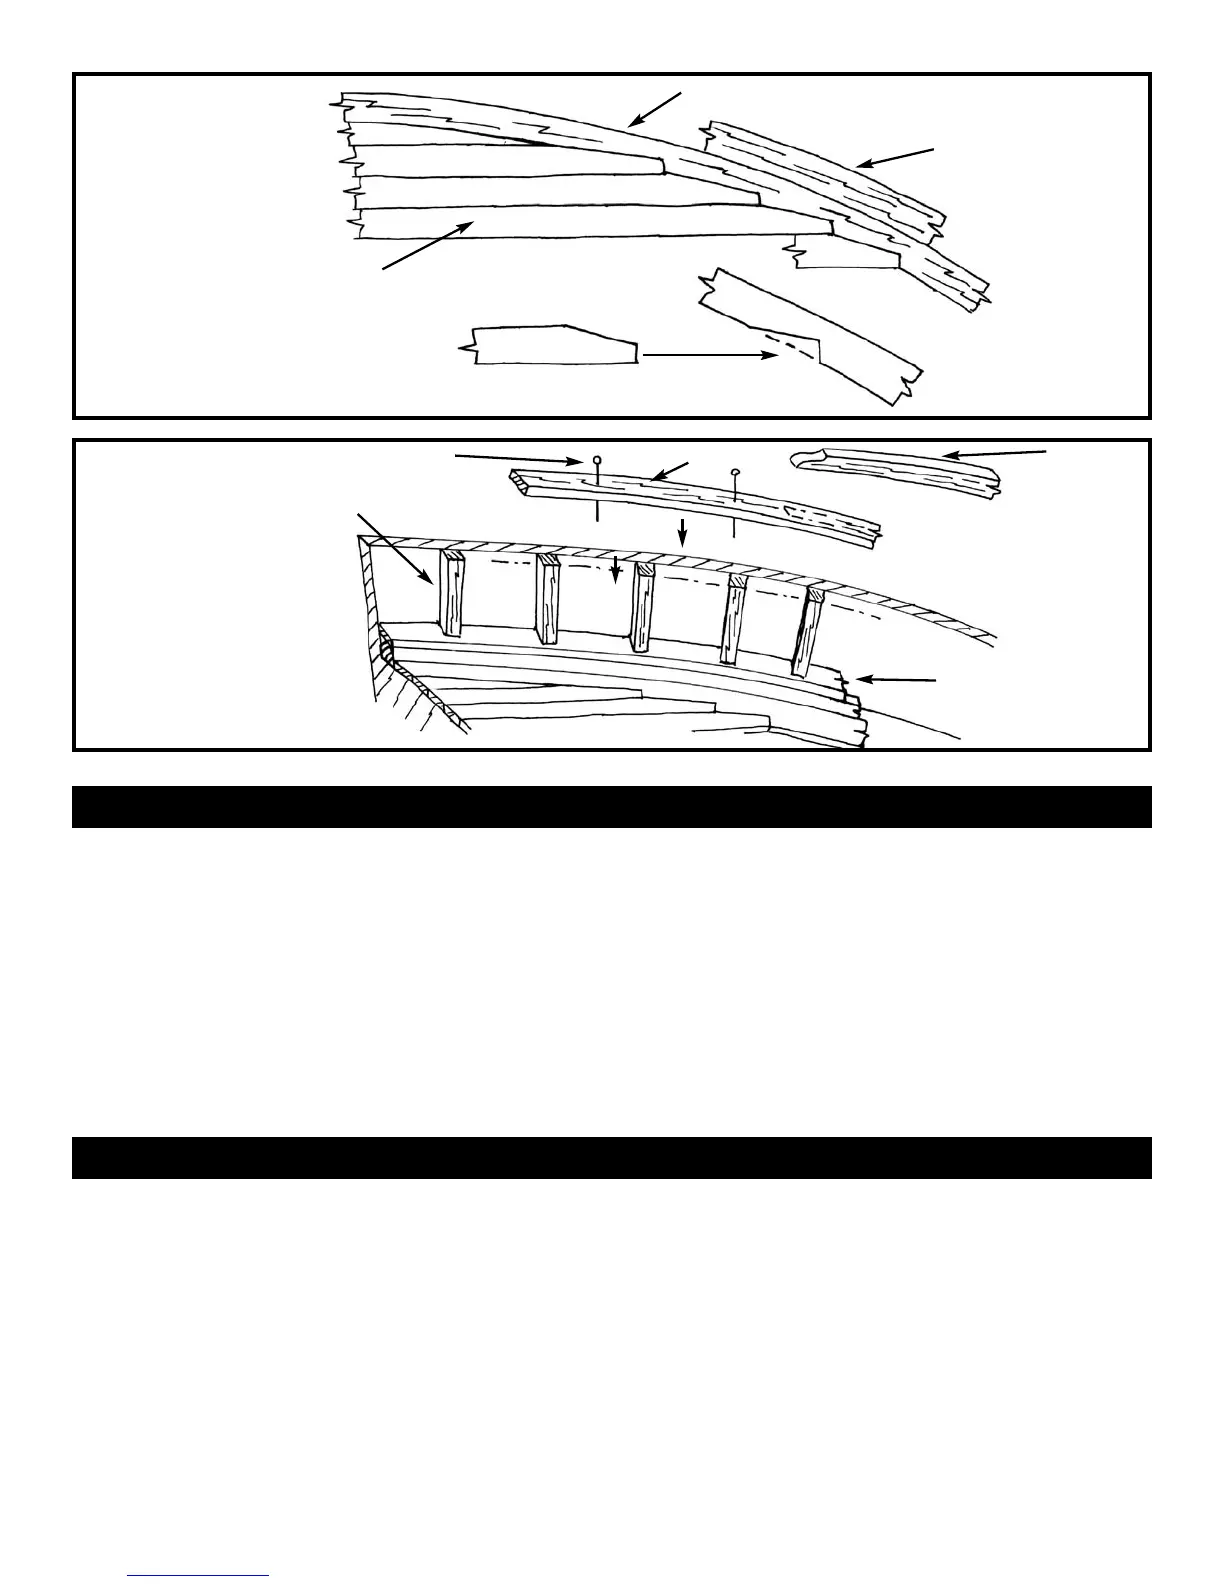
FIG. B-4
DECK
PLANKING
FIG. B-5
BULWARK
STANCHIONS,
CAP &
BOW RAILS
W
ATERWAY
NIBBING STRAKE
DECK PLANKS
CUT
SLOTS
PIN
CAP RAIL
PLANKSHEER
BOW
RAIL
ADD
ST
ANCHIONS
FIRST