EasyManua.ls Logo

Moen 4793 User Manual

Moen 4793
8 pages
To Next Page IconTo Next Page
Page #1 background imageLoading...
Page #1 background image
Installation Guide
Guía de Instalación
Guide d’installation
Size 1- 1/4" (32 mm)
Tamaño 1- 1/4" (32 mm)
Taille 1-1/4" (32 mm)
Sealant
Sellador
Mastic
HELPFUL TOOLS
For safety and ease of faucet replacement, Moen recommends the use of these
helpful tools.
HERRAMIENTAS ÚTILES
Para que el cambio de la llave sea fácil y seguro, Moen le recomienda usar estas
útiles herramientas.
OUTILS UTILES
Par mesure de sécurité et pour faciliter l’installation, Moen suggère l’utilisation des
outils suivants.
Please Contact Moen First
For Installation Help, Missing or
Replacement Parts
(USA)
1-800-BUY-MOEN (1-800-289-6636)
Mon - Fri 8:00 AM to 7:00 PM, Eastern
Sat. 9:00 AM to 3:00 PM Eastern
WWW.MOEN.COM
(Canada)
1-800-465-6130
Mon - Fri 7:30 AM to 8:00 PM, Eastern
WWW.MOEN.CA
Por favor, contáctese primero con Moen
Para obtener ayuda de instalación, piezas
faltantes o de recambio
011 52 (800) 718-4345
Lunes a viernes de 8:00 a 20:00 hs.
(Costa Este)
Sáb. 8:00 a 18:30 hs. (Costa Este)
WWW.MOEN.COM.MX
Veuillez d’abord contacter Moen
En cas de problèmes avec linstallation, ou pour
obtenir toute pièce manquante ou de rechange
1-800-465-6130
Du lundi au vendredi :
de 7 h 30 à 20 h, HE
WWW.MOEN.CA
INS2091C - 6/16
TWOHANDLE ROMAN TUB VALVE WITH
DURAGRIP™ MOUNTING SYSTEM
MODEL 4793
VÁLVULA PARA TINA ROMANA DE DOS
MANERALES CON SISTEMA DE MONTAJE
DURAGRIP™
MODELO 4793
SOUPAPE DE BAIGNOIRE ROMAINE À
DEUX POIGNÉES AVEC LE SYSTÈME DE
MONTAGE DURAGRIP
MC
MODÈLE 4793
CAUTION — TIPS FOR REMOVAL OF OLD FAUCET:
Always turn water supply OFF before removing existing faucet or disassembling the valve.
Open faucet handle to relieve water pressure and ensure that complete water shut-o has been
accomplished.
PRECAUCIÓN — CONSEJOS PARA CAMBIAR LA LLAVE MEZCLADORA:
Siempre CIERRE la toma de agua antes de quitar la llave existente o desmontar la válvula. Abra la
llave para liberar la presión, y asegúrese de que esté bien cerrada el agua.
ATTENTION  SUGGESTIONS POUR ENLEVER LANCIEN ROBINET:
Toujours couper l’alimentation en eau avant d’enlever ou de démonter le robinet. Ouvrir le robinet
pour libérer la pression d’eau et pour s’assurer que l’alimentation en eau a bien été coupée.
Question and Answer IconNeed help?

Do you have a question about the Moen 4793 and is the answer not in the manual?

Moen 4793 Specifications

General IconGeneral
BrandMoen
Model4793
CategoryKitchen & Bath Fixtures
LanguageEnglish

Summary

Contact Moen First

USA Support

Provides phone numbers, hours, and website for US customers.

Canada Support

Provides phone numbers, hours, and website for Canadian customers.

Mexico Support

Provides phone numbers, hours, and website for Mexican customers.

Installation Guide Overview

Product Identification and System

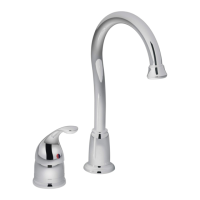
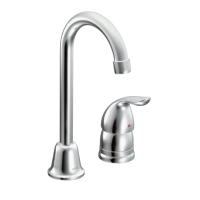
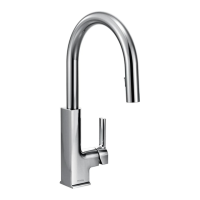
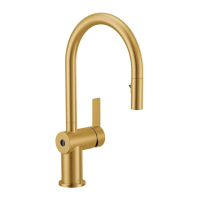
Identifies the specific model and the Dura-Grip mounting system.

Initial Safety and Removal Tips

Crucial safety advice for removing old faucets and starting installation.

Parts and Tools Identification

List of Components

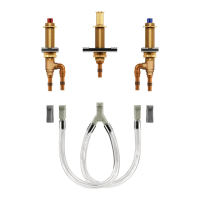
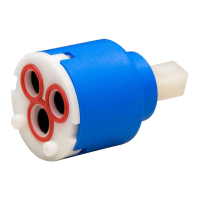
Detailed list and visual representation of all included faucet parts.

Icon Legend

Explains the meaning of symbols used throughout the installation guide.

Installation Steps - Preparation and Assembly

Hole Drilling and Measurements

Instructions for drilling holes and measuring center-to-center distances.

Valve and Shank Assembly

Guides on assembling valve bodies, bushings, brackets, and shank.

Installation Steps - Securing and Connecting

Securing Assemblies to Deck

Instructions for threading top mounting nuts onto valve bodies and shank.

Hose and Adapter Connections

Guidance on applying grease, attaching adapters, and connecting hoses.

Installation Steps - Final Assembly and Checks

Hose Securing and Spout Shank Adjustment

Securing hose assembly and adjusting spout shank height.

Internal Shank Nut Caution

Warning regarding the internal shank nut tightness and wire clip installation.

Installation Completion

Test Plug and Leak Check

Instructions for installing the test plug and checking for leaks.

Moen Limited Lifetime Warranty

Warranty Coverage Details

Explains warranty terms for homeowners and non-homeowners.

Related product manuals