EasyManua.ls Logo

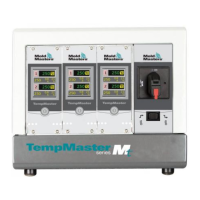
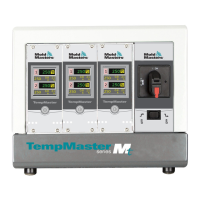
Mold-Masters TempMaster MT-04-04 User Manual

Default Icon
100 pages
To Next Page IconTo Next Page
Page #1 background imageLoading...
Page #1 background image
version 4
Original Instrucons
User Manual

Table of Contents

Questions and Answers:

Mold-Masters TempMaster MT-04-04 Specifications

General IconGeneral
ModelTempMaster MT-04-04
Number of Zones4
DisplayLCD
Control TypePID
Input TypeThermocouple
Output TypeRelay, SSR
CommunicationRS485

Summary

Section 1 - Introduction

1.1 Intended Use

Specifies the intended application of MT Series controllers in plastic molding equipment.

1.2 Release Details

Provides information on the manual's release version and date.

1.3 Warranty Details

States that warranty details are provided with order documentation.

1.4 Returned Goods Policy

Outlines the procedure for returning parts and policy on product alterations.

1.5 Movement or Resale of Mold-Masters Products or Systems

Discusses documentation usage for destination country and resale.

1.6 Copyright

States copyright information and trademarks of Milacron LLC and affiliates.

1.7 Units of Measure and Conversion Factors

Lists units of measure and their conversion values for manual data.

1.8 Trademarks and Patents

Lists registered trademarks and U.S. patents for Mold-Masters products.

Section 2 - Global Support

2.1 Manufacturing Facilities

Lists global and regional manufacturing facilities with contact information.

2.2 Regional Offices

Lists regional offices for sales and support with contact details.

2.3 International Representatives

Lists international representatives for sales and support by country.

Section 3 - Safety

3.1 Introduction

Emphasizes user's responsibility for safety compliance alongside provided information.

3.2 Safety Hazards

Identifies common safety hazards associated with injection molding equipment.

3.3 Operational Hazards

Lists warnings and precautions for operating the equipment safely.

3.4 General Safety Symbols

Explains common safety symbols and their meanings.

3.5 Wiring Check

Provides essential checks for system mains and controller-to-mold wiring.

3.6 Lockout Safety

Details lockout/tagout procedures and potential hazards if not followed.

3.7 Electrical Lockout

Provides a step-by-step guide for electrical lockout procedures.

3.7.1 Energy Forms and Lockout Guidelines

Lists energy forms, sources, and corresponding lockout guidelines for safety.

3.8 Disposal

Provides guidelines for the environmentally responsible disposal of system components.

3.9 MT/MT2 Controller User Hazards

Highlights electrical shock hazards and environmental conditions for controller installation.

Section 4 - Overview

4.1 Specification

Lists general technical specifications for the MT controllers.

4.2 TMXL/MT Compatibility

Explains compatibility and physical changes between TMXL2 and MT controllers.

4.3 Tool Connections

Refers to Section 9 for details on connecting cables to the system.

4.4 Controller Power Supplies

Discusses cabinet power supply acceptance and phase sequences.

4.5 Filter Option

Recommends an inline filter for countries with power line noise concerns.

4.6 Switch On and Off

Describes the main power switch and its function for turning the controller on/off.

4.6.1 Switch On

Explains that zones enter "Run" mode and start heating upon power-on.

4.6.2 Switch Off Individual Modules

Details how to turn individual modules on/off using their power switches.

4.6.3 Switch Off the Whole Controller

Explains that settings are memorized when the whole controller is switched off.

4.6.4 Switch Off Individual Zones

Provides steps to switch off individual zones via the menu.

4.7 Controller Cabinet

Describes power supply and connection methods for MT and MT-02-02 controllers.

4.7.1 Controller Modules

Details the components of a dual-zone modular controller unit.

4.8 How the MT Controller Works

Explains the closed-loop operation of MT controllers with a diagram.

4.8.1 Set the Ramp Feature (On / Off)

Explains the Ramp feature to skip dwell period for faster heating.

4.9 Program Menus

Illustrates the MT and MT2 controller program menus with navigation steps.

Section 5 - Setup

WARNING

General warning before setup, emphasizing safety and locating the main disconnect.

WARNING - ELECTRIC SHOCK HAZARD

Highlights critical electrical shock hazards and safety precautions.

5.1 Introduction

Introduces procedures for changing default settings and saving them.

5.2 Set Zone Numbering

Explains how to number higher zones in a logical sequence for MT controllers.

5.2 Set Zone Numbering - continued

Continues steps for setting zone numbering using the interface.

5.3 Set the Temperature Scale

Details how to change the temperature display between Fahrenheit and Celsius.

5.3 Set the Temperature Scale - continued

Completes the steps for setting the temperature scale on the controller.

5.4 Change Zone PID Characteristics

Explains how to override PID settings to change zone response time.

5.4 Change Zone PID Characteristics - continued

Continues instructions on selecting PID settings like Fast, Med, or Slow.

5.5 Set the Ramp Feature

Describes how to use the Ramp feature to skip the dwell period for faster heating.

5.5 Set the Ramp Feature - continued

Completes the steps for setting the Ramp feature on the controller.

5.6 Set Boost Value

Guides on configuring the Boost value for zone temperature increase.

5.6 Set Boost Value - Continued

Continues instructions on setting the desired Boost temperature.

5.7 Set Standby Value

Details how to configure Standby temperature settings for each zone.

5.7 Set Standby Value - continued

Completes the steps for setting the desired Standby temperature.

5.8 Monitor Temperature Limits

Explains how the controller monitors zone temperatures against set limits.

5.8.1 Warning and Alarm Limits

Details how warning and alarm limits are set and displayed.

5.8.1 Warning and Alarm Limits - continued

Completes setting Over and Under Temperature limits.

5.9 Set Ground Fault Detection

Describes the function of ground fault detection and its settings.

5.9 Set Ground Fault Detection - continued

Continues instructions on setting ground fault detection to On or Off.

5.10 Set Mold Leak Detection

Explains the leak detection function and its alarm triggering mechanism.

5.10 Set Mold Leak Detection - continued

Completes setting the leak detection power level.

5.11 Set Response to Thermocouple Failure

Details how to choose a response for a detected thermocouple failure.

5.11 Set Response to Thermocouple Failure - continued

Completes setting the Auto-Manual response for thermocouple failure.

5.12 Restrict Access to Manual, Standby or Boost

Explains how to prevent users from selecting certain control functions.

5.12 Restrict Access to Manual, Standby or Boost - continued

Continues steps for restricting access by checking the M.Dis box.

5.13 Extend Alarms for Manual, Standby or Boost Operation

Describes options to generate external alarm conditions for specific operations.

5.13 Extend Alarms for Manual, Standby or Boost Operation - continued

Completes setting alarm options for Manual, Standby, or Boost.

5.14 Language

Guides on selecting one of the four available language options for the controller.

5.15 Set the Required Zone Temperatures

Details how to set the normal operating temperatures for each zone.

Section 6 - Operation

6.1 Run Mode

Explains how to start a zone and put it into Auto-Run mode.

6.2 OFF Mode (Single Zone)

Details how to turn individual zones off using the controller interface.

6.3 Off Mode (Single Module)

Explains how to turn off an individual module using its front panel button.

6.4 Manual Mode

Guides on selecting Manual mode as an alternative to Auto mode.

6.5 Manual Mode - Power Level

Explains how to adjust power settings and temperature in Manual mode.

6.6 Slave Mode

Describes Slave mode as an alternative to Manual for zones with faulty thermocouples.

6.6 Slave Mode - continued

Completes Slave mode setup and explains how to restore to Auto mode.

6.7 Standby and Boost Mode

Presents two options for switching to Standby or Boost mode.

6.7.1 Standby – Whole Cabinet

Details how to set Standby mode for the entire cabinet.

6.7.2 Boost – Whole Cabinet

Details how to set Boost mode for the entire cabinet for two minutes.

6.7.3 No Standby or Boost Option

Explains when the Standby/Boost rocker switch may have no effect.

6.8 Standby Mode – Individual Zones

Guides on reducing zone temperatures for paused mold tools.

6.9 Leaving Standby Mode

Provides steps to leave Standby mode and revert to Auto mode.

6.10 Boost Mode – Individual Zones

Explains how Boost mode temporarily raises zone temperature for two minutes.

6.11 Change Set Temperature (Auto or Manual)

Details how to increase or decrease temperature settings in Auto/Manual zones.

Section 7 - Maintenance

7.1 Service and Repair The Controller

Discusses replacement parts and repair facilities for the controller.

7.1.1 Replacement Parts

Mentions that only fuses are expected to be replaced, with repair facilities available.

7.1.2 Cleaning and Inspection

Provides instructions for cleaning the cabinet and checking terminals.

7.2 Restore Factory Settings and Recalibration

Introduces functions for restoring default settings and recalibration.

7.2.1 Default Settings

Lists the default factory settings for various controller parameters.

7.2.2 Calibration Routine

Outlines the requirements and procedure for temperature calibration.

7.2.3 Calibration Sequence

Details the step-by-step process for calibrating the controller.

7.2.4 M.Dis Option

Explains how to prevent user access to Manual, Standby, or Boost functions.

7.3 Fuses and Overcurrent Protection

Covers fuses and overcurrent protection for the controller and its components.

7.3.1 Fans

Discusses fan operation, blockages, and fuse checks.

7.3.2 Controller Cards

Mentions separate protection fuses for controller cards.

7.3.3 Onboard Power Supply

Details the fuse for the module power supply.

7.3.4 Output Fuse Type: HRC High Speed

Specifies the type of fuse for output circuits.

7.3.5 Input Fuse Type: Surface-Mount Quick-Blow

Specifies the type of fuse for input circuits.

Section 8 - Troubleshooting

8.1 Individual Card Diagnostics

Explains features for diagnosing faults within the control system.

8.2 Other Possible Fault Conditions

Discusses potential fault conditions beyond individual card diagnostics.

8.2.1 Rapid Temperature Fluctuations

Identifies causes of temperature fluctuations, like extraneous voltages.

8.2.2 Ground Fault Detection

Explains ground fault detection and potential causes.

8.3 Module Removal

Provides warnings and steps for removing a control module.

Section 9 - Wiring Details

9.1 Single Phase Supply Cable

Details cable markings and supply configurations for MT-02-02 controllers.

9.2 Three Phase Designation

Explains three-phase designations and cable markings for MT Series controllers.

9.2.1 Five Wire Star 380VAC

Lists cable markings for a five-wire star 380VAC supply.

9.2.2 Set Power Terminal Block to STAR Configuration

Guides on connecting the power terminal block to a STAR configuration.

9.2.3 For Four Wire Delta 240V

Details cable markings for a four-wire Delta 240V supply.

9.2.4 Set Power Terminal Block To DELTA Configuration

Guides on connecting the power terminal block to a DELTA configuration.

9.3 Filter Option

Recommends an inline filter for noise across power lines.

9.4 Alarm Output

Explains the HAN4A connector for alarm output and input signals.

9.5 Standard Tool Connections

Introduces tool connection configurations for MT controllers.

9.5.1 MT-02-02

Highlights different configurations for MT-02-02 based on geographic location.

9.5.2 MT-02-02 For UK and Europe

Details pin configuration and cut-out dimensions for UK/Europe MT-02-02.

9.5.3 MT-02-02 For India

Details pin configuration and cut-out dimensions for India MT-02-02.

9.5.4 MT-02-02 For North America

Details pin configuration and cut-out dimensions for North America MT-02-02.

9.5.5 MT-04-04

Shows pin configuration and cut-out dimensions for MT-04-04 system.

9.5.6 MT-06-06

Shows pin configuration and cut-out dimensions for MT-06-06 system.

9.5.7 MT-12-12 and MT-18-xx

Mentions different configurations for MT-12-12/MT-18-xx based on location.

9.5.8 MT-12-12 and MT-18-xx for UK and Europe

Illustrates inserts for MT-12-12/MT-18-xx for UK and Europe.

9.5.8 MT-12-12 and MT-18-xx for UK and Europe - continued

Provides pin configuration and cut-out dimensions for UK/Europe MT-12-12/MT-18-xx.

9.5.9 MT-12-12 and MT-18-xx for North America

Shows pin configurations for North America MT-12-12/MT-18-xx male insert.

9.5.9 MT-12-12 and MT-18-xx for North America - continued

Provides pin configurations and cut-out dimensions for North America MT-12-12/MT-18-xx female insert.

Related product manuals