7
English
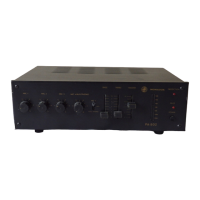
SA-130DMP
➁
➀
3 Applications
The stereo amplifier SA-130DMP is suitable
for a wide range of applications, e. g. in bars,
function rooms and offices. It provides connec-
tions for a microphone and two audio sources
with line signal level (e. g. mixer, CD player) and
also features an MP3 player with USB port and
memory card slot, a Bluetooth receiver and an
FM radio.
4 Setting up the Amplifier
The amplifier is designed for installation into
a rack (482 mm / 19”); however, it can also be
placed on a table. In order to ensure sufficient
cooling of the amplifier, air must always be able
to flow freely through all air vents.
4.1 Installation into a rack
For rack installation, the amplifier requires 1 U
(1 rack unit = 44.45 mm). The front plate is
not sufficient for fixing the amplifier safely;
additionally use lateral rails or a bottom plate
to secure the amplifier.
The hot air given off by the amplifier must
be dissipated from the rack; otherwise, heat
will accumulate in the rack which may not only
damage the amplifier but also other devices in
the rack. In case of insufficient heat dissipation,
install a ventilation unit into the rack.
2 Safety Notes
The device corresponds to all relevant directives
of the EU and is therefore marked with .
The device corresponds to the relevant UK leg-
islation and is therefore marked with UKCA.
WARNING
The device uses dangerous
mains voltage. Leave servicing
to skilled personnel and do
not insert anything into the
air vents; inexpert handling
may result in electric shock.
•
The device is suitable for indoor use only.
Protect it against dripping water, splash
water and high air humidity. The admissi-
ble ambient temperature range is 0 – 40 °C.
•
Do not place any vessels filled with liquid on
the device, e. g. a drinking glass.
•
The heat generated inside the device must
be dissipated by air circulation; therefore,
never cover the air vents.
•
Immediately disconnect the mains plug from
the socket
1. if the device or the mains cable is visibly
damaged,
2. if a defect might have occurred after the
device was dropped or suffered a similar
accident,
3. if malfunctions occur.
In any case the device must be repaired by
skilled personnel.
•
Never pull the mains cable to disconnect the
mains plug from the socket, always seize
the plug.
•
For cleaning only use a dry, soft cloth; never
use water or chemicals.
No guarantee claims for the device and no li-
ability for any resulting personal damage or
material damage will be accepted if the device
is used for other purposes than originally in-
tended, if it is not correctly connected or op-
erated, or if it is not repaired in an expert way.
If the device is to be put out of opera-
tion definitively, dispose of the device
in accordance with local regulations.
Stereo Mixing Amplifier
These instructions are intended for users with-
out specific technical knowledge. Please read
the instructions carefully prior to operation and
keep them for later reference.
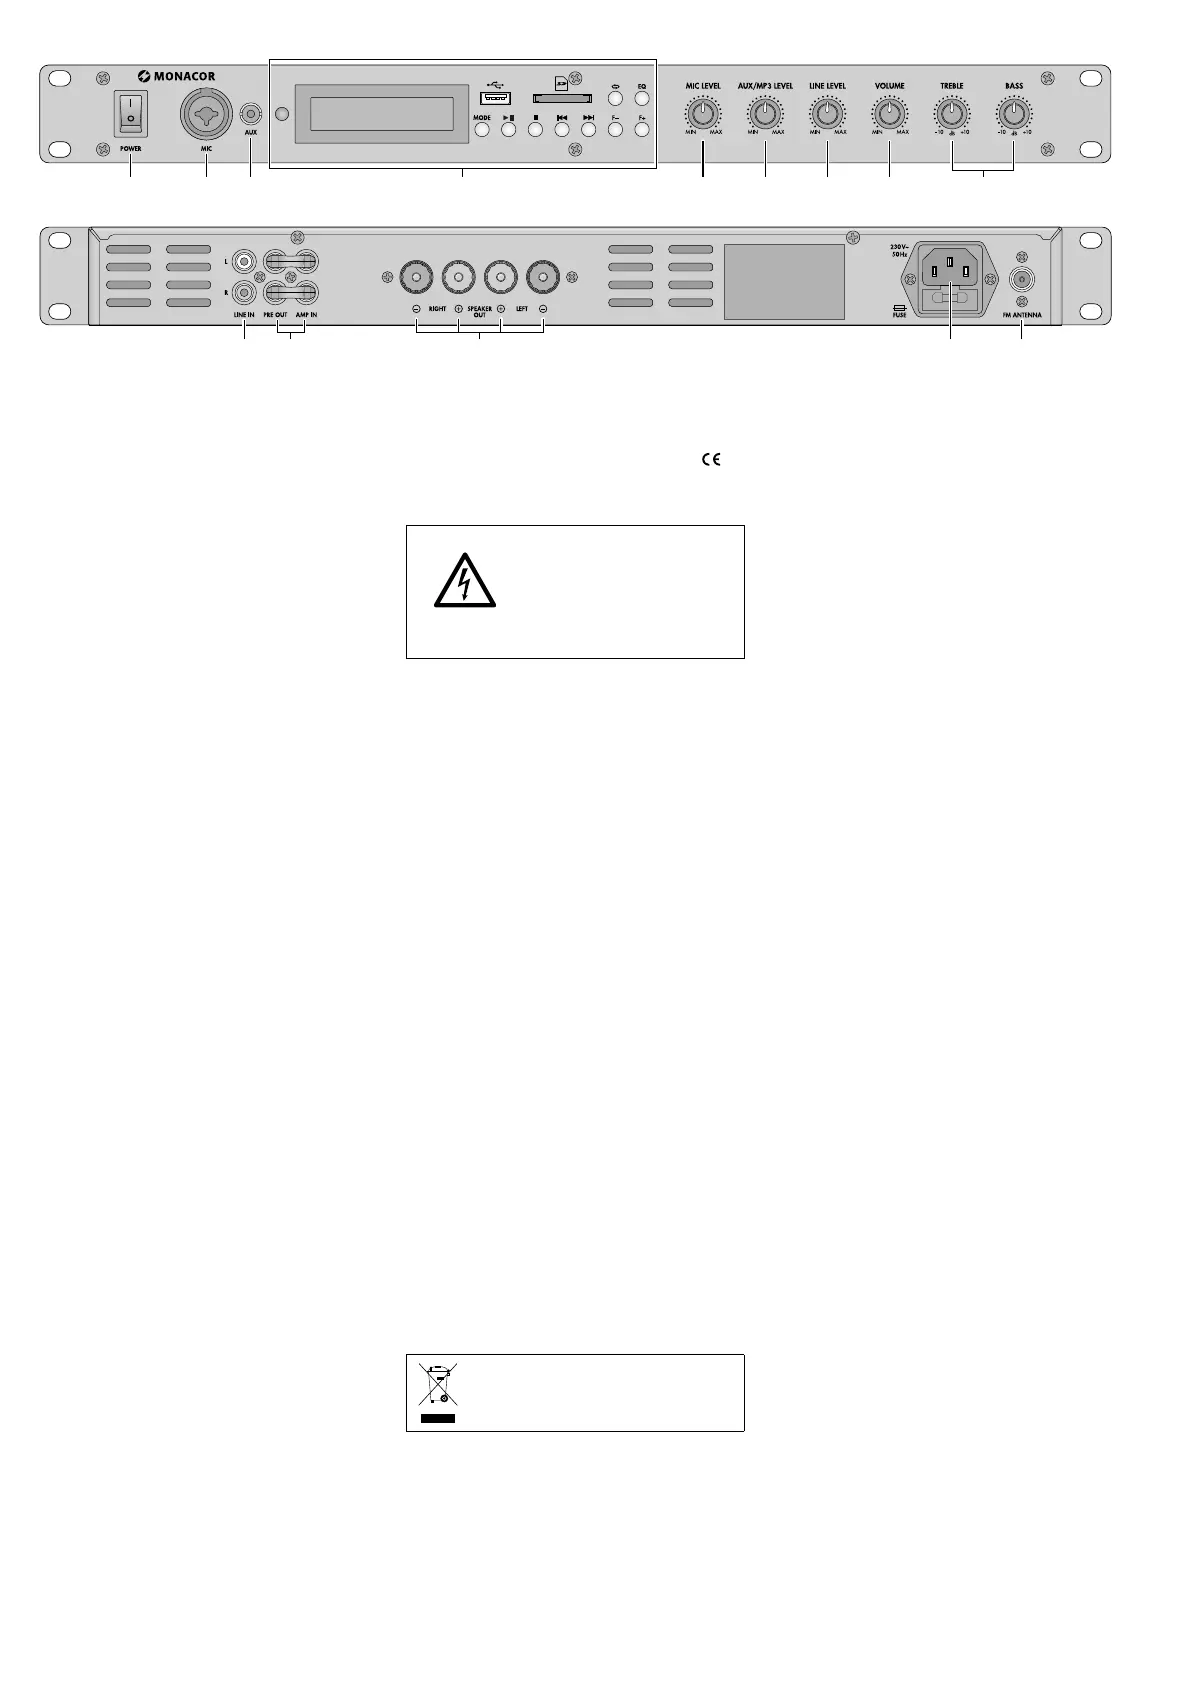
1 Overview
1 POWER switch
2 Mono input to connect a microphone via
an XLR plug or a 6.3 mm plug
3 Stereo input (3.5 mm jack) to connect an
audio source with line signal level, e. g.
MP3 player
Note: When this jack is connected, the module
“MP3 player / Bluetooth receiver / FM radio” (4)
will be muted.
4 Module “MP3 player / Bluetooth receiver /
FM radio”:
☞
chapter 6.1
5 Volume control for the input MIC (2)
6 Volume control for the input AUX (3) or,
when the input AUX is not used, for the
module “MP3 player / Bluetooth receiver /
FM radio” (4)
7 Volume control for the input LINE IN (10)
8 Total volume control
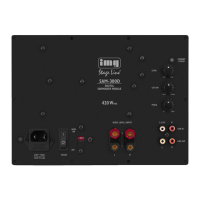
9
Tone controls TREBLE (high frequencies)
and BASS (low frequencies)
10 Stereo input (RCA jacks, L = left / R = right)
to connect an audio source with line signal
level (e. g. CD player, mixer)
11
Stereo output PRE OUT and stereo input
AMP IN (RCA jacks, L = left / R = right)
to insert a device for audio processing,
☞
chapter 5, item 3
Note: When PRE OUT and AMP IN are not used
to connect a device, make sure that they are
interconnected by means of the two jumpers
as shown in fig. 2. Otherwise, the signal flow
will be interrupted.
12
Speaker terminals (screw terminals with
4 mm banana jacks)
13
Mains jack for connection to a mains socket
(230 V / 50 Hz) via the mains cable provided
14 Connection for an FM antenna
English
English Page