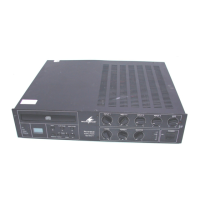
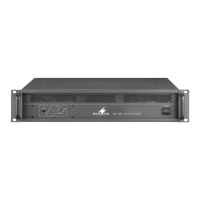
5 Connections
Prior to connecting any units or to changing any
existing connections, switch off the PA-906 and
the units to be connected.
5.1 Speakers
The speaker terminals can be found below the
protection cover (16). For connecting, remove
the cover.
At the output of the amplifier, either connect
100 V or 70 V speakers to the terminals (15) [fig-
ures 4a and 4b] – observe the maximum load of
the speakers on the amplifier output (120 W) to
prevent damage to the amplifier
or connect a speaker or a speaker group with a
total impedance of 8 Ω or 16 Ω to the terminals
(15) or to the corresponding 6.3 mm jack (17).
Figures 4c to 4j show several ways to observe
the correct impedance. However, there are other
possibilities.
When connecting the speakers, always observe
the correct polarity as indicated in the figures.
5.2 Microphones
The combined XLR/6.3 mm jacks (9) of the
inputs CH 1 – CH 6 allow connection of six micro-
phones with XLR plug or 6.3 mm jack. The jacks
have a latching; to disconnect the XLR plug,
press the PUSH lever. To connect a microphone
with flying leads, the screw terminals (22) at the
input CH 1 will be available as an alternative.
A microphone at the input CH 1 and CH 2
may automatically take priority over the other
inputs (
chapter 6.1).
1) When connecting a microphone, set the
switch LINE/MIC of the corresponding DIP
switch block (8) to the upper position (MIC).
2) If you use a phantom-powered microphone,
set the first switch of the corresponding DIP
switch block to the upper position (PHAN-
TOM).
CAUTION!
1. Only actuate the switch when the unit is
switched off (switching noise).
2. Do not connect any unbalanced micro-
phone when the phantom power (48 V ) is
activated; the microphone may be damaged.
5.3 Audio units with line output
It will be possible to connect six units with line
level (mixer, CD player, etc.):
1) Connect units with mono output to the com-
bined jacks (9) of the inputs CH 1 – CH 6 or to
the terminals (22) at the input CH 1. Set the
switch LINE/MIC of the corresponding DIP
switch block (8) to the lower position (LINE)
and the switch OFF/PHANTOM to the lower
position (OFF).
The jacks are designed for balanced sig-
nals. Connect audio units with unbalanced
signals via 2-pole 6.3 mm plugs or one of the
RCA jacks (10) or via an XLR plug with the
contacts 1 and 3 connected. With an unbal-
anced signal at the input terminals (22) of
CH 1, it is recommended to bridge the con-
tacts “
-
” and “GND”.
2) Connect units with stereo output to the RCA
jack (10) of the inputs CH 1 – CH 6. In the
amplifier, the two stereo channels will be
combined to a mono signal.
Set the switch LINE/MIC of the correspond-
ing DIP switch block (8) to the lower position
(LINE).
5
.4 Audio units for signal processing
To insert an audio unit for signal processing
(e. g. an equalizer or an automatic volume con-
trol), use the 6.3 mm jacks SEND (18) and
RETURN (19). For this purpose, connect the
input of the audio unit to the jack SEND and the
output to the jack RETURN.
N
ote: As soon as one of the two jacks is used, the sig-
n
al in the amplifier will be interrupted. The speakers will
remain mute if the unit inserted is not switched on, if it
is defective or not correctly connected.
5.5 Recorder or
additional amplifier system
To connect a recorder or another audio unit with
line input (e. g. an additional amplifier system for
PA applications in large zones), use the RCA
jack SLAVE OUT (20). At this output, the mixed
signal of the audio sources will be available,
unaffected by the adjustment of the control MAS-
TER (3).
5.6 Momentary pushbutton switch
for activating the chime
To activate the chime, connect a momentary
pushbutton switch (type: NO contact) to the two
terminals CHIME (21). To activate the chime
with the momentary pushbutton switch, the
switch OFF/CHIME in the DIP switch block of the
input CH 1 must be set to the upper position
(CHIME).
5.7 Power supply and
emergency power supply
To ensure operation of the amplifier in case of
mains power failure, connect a 24 V emergency
power supply (e. g. PA-24ESP from MONACOR)
to the terminal strip 24 V INPUT (14). Finally
connect the mains cable provided to the mains
jack (11), then connect it to a socket (230 V~/
50 Hz).
Notes
1. If a 24 V voltage is applied, the amplifier will be
immediately in operation and the LED ON (7) will
light up. It will not be possible to switch off the
amplifier with the POWER switch (6).
2. In the emergency power mode, the amplifier will
provide less power than in the mains mode.
6 Operation
1) Before switching on, set the control MASTER
(3) to “0” to prevent switching noise and an
excessive volume.
2) Switch on the audio sources connected first,
then switch on the PA-906 with the POWER
switch (6). The power LED ON (7) will light
up. If an additional amplifier system for PA
applications has been connected to the PA-
906, switch on this amplifier system last.
After operation, switch off the units in
reverse order:
1. the additional amplifier system
2. the PA-906
3. the audio sources connected
The amplifier features a switch-on delay:
After switching on, it will take a few seconds
before the speakers are activated.
3) As a basic setting, first set all controls INPUT
(1) to the left stop and set the tone controls
(2) to mid-position.
4) Turn up the control MASTER (3) for the mas-
ter volume so that the following adjustments
can be heard well via the speaker.
5) Mix the input signals with the corresponding
volume controls INPUT (1) or fade them in
and out as required:
If an audio source is not used, always set
its volume control to zero.
6) Adjust the definitive volume with the control
MASTER.
7) Adjust the sound with the controls (2) TRE-
BLE for the high range and BASS for the low
range. Readjust the volume, if required.
6.1 Automatic priority circuit
(talkover)
The automatic priority circuit of the input chan-
nels CH 1 and CH 2 will improve the intelligibility
of announcements by attenuating the signals of
the other input channels during the announce-
ment. The function of CH 1 will take the highest
priority. For an announcement via CH 1, the sig-
nals of CH 2 – CH 6 will be attenuated; for an
announcement via CH 2 the signals of CH 3 –
CH 6. To activate the priority function, set the
switch OFF/VOX (8) of the desired channel to
the position VOX.
6.2 Chime
To activate a chime, e. g. to precede announce-
ments, shortly press the momentary pushbutton
switch connected to the terminals CHIME (21)
[
chapter 5.6].
CAUTION Never adjust the speaker to a
very high volume. Permanent
high volumes may damage
your hearing! Your ear will get
accustomed to high volumes
which do not seem to be that
high after some time. There-
fore, do not further increase a
high volume after getting used
to it.
To prevent feedback howl, never direct the
microphone towards a speaker and never
place it too close to a speaker. Feedback
may also occur when the volume is too high.
In this case, reduce the microphone volume
with the corresponding INPUT control.
WARNING
Never operate the amplifier with-
out the cover (16); touching the
terminals may result in electric
shock.
8
G
B
 Loading...