A. PLANNING THE INSTALLATION
Always observe the water byelaws. Ensure there is only one rising
main, that you have allowed space for access to the unit for salt
filling and for any possible maintenance in the future. Check the
water pressure; locate the rising main, a drain facility and a power
supply.
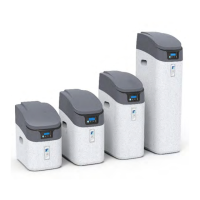
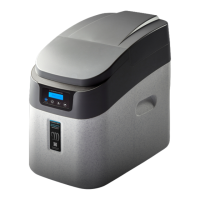
B. SITING THE SOFTENER – Fig 1
Where possible, this should be close to the rising main. Take care to
allow hard water take off points for a drinking water facility
and/also an outside tap. The distance between the softener and the
drain should be as short as possible. Ensure that both the drain and
the overflow are not subject to freezing or over 120 degrees F.
If siting the softener within a kitchen cupboard ensure that the base
is adequately supported.
If the softener is being installed in your loft, 1
st
, 2
nd
floor etc, it is
recommended to house the softener within a 25-gallon plastic tank
and insulate well. The overflow on the plastic tank should be below
the overflow of the softener and a minimum of ¾” in size. Failure to
install the softener in a suitable tank will void the Guarantee
C. NON-RETURN VALVE
In single dwellings a single check valve should be fitted. All other
applications require a double check valve.
D. DRINKING WATER FACILITY – Fig 1.
In compliance with U.K. Water Regulations a tap for drinking water
purposes should be left on the hard water supply.
E. MATERIAL CHECK LIST
The softener includes an installation kit for a conventional system
(tanks in roof). For Combi boilers you will need additional Maxflow
Hoses. For a pressurised system (22mm pipe work) you will need
the additional PSK that includes Maxflows.
F. WATER PRESSURE TEST
It is IMPORTANT that a pressure check is carried out. Low and
high pressure can result in either damage to, or failure of the
softener. If daytime static water pressure* exceeds 3.5 bar (50psi)
a pressure limiter should be fitted. Minimum dynamic pressure must
exceed 1.4 bar. If in any doubt please call us on 01986 784 759.
*50psi daytime pressure can reach over 70psi nighttime pressure!
G. INSTALL BYPASS VALVES & NON-RETURN VALVE
Form an installation as per Fig 1.
H. INLET & OUTLET CONNECTIONS – Fig 3.
Using the hoses provided connect the braided hoses to the in/out
connections on the sides of the softener – it is recommended to use
the ‘elbow’ connections here. Under no circumstances use washing
machines hoses or plumb the softener in solid copper pipe.
I. DRAIN CONNECTION – Fig 3.
Connect the white drain hose to the white barbed fitting using a
jubilee clip to fix. Run the drain hose to either an upstand or an
outside drain. A minimum air gap of 20mm should exist at the end
of the drain line. Softened water will have no adverse effect on a
septic tank. If you need to extend the drain hose this can be done by
connecting to a 15mm copper tube for a max run of 8 metres with a
minimum daytime pressure of 40 psi.
Ensure that the drain hose is adequately fixed to the copper pipe.
The drain hose must not dip or be kinked in any way as this will
lead to an overflow of the machine.
UPHILL? The white flexible drain hose can run uphill internally
for a maximum of 3 feet with a minimum water pressure of 40 psi.
J. FAST FLOW DRAIN KIT
Where a drain is not readily available. A Fast Flow Drain Kit may
be used and is available from us. Ref: FFDK
Please note that the Fast Flow Drain Kit cannot be used on overflow
connections.
K. OVERFLOW CONNECTION
The hose for the overflow should be cut from the drain hose
provided. The overflow connection is the ½” hose spigot on the rear
of the cabinet. No clip is required. The overflow must be run
downhill through an outside wall without kinks or restriction. It is
recommended the overflow hose be run to over an outside gully
whenever possible with a clear 20mm air gap at the end of the hose.
A 22mm copper protective sleeve through the outside wall will help
prevent kinking of the hose.
L. TEST INSTALLATION FOR LEAKS
Close Inlet and Outlet valves to the softener and open Bypass valve.
Open mains stopcock slowly and flush the new pipe work and
connections via an adjacent mains tap. Ensure the tap used is not a
hard water tap. Check all connections for leaks.
M. OBTAIN YOUR WATER HARDNESS
These instructions apply to the enclosed test kit only.
Run hard water for approx. 1 minute and rinse the test tube well.
Fill the test tube up to the 10ml level. Add 2 drops of the dark
solution and mix gently. If the water sample contains hardness it
will turn red. Add the dark solution in batches of 5 drops, holding
the dropper bottle at 45 degrees. Mix gently after each 5 drops.
Count the drops needed until the colour of the sample in the test
tube changes from a dark red to a dark blue/green.
You will need this figure for the ‘Settings Chart’.
Fig 1.