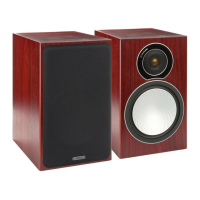
Fixing the Silver FX to a wall
CAUTION: You will need to determine where the Silver FX’s will be fixed and
the structure of the wall. For safety reasons, if you are unsure of your ability to
provide a secure and safe fixing, do not attempt to fix these speakers to your
wall, please obtain the services of a competent and qualified trades person.
CAUTION: Ensure that there are no water pipes or electricity cables running
behind where the wall brackets are going to be secured. Work from secure
steps and avoid trailing wires.
We do not supply wall fixing screws and plugs with the FX’s. Please use suitable
fixings for the type of wall construction the FX’s will be fixed to.
To fix your FX’s to the wall, we would recommend using the wall fixing template
enclosed within the packaging carton
Plinth Fixing
Floor standing models only
The Silver 6, 8 & 10’s are supplied with plinths to improve stability and acoustic
response. The plinths are secured in place by using the supplied M10 bolts. They
are not essential should space be at a premium. If you choose not to use the plinths,
fit the spiked feet direct to the cabinet.
Before you fit the plinth ensure the floor area is clear of any hard/sharp objects. To
fit the plinth turn the cabinet over so that the bottom is facing upwards. Place the
plinth onto the cabinet ensuring it is orientated correctly, lining up the bolt holes in
the plinth with the inserts in the cabinet. Using the bolts, secure the plinth to the
cabinet. Tighten them up gradually at first and ensure the plinth is fitted securely
to the cabinet. Fit the feet to the plinth before turning the loudspeaker back over.
(Please read the instructions opposite). The spikes are used to improve sound quality
and bass performance
Grilles
All of the Silver Series speakers come with grilles covered in acoustically transparent cloth. The
grilles are held invisibly in place by magnets in both the grille and the cabinet (except the FX).
To fit them, firstly ensure they are the correct way up (badge at the bottom) and offer
them up to the cabinet. The magnets should then pull it into position.
The FX comes with the grilles factory fitted. If you wish to remove them, carefully prize
them away from the cabinet with the tips of your fingers. There are three separate
grilles fitted to each cabinet.
CAUTION: Always remove grilles before lifting or moving the speakers.
Silver Series8

 Loading...