REGULAR INSPECTION B-11
6.4 Disassembling/Cleaning the Relief Valve
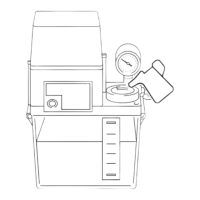
If the lubricating unit abnormal pressure is caused by a relief valve malfunction, disassemble and
clean the relief valve.
6.4.1 Relief Valve Disassembly
Remove the adjusting screw to disassemble the relief valve as indicated below.
6.4.2 Relief Valve Cleaning
Clean the disassembled relief valve with compressed air and kerosene.
• Take care to check for dust contamination of the tapered section. If scratches are visible on
the tapered section of the relief valve, replacement is necessary.
• Cover the tapered threaded section with seal or sealing tape.
Following disassembly and cleaning of the relief valve, press the manual lubrication button
to bleed air from the piping.
6.4.3 Relief Valve Adjustment
Following disassembly and cleaning, adjustment of the relief valve is required. Bleed air from the
piping properly prior to adjustment.
• Press the manual lubrication button.
• Set the pump discharge pressure to 1.2 MPa using the relief valve adjusting screw.
If unable to set the pressure to 1.2 MPa, the pump is malfunctioning. Contact Mori Seiki
Service Department for assistance.
Lock nut
Valve
Adjusting screw
Tapered threaded section
Relief valve disassembly
NOTE
NOTE