7
Using Your Health Fryer Manually
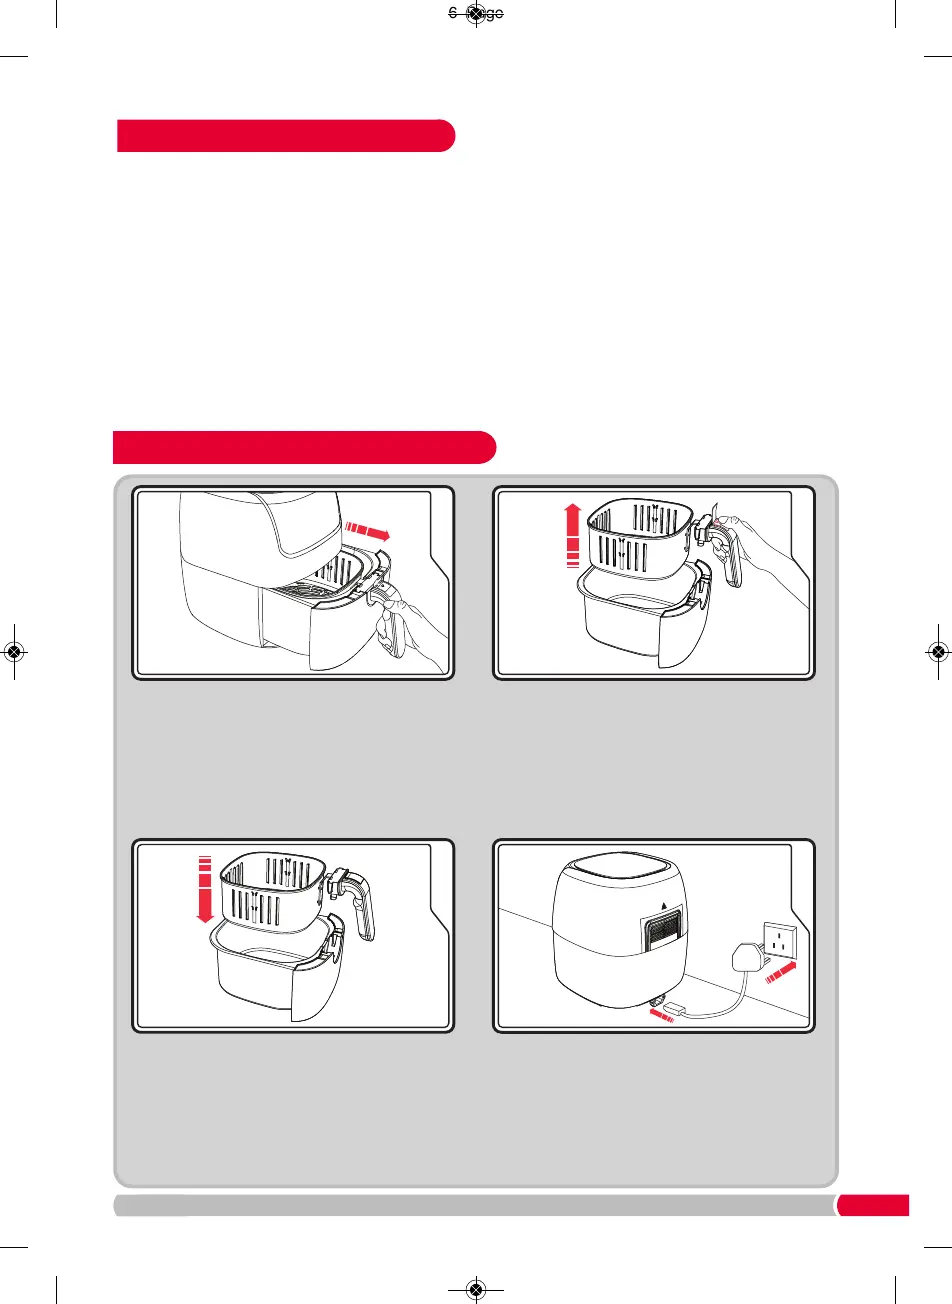
Place the Frying Basket (10) or Frying Pan (11)
into the Drawer and re-insert the Drawer into the
Main Body (3) until it clicks into place. Ensure
the Drawer is fully closed. A safety switch will
prevent it working if not closed properly.
If using the cake tin, place inside the Frying
Basket.
Remove the Drawer (4) from the Main Body (3).
Pull the Drawer fully out from the Health Fryer.
Ensuring the lead is inserted into the back of
the Main Body (3), plug the Health Fryer into
the mains.
1
Remove all packaging materials.
2
R
emove all stickers and labels from the appliance
(excluding the rating label).
3
C
lean all parts to remove any dust or
manufacturing residues.
4
T
horoughly wash all parts by hand with hot water,
washing-up liquid and a non-abrasive sponge.
• PLEASE NOTE: All parts are NOT dishwasher
safe.
5
Wipe the inside and outside of the appliance with
a
moist cloth.
6
Dry all parts of your Health Fryer thoroughly.
W
hen replacing the Drawer, ensure it is aligned
correctly.
7
U
se the appliance on a horizontal, flat and stable
heat resistant surface, away from a heating
s
ource and where it cannot be splashed by water.
Before First Use
Remove the Frying Basket (10) from the Main
Drawer (4) by lifting the Basket Release Button
Cover (5) and pressing the Basket Release
Button (6). Use the Frying Basket Handle or
Frying Pan Handle (7) to pull the basket fully
out from the Drawer.