Leave to air dry thoroughly before
Dust disposal
replacing into the cleaner.
To obtain the best results from your cleaner
DO NOT USE DETERGENTS
be sure to check and empty the dust
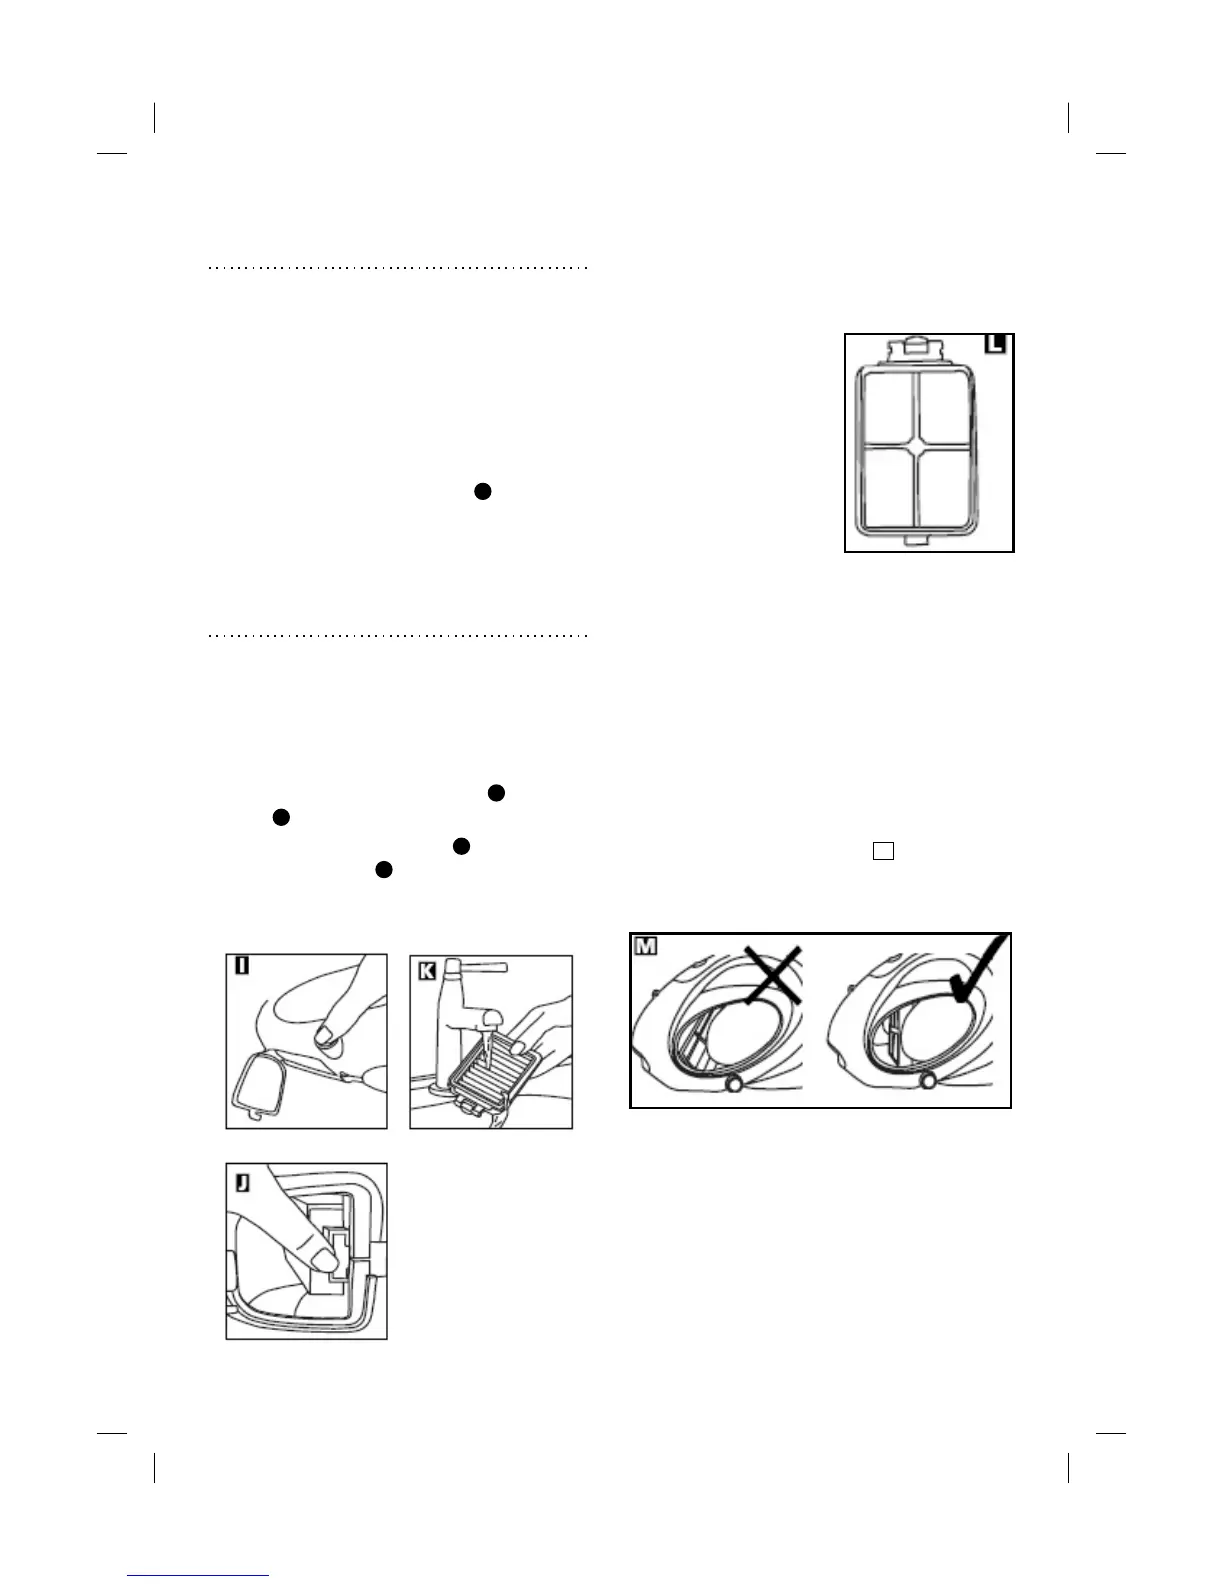
3 Replace the pleated
compartment regularly, otherwise the airflow
filter into the mesh
and cleaning power will be reduced and you
filter cover
may damage your cleaner.
Making sure the yellow
1 Ensure the cleaner is switched off and
tab on the Hepa Filter
disconnected from the mains supply.
moulding is adjacent to
2 Hold over a dustbin and press in the dust
the clip on the mesh
compartment release button , the dust
filter cover L and
compartment door will automatically drop
replace back into the
down. Shake the vacuum to release the dirt
cleaner. Ensure the
and make sure it is completely empty. I
hepa filter is securely fitted back into place.
Blocked filters will reduce the airflow to the
Hepa Filter cleaning
motor, should the airflow become
Warning: The dust compartment must be
substantially blocked, the product will then be
emptied BEFORE the Hepa filter is
liable to overheat and the thermal fuse will
removed. Every time you empty the
activate. Should this activate, the product will
cleaner the Hepa filter must be cleaned.
stop functining, unplug the product and allow
it to cool down (ths can take between 30-40
1 Once the dust compartment is empty,
minutes depending on the ambient
remove the pleated hepa filter & mesh
temperature conditions).
filter by pushing the tab to release. J
2 Pull the pleated hepa filter out of the
Inserting Hepa Filter M
mesh filter cover & clean both by gently
Warning: Make sure that the Hepa filter has
brushing over the dustbin. Wash the filters
been placed in correctly.
regularly in warm water. K
DO NOT USE THE PRODUCT WITHOUT
THE HEPA FILTER FITTED.
IMPORTANT
• All filters should be checked regularly for
signs of damage, preferably after each
cleaning task. The filters must be replaced
immediately if they become
6
22
23
22
23
6