8
3. Stop the engine and allow it cool before refuelling the unit.
4. Keep open flames away from the area where fuel is handled or
stored.
E
FUEL
FLAMMABLE
FUEL
5. Use only oil intended for 2 stroke air
cooled engine use. Other oils can
cause spark plug fouling, exhaust
port blocking, or piston ring sticking.
6. Fuel mixtures which have been left unused for
an extended period may clog the carburettor or cause hard
starting. Store unused fuel in an air-tight container in a cool
place.
7. Mix a regular grade petrol (leaded or unleaded) and a good
quality two stroke engine oil for air cooled engines. Shake them
together in a clean container to ensure thorough mixing before
pouring into the fuel tank. Do not use plastic containers not
specifically designed for use with petrol.
8. Mixing ratio chart
Unleaded
Gasoline
2 cycle
mineral oil
25:1
2 cycle semi-
synthetic oil
40:1
2 cycle
synthetic oil
50:1
1 L 40mL 25mL 20mL
4 L 160mL 100mL 80mL
5 L
200mL 125mL
100mL
10 L 400mL 250mL 200mL
OPERATING
STARTING THE ENGINE
Before starting the engine, inspect the entire unit for loose fittings or
fuel leaks, and verify that the cutting attachment is properly installed
and securely fastened.
Place the unit on a flat, firm place. Keep
the cutting head clear of any obstructions.
1. Check that there is fuel in the tank
and that the fuel cap is screwed on
tightly.
(1) Cap
(2) Fuel tank
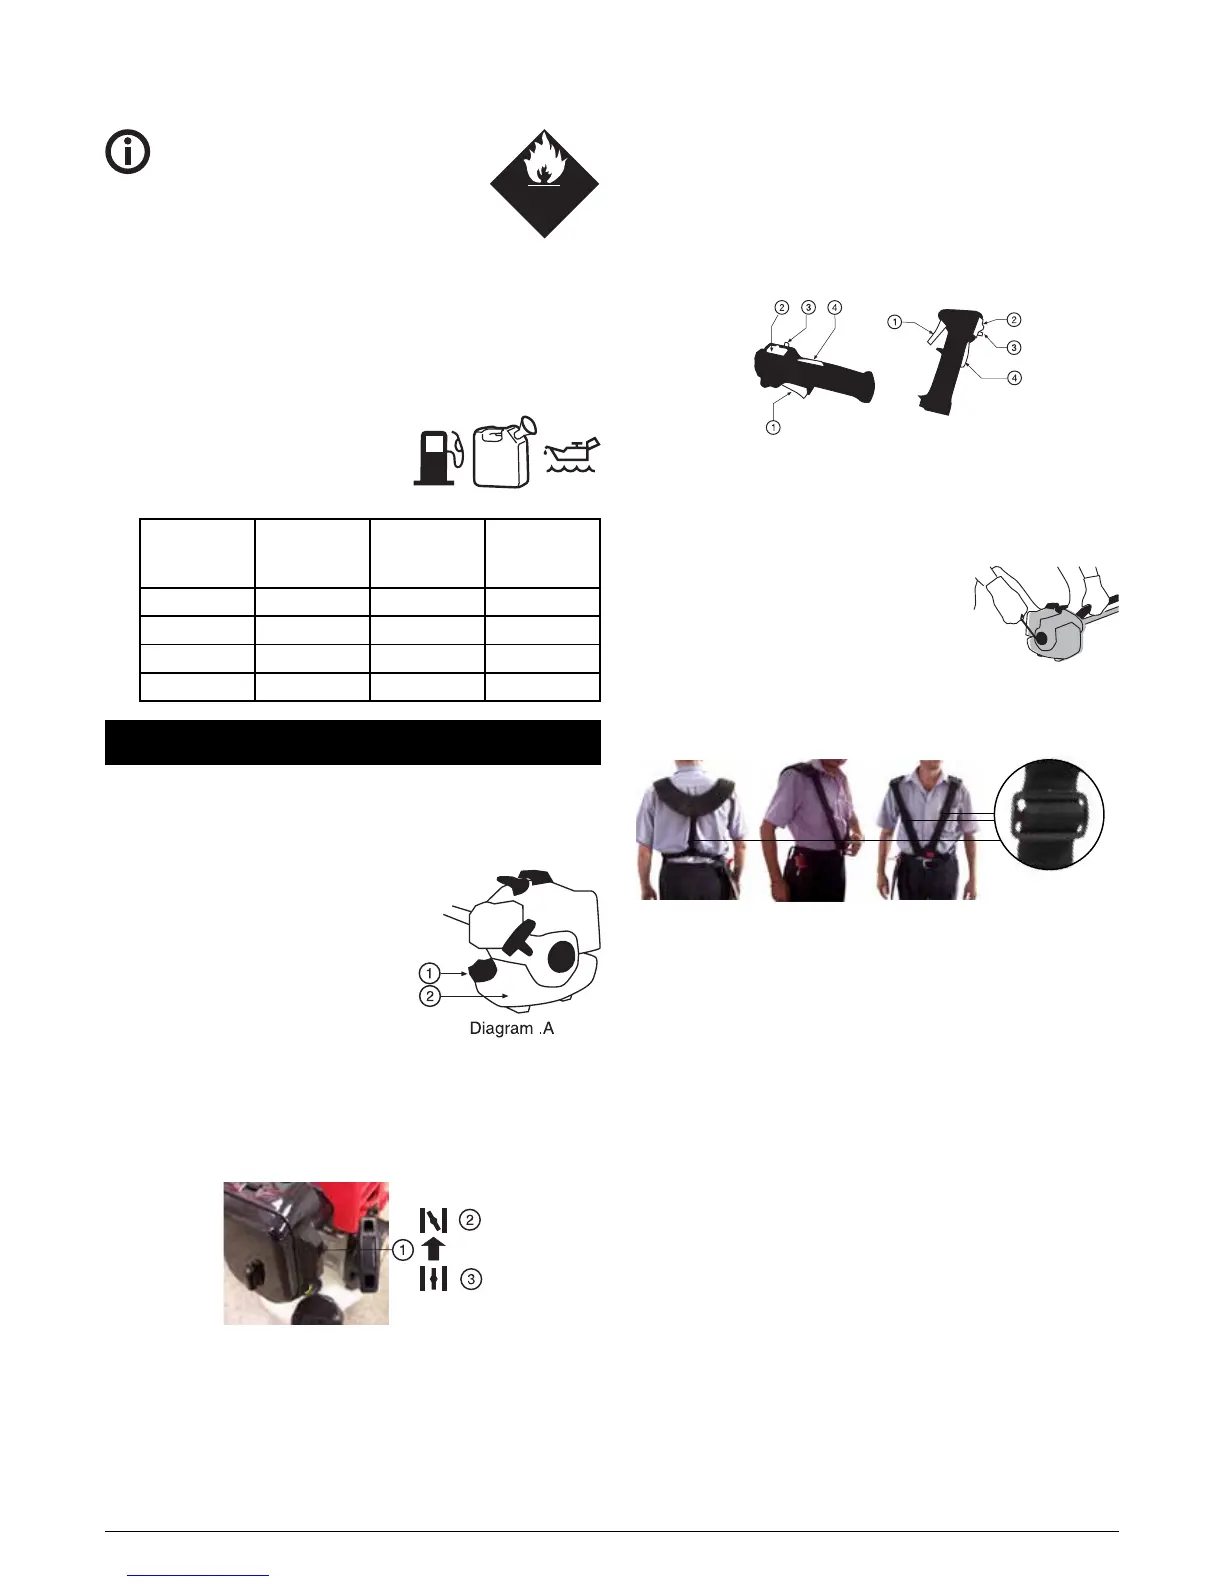
2. When starting a cold engine move
the choke lever (behind the air cleaner cover) to the closed
position.
(1) Choke lever
(2) Closed
(3) Open
Diagram .B
3. If the engine has been running and is still warm, move the
choke lever to the open position.
4. Press the priming bulb under the carburettor repeatedly until
excess fuel can be seen returning to the tank through the clear
fuel return pipe.
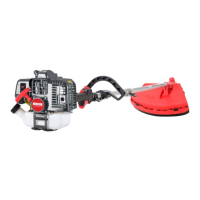
5. Slide the ignition switch (3) on the trigger grip away from the
STOP position (See Diagram .C on the next column).
6. To set the throttle in the start position.
- Depress the safety lever (4)
- Squeeze the throttle lever (1) fully.Hold down the starting
button (3) while releasing the throttle lever.
- The throttle lever will be held partly open until it is squeezed
again.
(1) Throttle lever
(2) Ignition Switch
(3) Starting button.
(4) Safety Lever
Diagram .C
7. While holding the unit firmly, pull out the starter rope quickly.
8. After the engine has started, open the choke gradually.
9. Allow the engine to run for 2 to 3 minutes to warm up before
starting work.
STOPPING THE ENGINE
1. Release the throttle lever.
2. Slide the ignition switch on the trigger grip
to the STOP position.
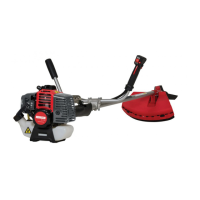
FITTING THE HARNESS
The harness must always be used as the machine cannot be
operated safely without it.
Adjustable
Belt Clip
1. Fit the horseshoe shaped plastic shoulder pad around your
neck (open end of pad facing forward), and slide your arms
through the side loops. The small rectangular belt cushion will
be at your left side and the larger pad and hook clip will be on
your right.
2. Adjust the various belt clips as necessary and fasten the buckle
across your waist.
3. Before starting the engine for the first time, try hooking the
hook clip into the various holes in the hanger along the top of
the main tube to find out which hole gives the best machine
balance.
4. Adjust the length of the strap holding the hook clip to achieve
the correct angle between the ground and the cutting head.
Note that the entire main tube of the machine can rotate to
help achieve the correct cutting posture.
5. Unhook the clip before starting the engine.
 Loading...