MACHINE PREPARATION and OPERATION (Cont.)
MAINTENANCE AND TROUBLESHOOTING
• In case of electrical or mechanical malfunction, immediately
turn o the machine and disconnect the plug. Ensure that ‘
the saw is unplugged and the blade has stopped rotating
before doing any maintenance.
• Keep your Metal Devil Circular Saw and cord clean.
Use only a damp cloth and very mild soap to clean the saw.
• Excessive sparking can indicate the presence of dirt in the
motor or worn carbon brushes. Check for wear. (g. 23A / 23B)
Replace brushes when they reach ¼’ (6mm)
• For all other service and maintenance take machine to an a
uthorized service center.
MACHINE LUBRICATION
This machine is lubricated during its manufacturing and is ready
to use.
It is recommended that after the rst 10 hours of use that the oil
be changed. This will prolong life of the tool by removing any
gear particles, during the gear break-in period , that could be
found in the oil.
OIL CHANGE PROCEDURE
Removal:
1 Use 85W/140 Oil (automotive gear oil)
2 Unplug the tool and place in horizontal position.
3 Use a 5mm hex wrench to loosen the screw and remove the
oil plug (g. 24)
4 Drain oil into suitable container and recycle responsibly.
Rell:
1 When relling go slowly to ensure that the air is pushed out
of the tool.
2 Use 1.3 oz / 40cc or one tablesppon of oil.
3 Replace the oil plug with the 5mm hex wrench.
Do not overtighten.
4 The O-Ring, under the head of the plug should compress
slightly. Overtightening will cause the o-ring to unseat and
not seal properly.
TOOL OVERLOAD / RESET
If the tool overload protection device activates, allow the motor to
cool. (Approximately 3 minutes) Then press the reset button to
continue operations. (g. 25)
(g. 5)
4
PREPARACION Y OPERACION DE LA MAQUINA
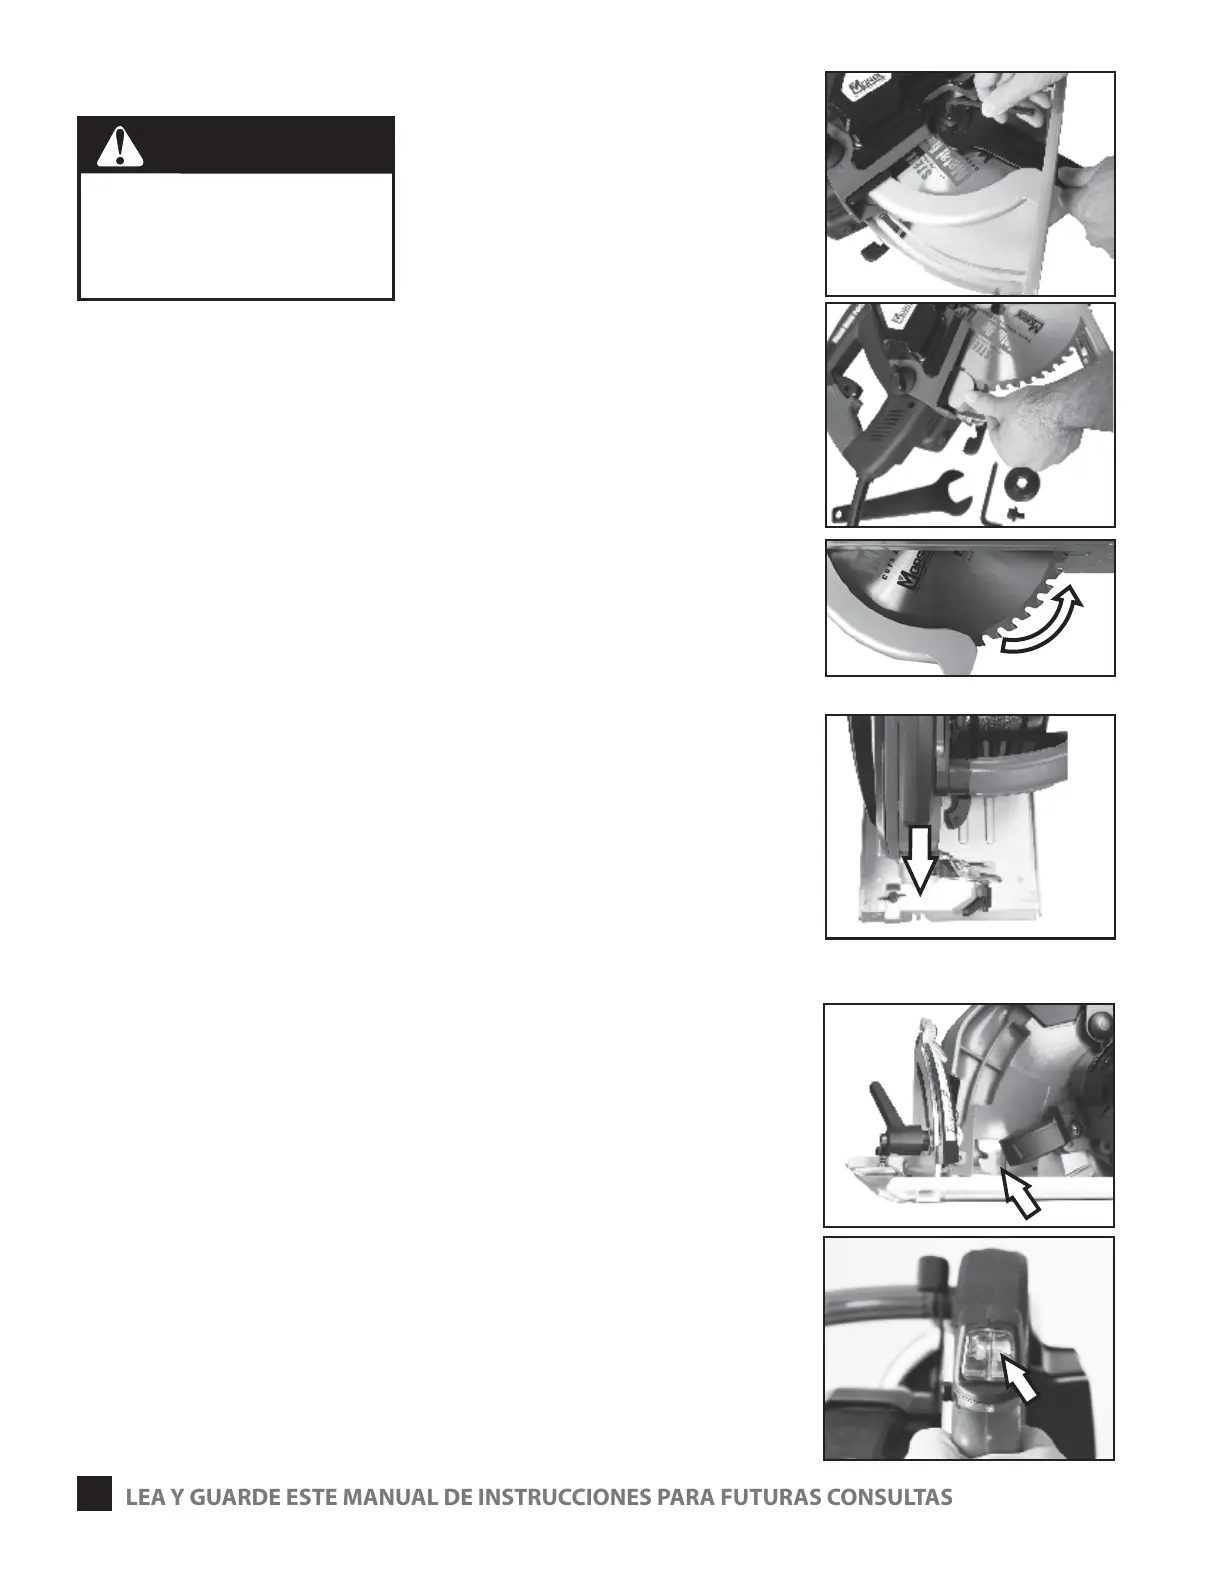
CAMBIO E INSTALACION DEL DISCO
1 Desconecte la máquina de la toma de corriente antes de
realizar un servicio o reemplazar el disco.
2 Aoje el seguro de la base y extíendala completamente
3 Utilice las llaves (para la brida y la hexagonal en “L”) que se
suministraron con la sierra para aojar y retirar el tornillo y la
brida que sostienen el disco. (g. 1)
4 Gire el protector del disco hasta que quede fuera del mismo.
(g. 2)
5 Retire el disco usado
6 Reemplácelo por un disco nuevo marca Metal Devil de Morse.
7 Coloque la brida y el tornillo. Apriete el tornillo de seguridad..
8 Asegúrese de que la echa marcada en el disco y los dientes
del mismo giran en sentido contrario de las manecillas del reloj.
(g. 3)
USO DE LA RANURA FRONTAL DE LA BASE COMO GUIA
1 Utilice como guía la ranura que se encuentra en la parte frontal
de la base de la máquina
(g. 4). La ranura representa el ancho
del corte (espesor del disco)
2 Alinie visualmente su línea de corte (marca) a la izquierda o a la
derecha del centro de la ranura (Dependiendo del largo del
corte que se requiere hacer hasta el nal del mismo).
USO DE LA LUZ LED
1 Utilice la luz del led cuando las condiciones de iluminación son
pobres
2 El led ayudará al usuario a ver la pieza que se está cortando y el
disco a través de la ventana. (g. 5)
3 Presione el botón del led (g. 6) para encenderlo.
4 Presione el botón del led nuevamente para apagarlo
(g. 1)
(g. 2)
(g. 6)
Realizar los ajustes a la sierra cuando se
encuentra conectada al tomacorriente
puede provocarle serias lesiones si ésta se
encendiera repentinamente.
Nunca conecte la sierra al tomacorriente
hasta que haya completado todos los
pasos de ajuste.
LEA Y GUARDE ESTE MANUAL DE INSTRUCCIONES PARA FUTURAS CONSULTAS
(g. 3)
(g. 4)
ADVERTENCIA
 Loading...