(g. 5)
4
MACHINE PREPARATION and OPERATION
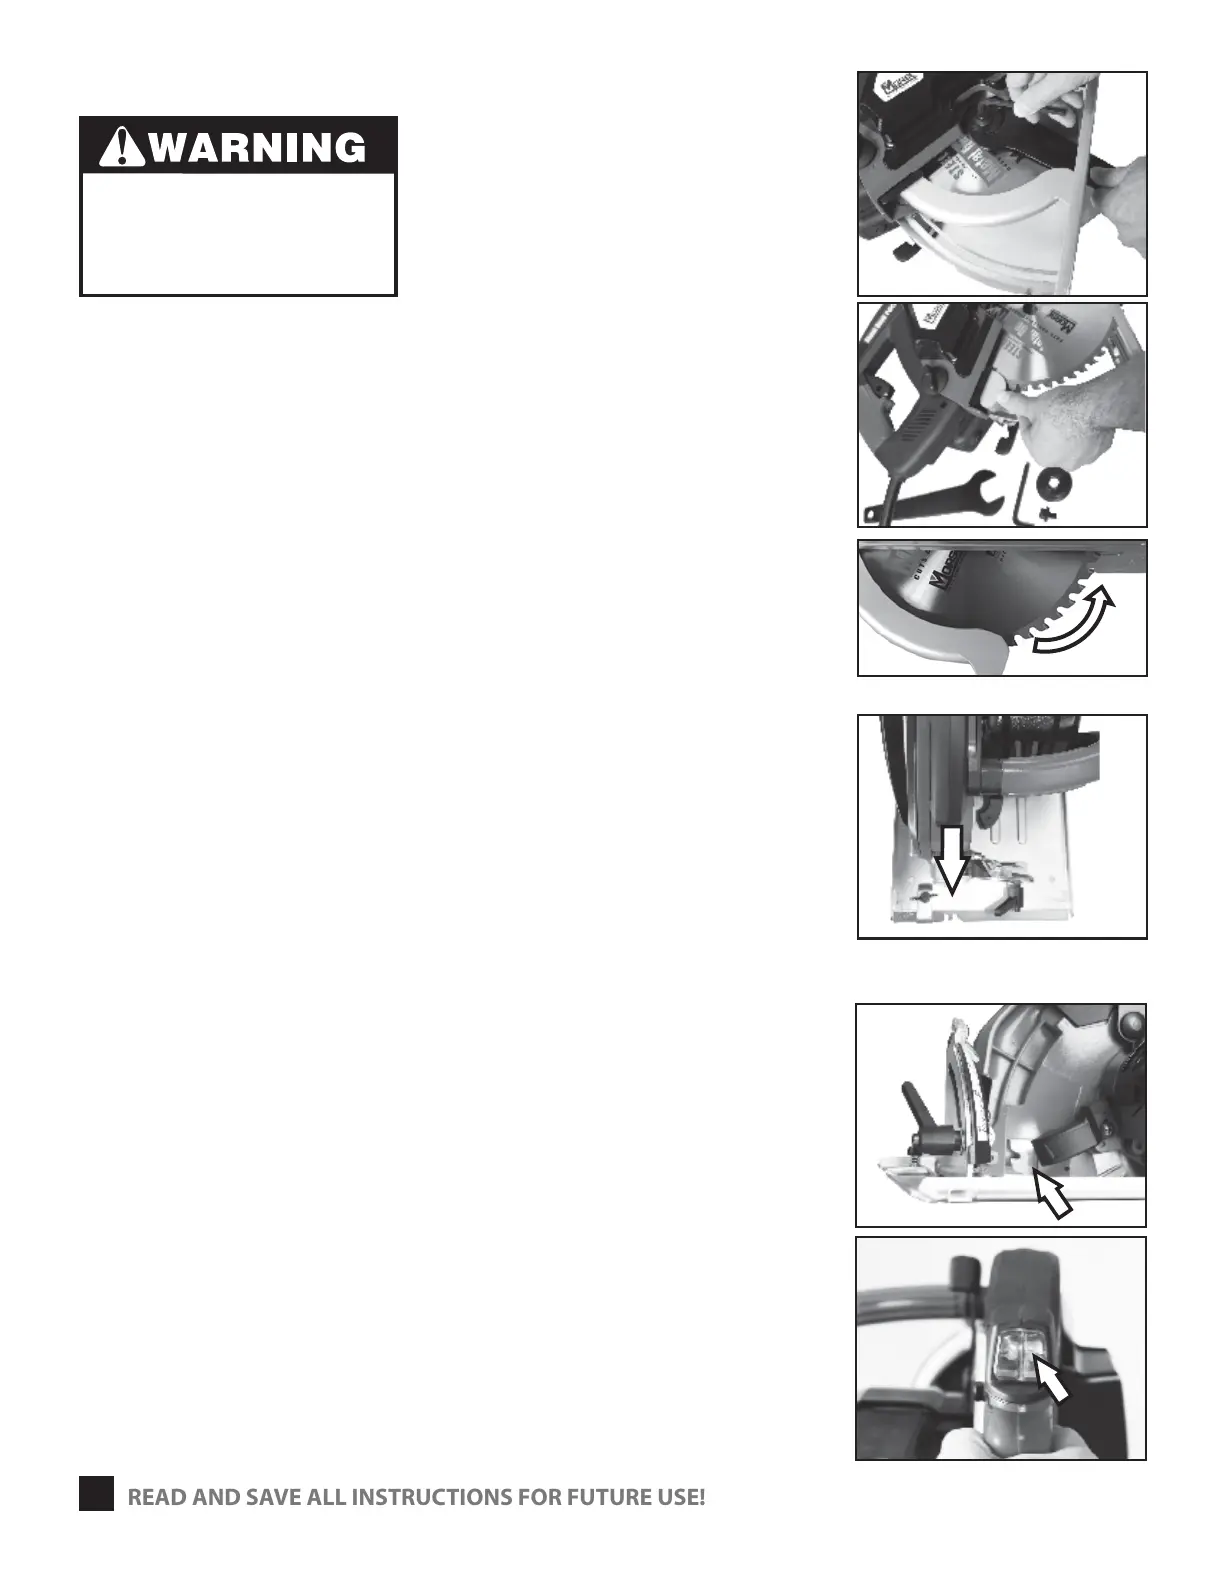
BLADE REMOVAL AND INSTALLATION
1 Unplug machine from power source before doing any
servicing or blade replacement.
2 Loosen base plate lock and extend base plate fully.
3 Use supplied blade wrench and hex key to remove the
bolt and ange holding the blade. (g. 1)
4 Rotate the blade guard away from the blade. (g. 2)
5 Remove used blade.
6 Replace with new Morse Metal Devil Blade.
7 Replace ange and bolt. Tighten the bolt securely.
8 Make sure that the arrow on the blade and the teeth are
rotating counterclockwise. (g. 3)
SIGHT LINE NOTCH
1 Use the sight-line notch, at the front of the base plate as
guide. (g. 4) The notch represents the kerf of the cut.
2 Align your cut line to the left or the right center of the
sight-line notch. (Depending on the nal length of the
cut piece required.)
LED LIGHT
1 Use the LED when the light conditions are poor.
2 LED will assist user to see the workpiece and
the blade through the window (g. 5)
3 Push the LED button (g. 6) to start the LED.
4 Push again to turn o.
(g. 1)
(g. 2)
(g. 6)
Adjusting a saw with the power
connected could lead to an injury
if the saw started suuddenly.
Never connect the saw to a power
source until all adjustment steps are
completed.
READ AND SAVE ALL INSTRUCTIONS FOR FUTURE USE!
(g. 3)
(g. 4)