12 AP-7522 Access Point
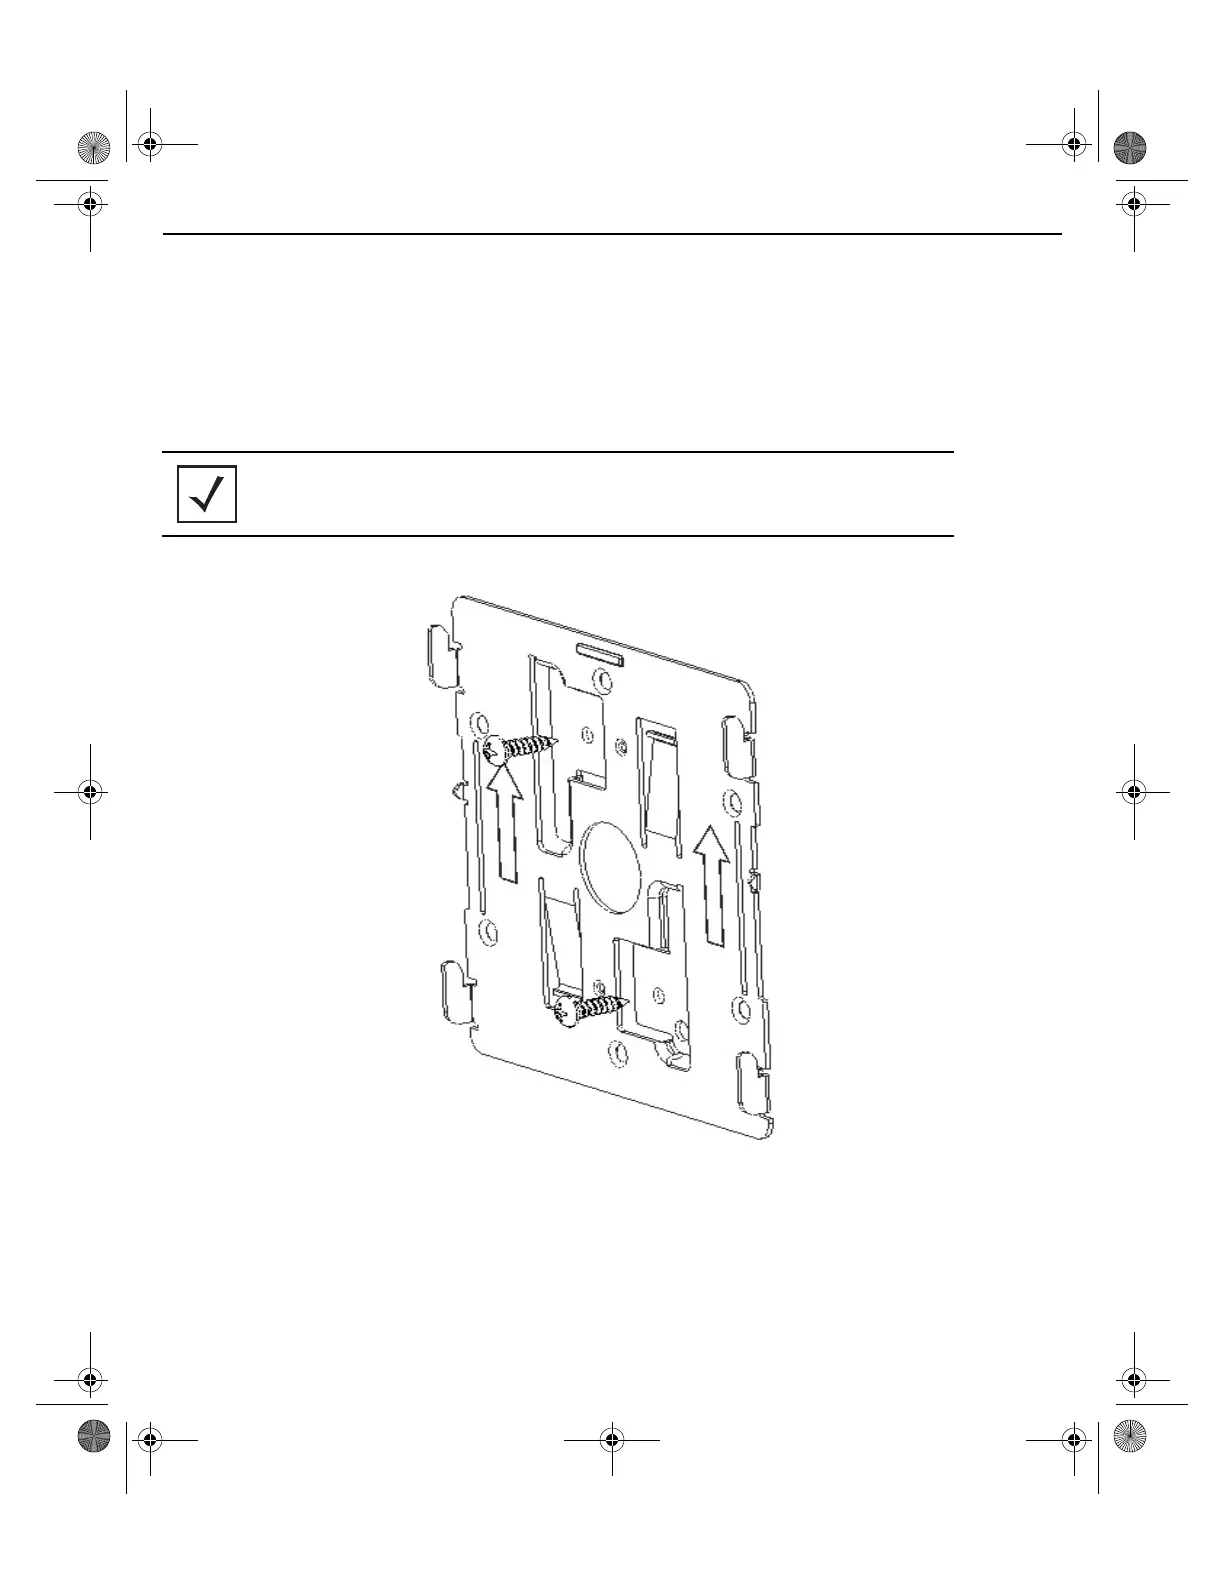
2.5.1 Wall Mount Procedure - New Installation
This section describes a new AP-7522 installation with no previous Access Point existing on the intended wall
surface.
1. Place the mounting bracket against the wall.
2. Mark the screw hole locations depending on the intended deployment orientation of the unit.
3. At each point, drill a hole in the wall and attach the mounting bracket.
4. Place the Access Point on the mounting bracket.
5. Cable the Access Point using either the Power Injector solution (AP-PSBIAS-2P3-ATR) or the approved
AP-7522 power supply (PWRS-14000-54R).
NOTE When pre-drilling a hole the recommended hole size is 4mm (0.16in.).
MN000879A01B.fm Page 12 Thursday, July 10, 2014 11:01 AM
 Loading...