Hardware Installation
15
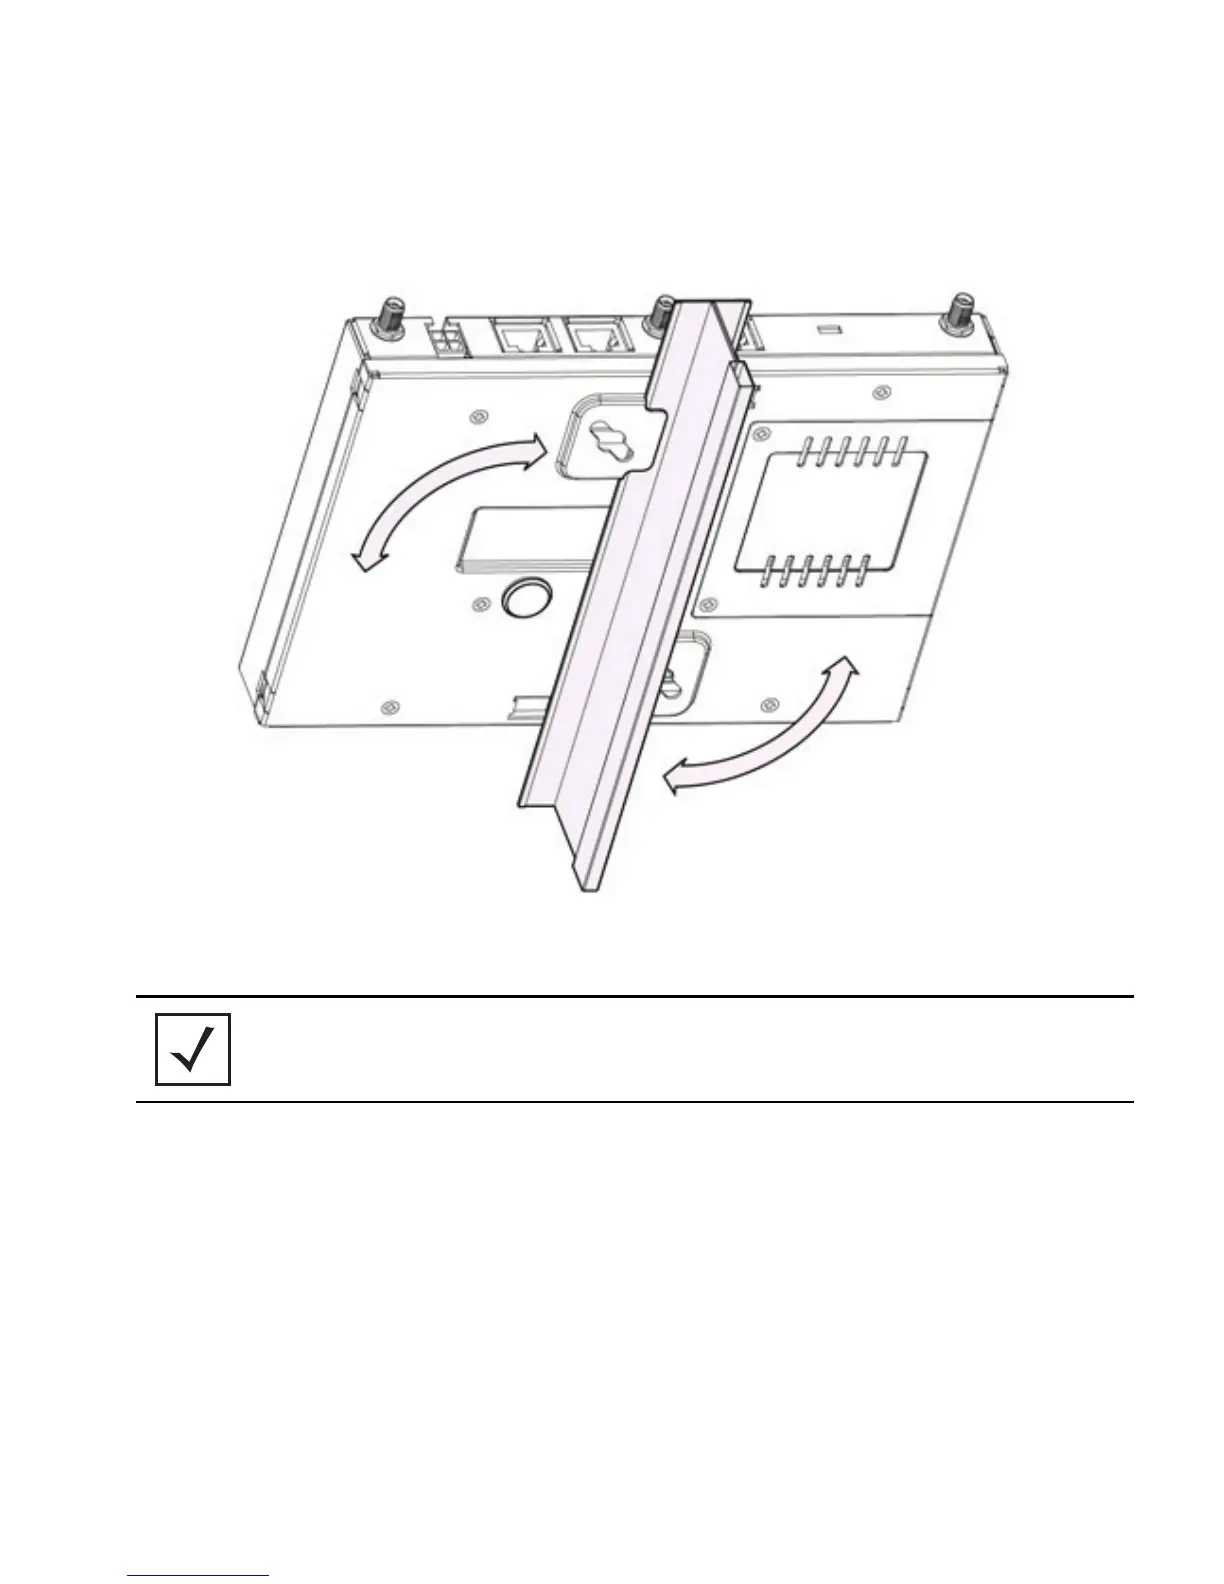
10. Rotate the access point chassis 45 degrees counter-clockwise. The clips click as they fasten
to the T-bar.
11. The access point is ready to configure. For information on basic access point device
configuration, see “
Configuring “Basic” Device Settings” on page 26.
2.4.3 Above the Ceiling (Plenum) Installations
An above the ceiling installation requires placing the access point above a suspended ceiling and
installing the provided light pipe under the ceiling tile for viewing the rear panel status LEDs of the
unit. An above the ceiling installation enables installations compliant with drop ceilings, suspended
ceilings and industry standard tiles from .625 to .75 inches thick.
NOTE If the access point is utilizing remote management antennas, a wire
cover can be used to provide a clean finished look to the installation.
Contact Motorola for more information.

 Loading...