3-2 6880309N15-A October, 2004
CDM Control Station Installation CDM Control Station
Additional Considerations
requirements of each installation. These levels are set with
trim pots located on the back panel of the inner chassis.
• POT1 (IC/MON)
This potentiometer allows adjustment of the Inter-
com/Parallel audio level to the internal speaker.
• POT2 (ACC RX)
This potentiometer allows the Accessory RX audio
level to be set.
• POT3 (HEADSET)
This potentiometer provides audio level adjustment
for Radio RX to the Headset.
Additional Considerations
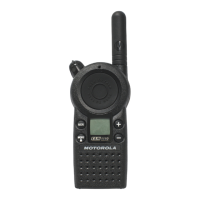
Radio Control Head Speaker
Since the Control Station comes equipped with an internal
speaker, it is recommended that the radio speaker (located in
control head) be disabled. This is accomplished by removing
the front panel of the control head and unplugging the
speaker lead wires.
Radio Programming Parameters
The Control Station requires that several radio parameters be con-
figured to allow proper Control Station operation.
NOTE
• Accessory Configuration/RX Audio Type
must be set for Filtered Audio.
• Accessory Pins/Pin #3 must be set for
External Mic PTT (Input).
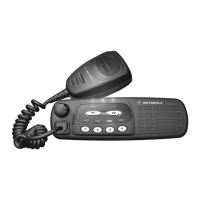
Desk Microphone
JU1 of the Desk Microphone (HMN3000) must be installed to
allow proper base station intercom operation. The jumpers
keeps the microphone circuit active at all times, thus allowing
proper base station intercom function. Instructions for install-
ing this jumper can be found in the HMN3000 Installation
Guide, 6880903Z37.
Basic Disassembly/Assembly
NOTE
Unless specifically instructed otherwise, DO
NOT discard any hardware removed during
disassembly.
In order to conserve space in the packing box, the Control Sta-
tion housing is shipped completely assembled with the fan
assembly, top cover, power supply, and control circuitry
installed. To install the radio and configure the unit, the Con-
trol Station may have to be completely disassembled. With the
Control Station disassembled, you can begin to install the
radio and configure the Interface Module before reassembling
the housing.
Before beginning installation, remove all items from the
packing container and check them against the items refer-
enced in one of the parts lists on page 3-7. This assures that
you have received all items necessary to assembly the Con-
trol Station. Immediately report any missing or damaged
items to Motorola Product Services.
The following steps explain how to disassemble the Control
Station housing and how to reassemble it while installing the
radio and necessary cables.
Disassembling the CDM Control Station
Housing
The following steps cover the disassembly of the Control
Station housing. Refer to Figure 3-3 and Figure 3-4 on pages
3-7 and 3-8 for identification of each part and its correspond-
ing reference number.
Removing the Housing Cover
1. Place the Control Station on a flat surface.
2. Observe proper procedures for handling ESD sen-
sitive devices.
3. Remove the six (6) TT3.5mm, pan head Taptite
screws, located on the sides of the housing using a
Torx T15 driver.
4. From the front, lift the top cover up until it clears
the base, turning it on its side and placing it on the
surface at a 90 degree angle from the base.
Disassembling the Inner Chassis
Most installations will not require access to the Control Sta-
tion Interface Module (CSIM) located inside the inner chas-
Table 3-1. Jumper Settings
Jumper Function In Out (default)
JU1 Headset mic audio output level Gain added Nominal Gain
JU2 Local mic audio output level Gain added Nominal Gain
JU3 Desk mic audio output level Gain added Nominal Gain
JU4 Accessory mic audio output level Gain added Nominal Gain
JU5 Desk mic monitor logic Desk mic not installed Desk mic installed
 Loading...