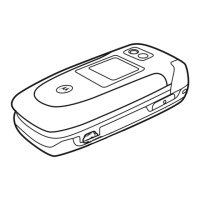
28 - Highlight Features
Taking and Sending a Photo
To activate your phone’s camera:
The active viewfinder image appears on your display.
Point the camera lens at the photo subject, then:
Find the Feature
M
>
>
Press To
1
(
+
) take a photo
2
(
+
)
or
**
(
-
)
view storage options
If you choose to store the photo,
continue to step 3.
delete the photo and return to active
viewfinder
Highlight Features - 29
Using the Auto Timer
Activate the camera and then press
M
>
,
.
Press
S
left or right to set a 5 or 10 second timerdelay, then
press
(
+
). Close the flip, and use the mirror to aim the
camera lens. When you hear the camera click, open the flip to see
your photo.
Adjusting Camera Settings
Press
M
to open the
#
when the camera is active.
The
#
can include the following options:
3
S
scroll to
,
,
.
,
# +
,
or
!"
4
%
(
+
) perform the storage option
Option Description
/ #
View pictures and photos stored on
your phone.
,
Setatimerforthecameratotakea
photo.
#
Open the setup menu to adjust picture
settings.
) #
See how much memory remains for
storing pictures.
Press To
30 - Highlight Features
Sending a Multimedia Message
A
Multimedia Messaging Service
(MMS) multimedia
message contains one or more pages with text and
embedded media objects (including photos, pictures,
animations, sounds, voice records, and video clips). You
can send a multimedia message to other wireless phone users, and
to email addresses.
Tip: The layout of all pages in a multimedia message is defined by
the layout of the first page. To display a media object at the top of
the page, insert it in the first half of the message text. To display a
media object at the bottom of the page, insert it in the second half
of the message text.
Find the Feature
M
>
>
>
Press To
1 keypad keys enter text on the page
2
M
open the
3
S
scroll to
4
%
(
+
) display a list of items you can insert
5
S
scroll to
#
,
# #
,
,
,
,
0#"
,or
# (
6
%
(
+
) select the file type
7
S
highlight the file you want
8
%
(
+
) insert the file
To add another page to the message,
continue to step 9.
9
M
open the
to insert a new
page
Highlight Features - 31
When you finish composing the multimedia message:
10
S
scroll to
11
%
(
+
) display a list of items you can insert
12
S
scroll to
13
%
(
+
) insert a new page after the current
page
Repeat steps 1 to 8 to enter contents
for the new page.
Press To
1
&
(
+
) store the message
2
S
scroll to a
option:
Highlight an existing phonebook entry.
Or highlight
to enter one
or more phone numbers or email
addresses.
Or highlight
!"
to
enter a number/address and add it to
the phonebook.
3
**
(
+
)
or
%
(
+
)
add a phonebook entry to the list of
recipients
Repeat steps 2 and 3 to add additional
phonebook entries to the list.
select
or
!"
Press To
 Loading...