VMX Quick Setup Guide 14 | P a g e
Dual Ramp and Jog Features
TB1 includes provisions for enabling the Dual Ramp and Jog functions by using external contact closures.
Both features use a common +24VDC from Terminal 7 however, they can be used independently of each
other or together. See Section 5.6.2.and 5.6.3 of the Advanced Installation, Operation and Programming
Manual for full function description and setup.
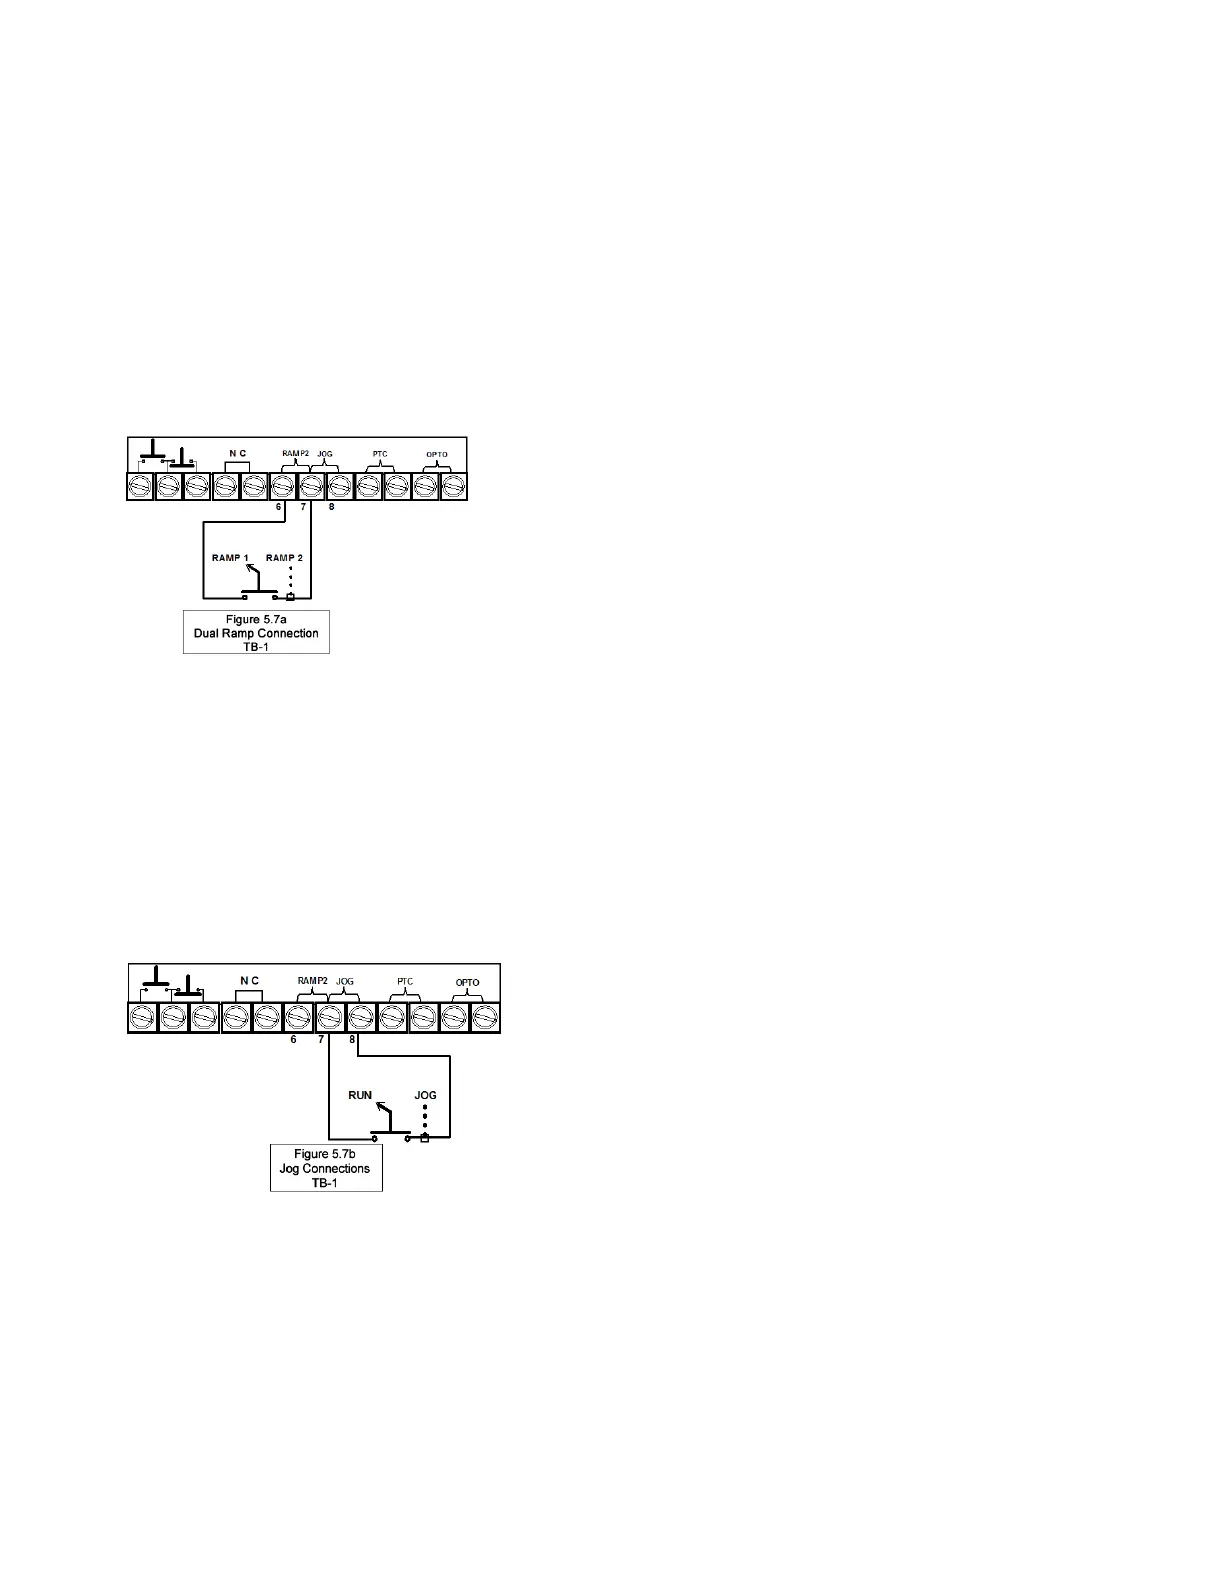
Dual Ramp Command
Closing a dry (voltage free) contact between TB1, terminals 6 and 7 will enable Ramp 2, and the VMX Series
starter will respond to the settings for Ramp 2 in F015 - F018. If no contact closure is present, the VMX
Series starter defaults to the Ramp 1 parameters (F011 – F014).
See Section 5.6.2.of the Advanced Installation, Operation and
Programming Manual for full function description of how to setup the
Dual Ramp Feature.
The Dual Ramp feature is useful in instances where the load
changes significantly. Example: a loaded or unloaded conveyor belt.
The characteristics for starting an unloaded conveyor can be
programmed for ramp 1. The characteristics for starting a loaded
conveyor can be programmed for ramp 2. Ramp 2 can also be
programmed for Full Voltage / Across-the-Line starting by setting the
ramp time to 0 and Current to 600%.
Dual Ramp is also useful in 2-speed motor applications. Simply use an auxiliary contact from one of the
speed contactors to select Ramp 2 so that separate ramp profiles can be used.
Jog / Remote Command
Connecting a dry (voltage free) contact between TB1, Terminals 7 and 8 will enable the Jog feature. A Start
command (Run Command or Start button) is required to activate the Jog feature. See Section 5.6.3. of the
Advanced Installation, Operation and Programming Manual for
full function description of how to setup of the Jog Function.
The Jog feature can be used for tasks such as lining up
machines for blade or bit changes or inching belts along to check
tracking.
This input is also used to change the function of the Serial
Communications port control through F068. For additional
information, see user manual.
 Loading...