Do you have a question about the motortronics XLS Series and is the answer not in the manual?
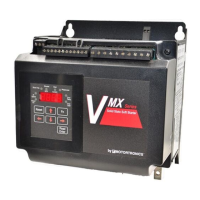
Overview of the XLS Series soft starter, its features, and benefits for motor control.
Details technical specifications, ratings, and performance characteristics of the XLS Series.
Instructions for inspecting the unit upon receipt and verifying its contents and condition.
Guidelines for selecting an appropriate installation environment, considering temperature, humidity, and air quality.
Procedures for a visual check of the unit for damage and loose connections before installation.
Critical safety warning about electrical shock hazards and proper power disconnection before servicing.
Instructions for mounting the unit, ensuring proper airflow, and cleaning procedures to maintain performance.
Tables specifying recommended wire sizes and torque values for power terminal connections.
Provides dimensional data for different enclosure types (Panel, NEMA1, NEMA4/4X, NEMA12) of the XLS Series.
Explains the adjustable solid state overload relay providing Class 10 or Class 20 protection.
Describes the overload relay's adjustable FLA range and its tripping current setting.
Details how to set the overload relay dial based on FLA and CT ratio for proper protection.
Explains the selection of manual or automatic reset for the overload relay and required warning labels.
Describes the built-in test function to verify the overload relay's trip indication and contact actuation.
Instructions for connecting power lines to the unit's input and motor leads to output terminals, including grounding.
Specifies how to connect the ground cable to the unit and earth ground according to NEC standards.
Outlines how to connect control power and provides a chart for recommended control power transformer sizes.
Details the requirements for control voltage supply (120VAC or 240VAC) and connection points.
Describes the alternate two-wire connection method for unattended operation and its interlocking requirements.
Explains the standard three-wire control connection method using N.C. stop and N.O. start buttons.
Procedures for resetting faults by removing control power or using a remote reset command.
Details the Form C relay contacts (N.O., N.C.) and their terminal block (TB2) for external connections.
Explains the function and configuration of the programmable relay on TB2 for fault or up-to-speed conditions.
Describes the auxiliary run contacts on TB2 and how dip switches control their latching behavior during deceleration.
Details the shunt trip relay activation for motor protection and its use in external circuits.
Explains the optical AC switch triac driver used for fault indication and its output rating.
Guidance on setting parameters under full load conditions and trying initial factory settings for adjustments.
Describes how to adjust starting voltage, ramp time, and current limit for optimal motor acceleration.
Step-by-step guide to setting the initial starting voltage and checking motor rotation direction.
Instructions for adjusting the acceleration ramp time to control motor speed transition.
Explains how to set the current limit to cap peak current and ensure motor reaches full speed.
Overview of deceleration adjustments to optimize stopping time and provide smooth deceleration.
Details the step down voltage adjustment to eliminate deceleration dead bands and improve response.
Defines the stop voltage level set point where deceleration voltage drops to zero.
Instructions for adjusting the deceleration ramp time to control the stopping speed transition.
A comprehensive checklist of pre-start-up verifications for the unit and motor.
Describes the expected sequence of events and LED indications during the start-up process.
Explains the function of each status indicator LED (Run, Power On, At Speed, Faults) on the operator panel.
A table providing common problems, possible LED displays, causes, and solutions for troubleshooting.
Detailed steps for testing SCRs using an ohmmeter, including wiring configurations and good/bad readings.
Procedures for replacing isolated SCRs and hockey puck type SCRs, including safety warnings.
Step-by-step guide for replacing isolated SCRs, including preparation, thermal grease, and wiring verification.
Instructions for replacing hockey puck type SCRs, focusing on force application and proper mounting.
Procedure for replacing the main control board, including steps for removal, mounting, and configuration.
Diagram illustrating the main control board components, connectors, dip switches, and terminal blocks.
Details the factory settings and functions of the dip switches on the main control board.
Outlines the warranty period, company's rights for repair/replacement, and limitations of liability.
| Overload Protection | Electronic Overload Relay |
|---|---|
| Frequency | 50/60 Hz |
| Current | 9-1200A |
| Enclosure | NEMA 1, NEMA 4X, NEMA 12 |
| Communication | Modbus RTU |
| Protection Features | Phase Loss |