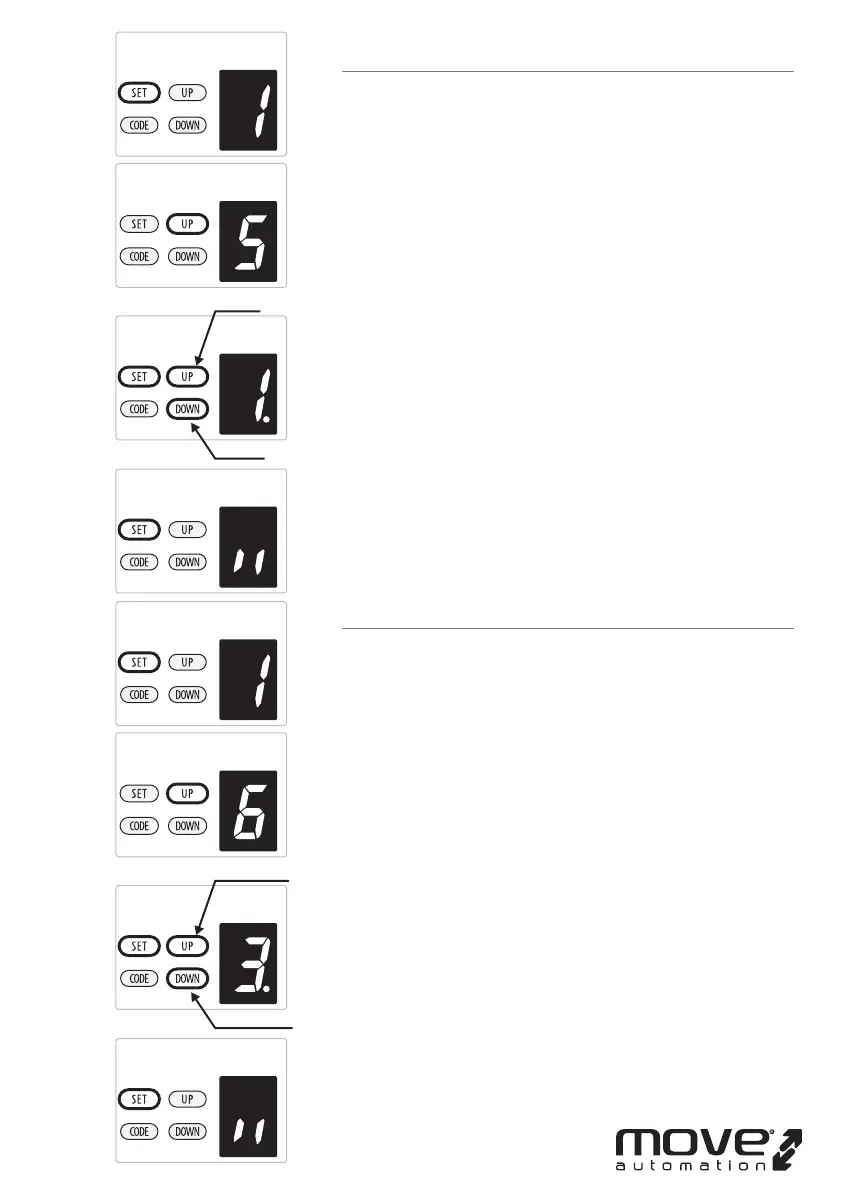
5. 5. AUTOMATIC CLOSING CONDITION SETTING
a) Press and hold SET Button until “
1” appears on the display,
next press the UP button until “
5” appears on the display to
enter this function setting then release the button.
b) Press the SET button again. The unit is now in automatic
close condition adjustment mode. And then you will see a
gure “
1” with ash dot appears on the display.
c) Press UP / DOWN button once to set the auto close
condition. You can choose “
1” or “2” set.
Figure “
1” means, the door only can auto close while in the
open limit position.
Figure “
2” means, the door can auto close while the door is in
any position.
d) Press SET button to conrm the set and it will back to
standby status automatically and display “ll”.
NOTE:
1. The closing condition is set on “
1” as standard in factory.
2. The door will only automatic close while in its opening
process, but can’t automatic close after it is stopped while in
its closing process.
-13D-
6. LED OFF DELAY TIME SETTING
a) Press and hold SET Button until “
1” appears on the display,
next press the UP button until “
6” appears on the display to
enter this function setting then release the button.
b) Press the SET button again. The unit is now in LED o delay
time adjustment mode. And then you will see a
gure“
3”with ash dot appears on the display.
c) Press UP / DOWN button once to set the LED o delay time
(1~9).
d) Press UP button to increase the time, or DOWN button to
decrease the time.
The delay time is 1 minute*N, N=1~9. The maximum delay
time is 9 minutes.
e) Press SET button to conrm the set and it will back to
standby status automatically and display “ll”.
NOTE: The LED o delay time is set on “
3” as standard in
factory.
increase
decrease
increase time
decrease time