8
• With high capacity batteries, this
phase can sometimes be the longest
of the three phases
• With some low capacity batteries and
batteries reaching the end of their life,
this phase can be very short.
NOTE: When a battery is first connected, the
LEDs may instantly indicate MED, HI
and MAX charge, depending on the
charge status of the battery. The
process will continue normally from
that point forward.
NOTE: It is normal for the charger, AC
adapter, or the battery to become
warm during charging.
• Phase 2 - MED Charge:
• MED LED is ON continuously and
other LEDs are flashing in sequence
• At this point, the battery is typically
about 50% charged.
• Phase 3 - HI Charge:
• The MED and HI LEDs are ON and
the MAX LED is flashing
• At this point, the battery is typically
about 70% charged.
• Phase 4 - MAX Charge:
• All three LEDs are ON at the
same time
• Charging is complete and the battery
is fully charged
• It is recommended to remove the
battery at this time.
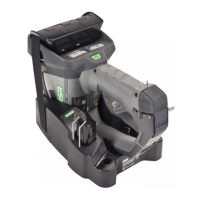
3. Remove the battery from the unit.
• The battery is now ready for use.
NOTE: Error Condition - Charge Terminated -
If the If the battery is removed before a
complete charge is reached, the charger
continues indicating the last complete
charging phase for up to one minute. After
that time, an "Error" indication appears on
the LEDs (shown by the MED and MAX
LEDs coming ON together while the HI
LED is OFF).
The Error Condition is also indicated if
the charger senses any problem with the
battery being charged. To reset the Error
Condition, unplug the charger from the
power adapter for a few seconds; then,
reconnect the charger to the power
adapter. If the Error occurs again,
there may be a defect in the battery that
prevents safe charging.