Operation
Getting Started
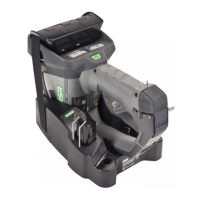
The Evolution 5000 Series Universal Truck-
Mounted Charging System must be correctly
installed before use. Read all installation
instructions thoroughly before starting actual
installation.
Carefully follow all instructions pro-
vided with this charger. This charger
will perform as designed only if
installed, used, and maintained prop-
erly; otherwise, it may fail to operate
properly and result in serious person-
al injury or death.
Use eyewear or face protection to
avoid eye injury during installation;
failure to do so may result in serious
personal injury.
What you will need:
• Electric drill
• #7 (.201) drill bit, 9/32 (0.281) drill bit
• 1/4-20 tap
• #2 Phillips head screwdriver
• Stainless steel 1/4- 20 bolts (4)
• 5-amp in-line fuse
• Master ON/OFF switch
• Strain relief bushing for power supply cable
• Installation hardware kit (provided).
Installation Guidelines
Select a large flat surface area for mounting that
allows easy access for Evolution 5200 TIC storage
and adequate cable length for electrical
connections. Take care to install the charger in an
area protected from direct water spray and
extreme temperature conditions.
Mounting Hanging Channels
1. Drill two holes in both Unistrut channels (A in
FIGURE 8), using a 9/32 (.281) drill.
• Drill mounting holes, 1-1/2 inches in
from outside edges of channels.
2. Place top channel on the cab wall,
approximately four inches away from
overhead obstructions.
3. Using a Unistrut channel as a template, drill
two holes into cab wall with a #7 (.201) drill.
4. Tap both holes for 1/4-20 mounting bolts.
5. Position bottom channel on cab wall, 6-1/2
inches away from center of top channel.
6. Repeat steps 3 and 4 to mount bottom
channel.
7. Bolt both channels in-place with stainless
steel 1/4-20 bolts.
Mounting the Universal Truck-Mounted
Charger to Channels
1. Slide Unistrut spring nut (B in FIGURE 8) into
channel and rotate 90° to seat nut in channel
V-groove. One nut is required for the top
channel and two for the bottom channel.
2. Place the stainless steel bolts (C in
FIGURE8) through the mounting holes
molded into the charger.
3. Place the neoprene rubber washer (D in
FIGURE 8) over the bolt, align bolt with
spring nut and tighten.
NOTE: If mounting the charger vertically, use
the two longer stainless steel bolts on
the bottom and add a second
neoprene washer to each of the
bottom two bolts.
"
WARNING
12
EVOLUTION 5000 SERIES UNIVERSAL TRUCK-
MOUNTED CHARGING SYSTEM INSTALLATION