Do you have a question about the MSA OptimAir TL PAPR and is the answer not in the manual?
Cautions and limitations for NIOSH approval, including oxygen levels and exposure limits.
Critical user instructions and specific use limitations for the OptimAir TL PAPR.
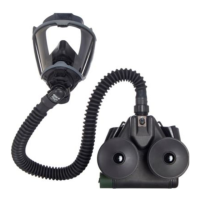
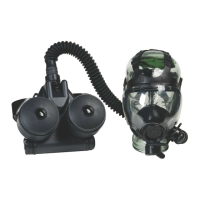
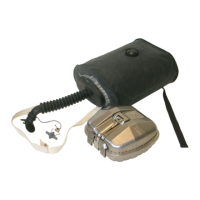
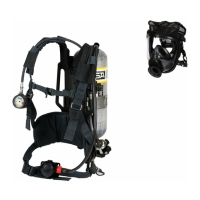
Overview of the OptimAir TL PAPR, a blower-assisted air-purifying respirator.
Maximum use concentrations and atmospheric limitations for respirator operation.
Details on NIOSH approval, protection codes, and certifications for respirators. (Includes 2.3.1 Protection)
References for acceptable exposure limits from ACGIH, OSHA, and NIOSH. (Includes 2.4.1 Exposure Limits for Mixtures)
Technical specifications including airflow rates for hoods and facepieces.
Information on the rechargeable battery packs (NiMH and Li-Ion) used with the PAPR.
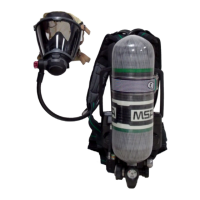
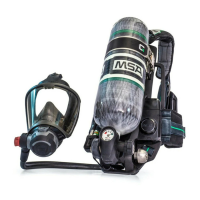
Lists components included in the OptimAir TL PAPR kits.
Pre-use checks for respirator completeness, damage, and cartridge appropriateness.
Procedures for charging standard and extended life battery packs.
Instructions for correctly installing the battery pack into the blower assembly.
Guide for installing the protective cover, primarily for decon waist belts.
Steps for properly installing new MSA cartridges onto the PAPR.
Information on optional accessories for the PAPR.
How to attach spark covers for use in spark environments.
Instructions for attaching and adjusting the waistbelt and optional shoulder strap.
Attaching the decon belt with a cam buckle to the blower assembly.
Attaching the decon belt with a side release buckle to the blower assembly.
Steps to thread and install the comfort belt onto the blower assembly.
How to attach and adjust the optional shoulder strap with the comfort belt.
Procedures for connecting the breathing tube to the blower and hoods.
Instructions for connecting the breathing tube to the blower outlet.
Methods for attaching the breathing tube to full coverage hoods.
How to attach the breathing tube to the low profile PAPR hood.
Steps for installing the optional hood lens cover.
General procedures and important considerations for donning the PAPR.
Information on audible and visible alarms for low battery and improper airflow.
How the battery indicator displays the charge state and warnings.
How the flow indicator monitors motor RPM and warns of airflow issues.
Step-by-step guide to donning the blower assembly with the waistbelt.
Instructions for putting on the PAPR hood over the head.
How to adjust the hood suspension for a proper fit on the head.
Steps to loosen or tighten the headband for a secure fit.
Guide for properly installing the suspension system into the hood.
Instructions for using the V-Gard Cap as a suspension for PAPR hoods.
Procedures for donning the low profile PAPR hood.
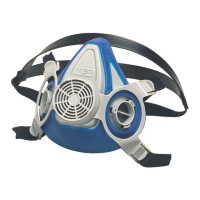
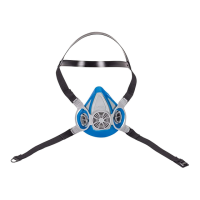
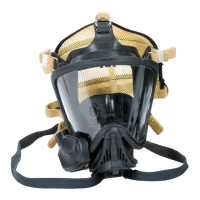
Guidance for donning and seal testing tight-fitting facepieces.
Steps for operating the PAPR, including turn-on and calibration.
Procedures for decontaminating the respirator and protective clothing before removal.
Instructions for safely removing the battery pack from the blower assembly.
Steps for cleaning and disinfecting all components of the PAPR after use.
Procedures for inspecting the respirator for damage and proper condition.
Guidelines for storing the respirator in a cool, dry, and clean environment.
Recommended storage temperatures and conditions for battery packs.
Proper disposal procedures for used cartridges in accordance with regulations.
Guidelines for the safe disposal and recycling of battery packs.
How to identify and resolve issues indicated by audible and visible alarms.
Solutions for problems encountered when installing the breathing tube hose.
Steps to diagnose and fix issues when the blower unit fails to operate.
MSA's express warranty terms for mechanical defects and workmanship.
Details on the purchaser's sole and exclusive remedy for warranty claims.
Agreement regarding MSA's liability for consequential damages.
| Type | Powered Air Purifying Respirator (PAPR) |
|---|---|
| Battery Life | Up to 8 hours |
| Airflow Rate | 170 L/min |
| Weight | 1.1 kg (2.4 lbs) |
| Filters | particulate filters (HEPA) |
| Protection Level | Assigned Protection Factor (APF) of 25 when used with tight-fitting facepieces; APF of 1000 when used with loose-fitting hoods and helmets. |