English
User manual
13
6. While mounting and dismounting of a unit from the bench, to prevent arms from harming, be
more cautious.
5.2. Installation and connection of test bench
The bench is delivered packed. Release the bench from the packaging materials, remove the
protective film from the display (if available). After unpacking, it is necessary to make sure that
the bench is intact and does not have any damage. If damage is detected before the bench is
activated, contact the manufacturer or the sales representative.
The bench has a desktop version. When installing the bench, it is necessary that it is supported
by legs that can be adjusted in height by twisting or screwing them. The bench must be stable.
After the bench is transported at an ambient temperature of less than 0°C, it shall be kept at a
working temperature of at least 24 h before being turned on.
The bench ensures the operation at the temperature from +10
0
C up to +40
0
C and relative air
humidity from 10% up to 75%.
When installing the bench, keep the minimum space gap 0.5 m from the rear bench side - for a
proper air circulation.
Prior to the bench operation, connect:
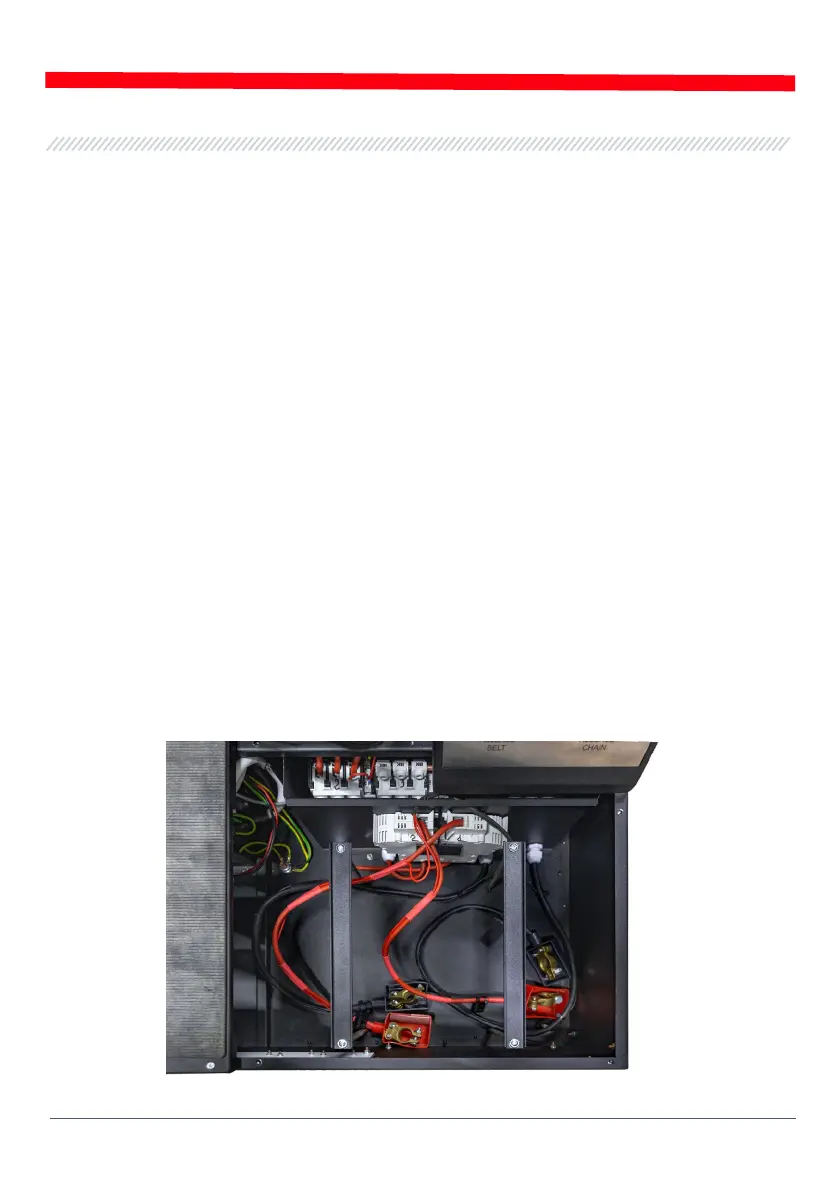
• Storage batteries 12V that have to be located in the storage battery section of the bench (fig.8).
While connecting the storage batteries refer to the power cable markings. If only one battery
is connected (either battery 1 or battery 2) just 12V diagnostics mode will be available. 24V
mode is not active.
• Electric circuit of 400V – referring to the markings inside of socket (included into supply slip).
Figure 8. Location of the storage batteries in the bench