40
Overview of Components
1
30°
Installing M.2 device
CAUTION
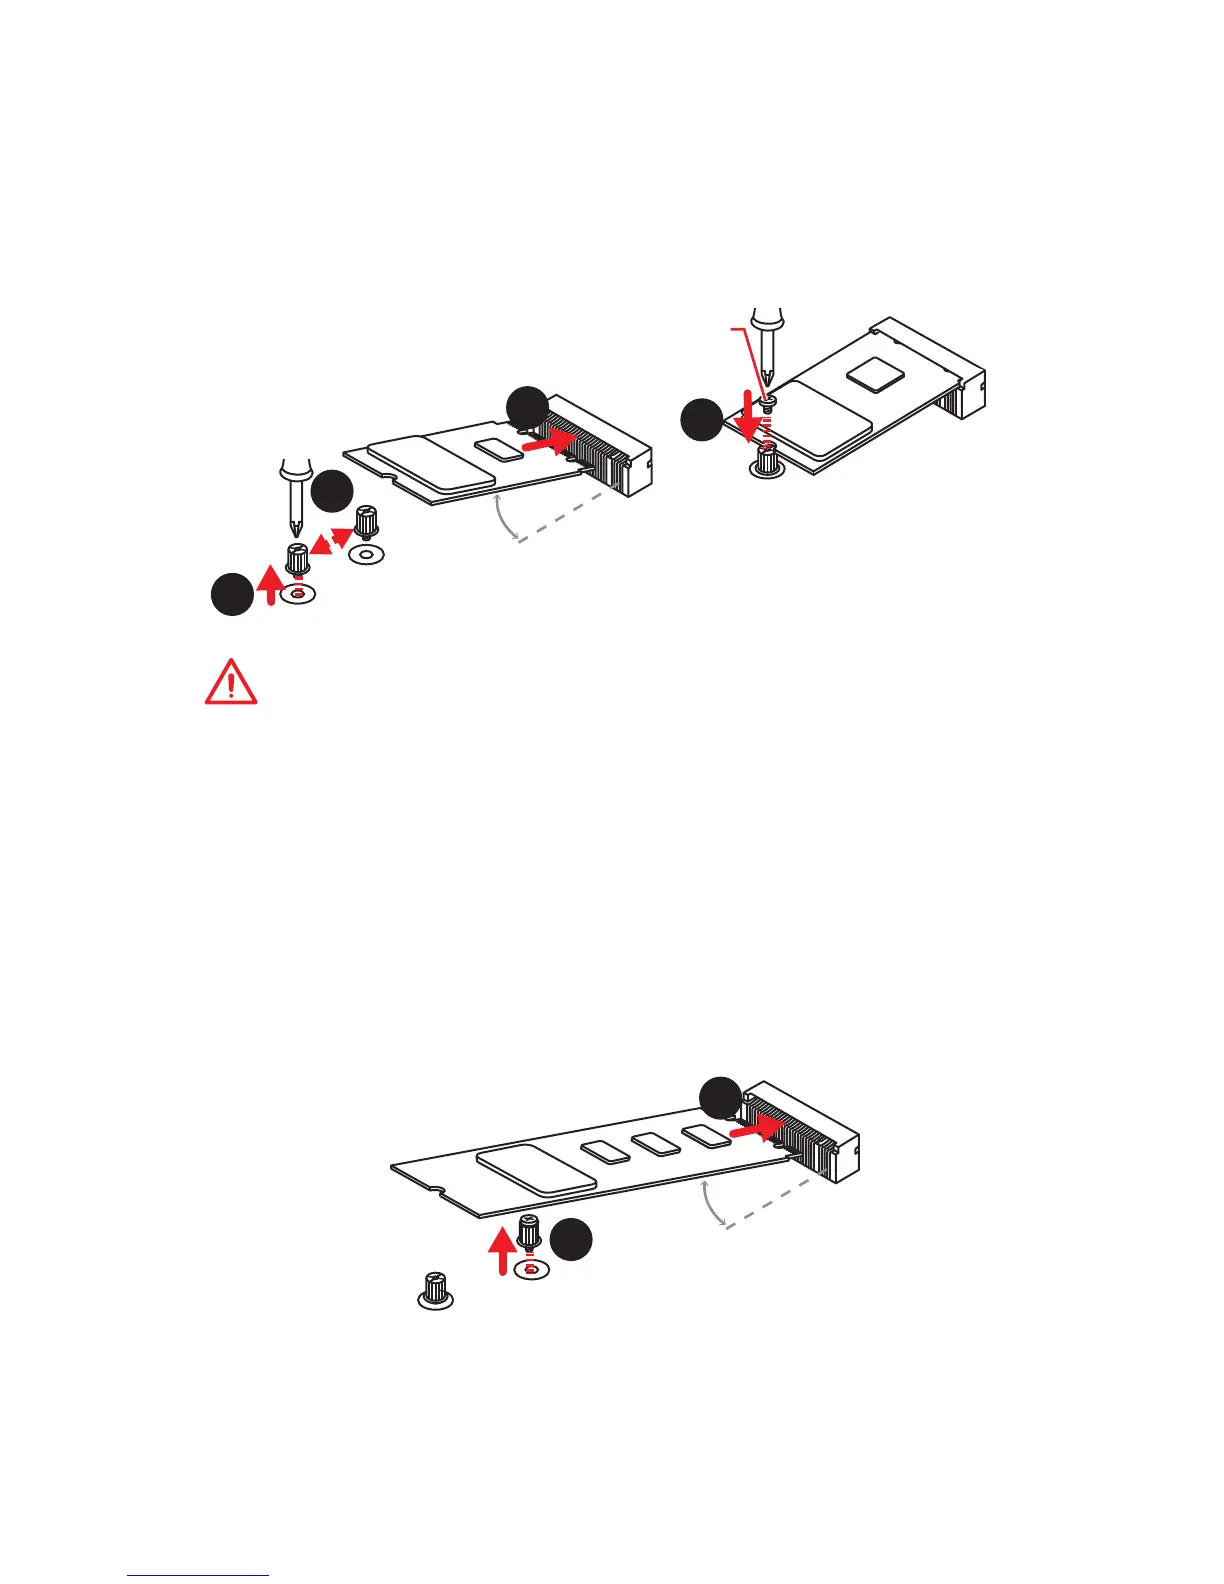
For the installation of M2_2 slot with 22110 M.2 device, M2_1 slot with 2280 M.2
device or M2_3 slot with 2280 M.2 device, you need to remove the unnecessary base
screw to prevent damage to the M.2 device. Please follow the steps below.
The installation of M2_2 slot with 22110 M.2 device, M2_1 slot with 2280 M.2
device or M2_3 slot with 2280 M.2 device
1. Remove the unnecessary base screw between the M.2 slot and the necessary base
screw.
2. Insert the M.2 device into the M.2 slot at a 30-degree angle. Make sure there is
only one base screw under the trailing edge of M.2 device.
3. Reinstall the M.2 SHIELD FROZRs onto the M.2 device and screw the M.2 SHIELD
FROZRs in place with the heatsink screws.
2
1
2
3
30°
1. Loosen the M.2 riser screw from the
motherboard.
2. Move and fasten the M.2 riser screw to
the appropriate location for your M.2
SSD.
3. Insert your M.2 SSD into the M.2
slot at a 30-degree angle.
4. Secure the M.2 SSD in place with
the supplied M.2 screw.
4
Supplied
M.2 screw
 Loading...