Do you have a question about the MSI MEG X299 CREATION and is the answer not in the manual?
Diagrams illustrating necessary tools and components for computer assembly.
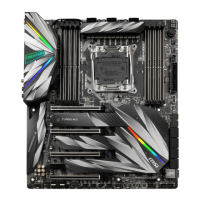
Details on CPU socket compatibility and specifications.
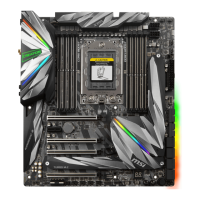
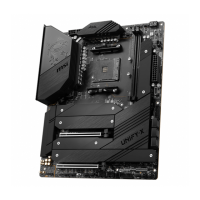
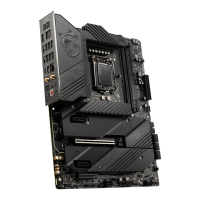
Information about the motherboard's chipset.
Specifications for DDR4 memory slots and capacity.
Details on PCIe slot configurations and compatibility.
Status indicators for the 2.5G LAN port.
Status indicators for the 1G LAN port.
Description and pin layout of the CPU socket.
Details on memory module slots and installation.
Information on PCIe slot configurations and usage.
Details on M.2 slot specifications and installation.
Information on SATA connectors and their usage.
Guidance on correctly aligning the LGA 2066 CPU for installation.
Recommended DIMM slot population for 4-channel CPU.
Recommended DIMM slot population for 2-channel CPU.
Bandwidth allocation table for PCIe and M.2 slots.
Steps for installing a U.2 SSD.
Procedure for installing an M.2 module.
Instructions for using the M.2 Shield Frozr for heat dissipation.
Information on the VROC key module connector.
Details for connecting front panel audio jacks.
Guide on setting up and using the GAME BOOST knob.
Jumper for forcing BIOS entry and skipping OC failures.
Jumper for extreme overclocking and system stability.
Instructions for switching between PWM and DC fan modes.
Connector for thermal sensor cable.
Connector for Thunderbolt add-on cards.
Guide for daisy-chaining Thunderbolt devices and monitors.
Details on the USB connector for fast charging.
Information on the USB 3.1 Gen2 Type-C front panel connector.
Jumper for clearing CMOS settings.
Steps to connect and use the chassis intrusion detector.
Procedure to reset chassis intrusion warnings.
Steps for recovering the system BIOS.
Explanation of onboard debug LEDs.
Indicators for installed memory modules.
Indicator for XMP mode status.
Connector for demonstrating onboard LED effects.
Table detailing debug code meanings.
Guide for installing the Windows 10 operating system.
Instructions for installing system drivers.
Steps for installing system utilities.
Interface for controlling device LED effects.
Procedure for installing or updating Nahimic 3 audio software.
Accessing audio effects, profiles, and settings in Nahimic 3.
Interface for selecting Nahimic 3 language.
Methods to access the BIOS setup menu.
Ways to restore BIOS settings to default.
Procedures for updating the system BIOS.
Instructions for BIOS update using the Flash BIOS button.
Options available in the BIOS advanced menu.
Configuration of system date and time.
Advanced system settings and configurations.
Setting the SATA controller operation mode.
Settings for onboard USB controllers and devices.
Configuration of system power management features.
Settings related to Windows OS configuration.
Enabling MSI Fast Boot for accelerated system boot times.
Configuration for Windows secure boot.
Enables or disables system wake-up by RTC Alarm.
Enables or disables system wake-up by USB devices.
Configuration of system boot devices and sequence.
Selection between Legacy and UEFI boot modes.
Setting up an administrator password for system security.
Configuration for chassis intrusion detection.
Saves current changes and reboots the system.
Restores or loads all default BIOS values.
Enables or disables normal or expert OC settings.
Sets applied mode for CPU ratio.
Enables or disables Intel Turbo Boost technology.
Sets the CPU Base clock for overclocking.
Enables or selects memory profiles for overclocking.
Detailed configuration of memory timings.
Displays information about the installed CPU.
Displays settings and timings of installed memory.
Displays key CPU features and technologies.
Enables or disables Intel Virtualization Technology.
Enables or disables hardware prefetcher for CPU performance.
Enables or disables C1E function for power-saving.
Locks or unlocks the CFG lock bit.
Manages overclocking profiles.
Save and load OC profiles to/from USB.
Configuration for fan speed and mode.
Buttons for controlling fan speeds.
Steps to enable Intel RST.
Procedure to access the Intel RST menu.
Installing RAID drivers during OS setup.
Installation guide for Intel RST software.
Prerequisites for Intel Optane memory.
Steps to install Intel Optane memory.
Procedure to enable Intel Optane memory.
Steps to disable Intel Optane memory.
Procedure to disable M.2/Optane Genie in BIOS.
Steps to resolve power issues.
Solutions for recovering a lost BIOS password.
Statement regarding FCC compliance for the device.
Declaration of conformity with EU directives.
Guidelines for battery disposal and handling.
| Memory channels | Quad-channel |
|---|---|
| Memory slots type | DIMM |
| Number of memory slots | 4 |
| Supported memory types | DDR4-SDRAM |
| Supported memory clock speeds | 4100, 2133, 2400, 2666, 2800, 2933, 3000, 3200, 3333, 3400, 3466, 3600, 3733, 3800, 4000, 4200 MHz |
| Processor socket | LGA 2066 (Socket R4) |
| Processor manufacturer | Intel |
| Compatible processor series | Intel® Core™ X-series |
| Supported processor sockets | LGA 2066 |
| USB 2.0 connectors | 2 |
| ATX Power connector (24-pin) | Yes |
| Number of SATA II connectors | 0 |
| Number of SATA III connectors | 8 |
| USB 3.2 Gen 2 (3.1 Gen 2) connectors | 1 |
| RAID levels | 0, 1, 5, 10 |
| Supported storage drive types | HDD & SSD |
| Supported storage drive interfaces | SATA III, U.2 |
| BIOS type | UEFI AMI |
| USB 2.0 ports quantity | USB 2.0 ports have a data transmission speed of 480 Mbps, and are backwards compatible with USB 1.1 ports. You can connect all kinds of peripheral devices to them. |
| Audio chip | Realtek ALC1220 |
| Component for | PC |
| Motherboard chipset | Intel® X299 |
| Audio output channels | 7.1 channels |
| Motherboard form factor | Extended ATX |
| Windows operating systems supported | Windows 10 |
| LAN controller | Realtek RTL8125-CG, Intel I219-V |
| Wi-Fi standards | 802.11a, Wi-Fi 5 (802.11ac), 802.11b, 802.11g, Wi-Fi 4 (802.11n) |
| Bluetooth version | 5.0 |
| Ethernet interface type | 2.5 Gigabit Ethernet, Gigabit Ethernet |
| Parallel processing technology support | CrossFire, SLI |
| Cables included | SATA |
| Depth | 272 mm |
|---|---|
| Width | 305 mm |