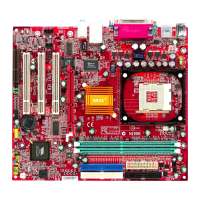
CHAPTER 2 HARDWARE INSTALLATION
2-26
Diagnostic LED
2345
0000
0001
0010
0011
0100
0101
0110
0111
1000
1001
1010
1011
1100
1101
1110
1111
Description
System Power ON.
This will start BIOS Initialization
Early Chipset Initialization
Memory Detection Test
Testing Onboard memory size
Decompressing BIOS image to RAM for fast booting.
Initializing Keyboard Controller
Test shadow RAM (R/W Shadow RAM Area)
Processor Initialization
This will show information regarding the processor
(like brand name, system bus, etc...)
Testing RTC (Real Time Clock)
Initializing Video Interface
This will start detecting CPU clock, checking type of
video onboard. Then, detect and initialize the video
adapter
BIOS Sign On
This will start showing information about Logo,
processor brand name, etc.....
Testing Base and Extended Memory
Testing base memory from 240K to 640K and
extended memory above 1MB using various patterns.
Assign Resource to all ISA
Initializing Hard Drive Controller
This will initialize IDE drive and controller
Initializing Floppy Drive Controller
This will initialize Floppy Drive and controller
Assign IRQs to PCI Devices
Operating System Booting.
Possible Problem/
Solution
The Processor might be damage or not
installed properly
Damage/Discharge Lithium Battery
***
The Memory module might be damage or
not installed properly.
***
*If there is no keyboard connected,
D-LED will blink 3 times.
***
***
Low Lithium Battery
*If RTC battery is low or failed, D-LED
will blink 3 times.
System D-LED will produce Beep sound
The VGA card might be damage or not
inserted properly.
*If there is no VGA installed, D-LED will
blink 3 times.
***
***
***
Check IDE cable for proper installation
*If there is no HDD connected, D-LED
will blink 3 times.
The Floppy Drive Cable might not be
installed properly
***
***
*** Check local Vendor for possible internal mainboard problem.
1 = GREEN 0 = RED
Diagnostic LED Function
 Loading...