27
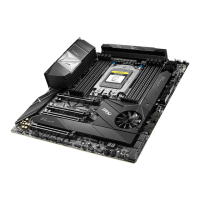
Vue d’ensemble des composants
9. Insérez la carte M.2 XPANDER-Z dans le slot PCI_E3.
10. Fixez la vis pour sécuriser la carte M.2 XPANDER-Z.
11. Connectez le PCIE_PWR1 à l’alimentation.
12. Branchez le câble HDD LED du boîtier au connecteur JCASE.
13. Utilisez le câble HDD LED fourni pour relier le connecteur JMB aux broches HDD
du connecteur JFP1 (broche 1 et broche 3).
9
10
PCI_E3
+
+
11
12
13
1
2
+
-
HDD LED
JFP1
PCIE_PWR1
JCASE
JMB

 Loading...