Checking Oil Level on Engines with Threaded Oil Fill Caps
NOTE: Be sure to check the oil while on a level surface with the
engine stopped.
To avoid engine damage, it is important to:
Check oil level before each use and every 5 operating •
hours when engine is warm. Check oil level more
frequently during engine break-in.
Keep oil level between “H” and “L” marks on dipstick. •
See Fig. 3-4.
Be sure to rest oil fill cap on the threads when •
checking. Do not tighten down oil fill cap when
checking the oil on threaded oil fill cap engines.
Remove the oil filler cap/dipstick and wipe the dipstick 1.
clean. See Fig. 3-4.
Insert the cap/dipstick into the oil filler neck, but do not 2.
screw it in.
Remove the oil filler cap/dipstick. If the level is low, slowly 3.
add oil until oil level registers between high (H) and low (L),
Fig. 3-4.
Replace and tighten cap/dipstick firmly before starting 4.
engine.
NOTE: Do not overfill. Overfilling with oil may cause smoking,
hard starting, or spark plug fouling.
NOTE: DO NOT allow oil level to fall below the “L” mark on the
dipstick. Doing so may result in equipment malfunctions or
damage.
NOTE: To change the oil on your engine, see the Maintenance
Section of this manual.
Checking Oil Level on Engines with Quarter-Turn Oil Fill Caps
NOTE: Be sure to check the oil while on a level surface with the
engine stopped.
To avoid engine damage, it is important to:
Check oil level before each use and every 5 operating •
hours when engine is warm. Check oil level more
frequently during engine break-in.
Keep oil level between “H” and “L” marks on dipstick. •
See Fig. 3-3.
Be sure oil fill cap/plug is tightened securely when •
checking.
Remove the oil filler cap/dipstick and wipe the dipstick 1.
clean. See Fig. 3-3.
Insert the cap/dipstick into the oil filler neck, and tighten 2.
the cap until seated.
Remove the oil filler cap/dipstick. If the level is low, slowly add 3.
oil until oil level registers between high (H) and low (L), Fig. 3-3.
Replace and tighten cap/dipstick firmly before starting 4.
engine.
NOTE: Do not overfill. Overfilling with oil may cause smoking,
hard starting, or spark plug fouling.
NOTE: DO NOT allow oil level to fall below the “L” mark on the
dipstick. Doing so may result in equipment malfunctions or
damage.
NOTE: To change the oil on your engine, see the Maintenance
Section of this manual.
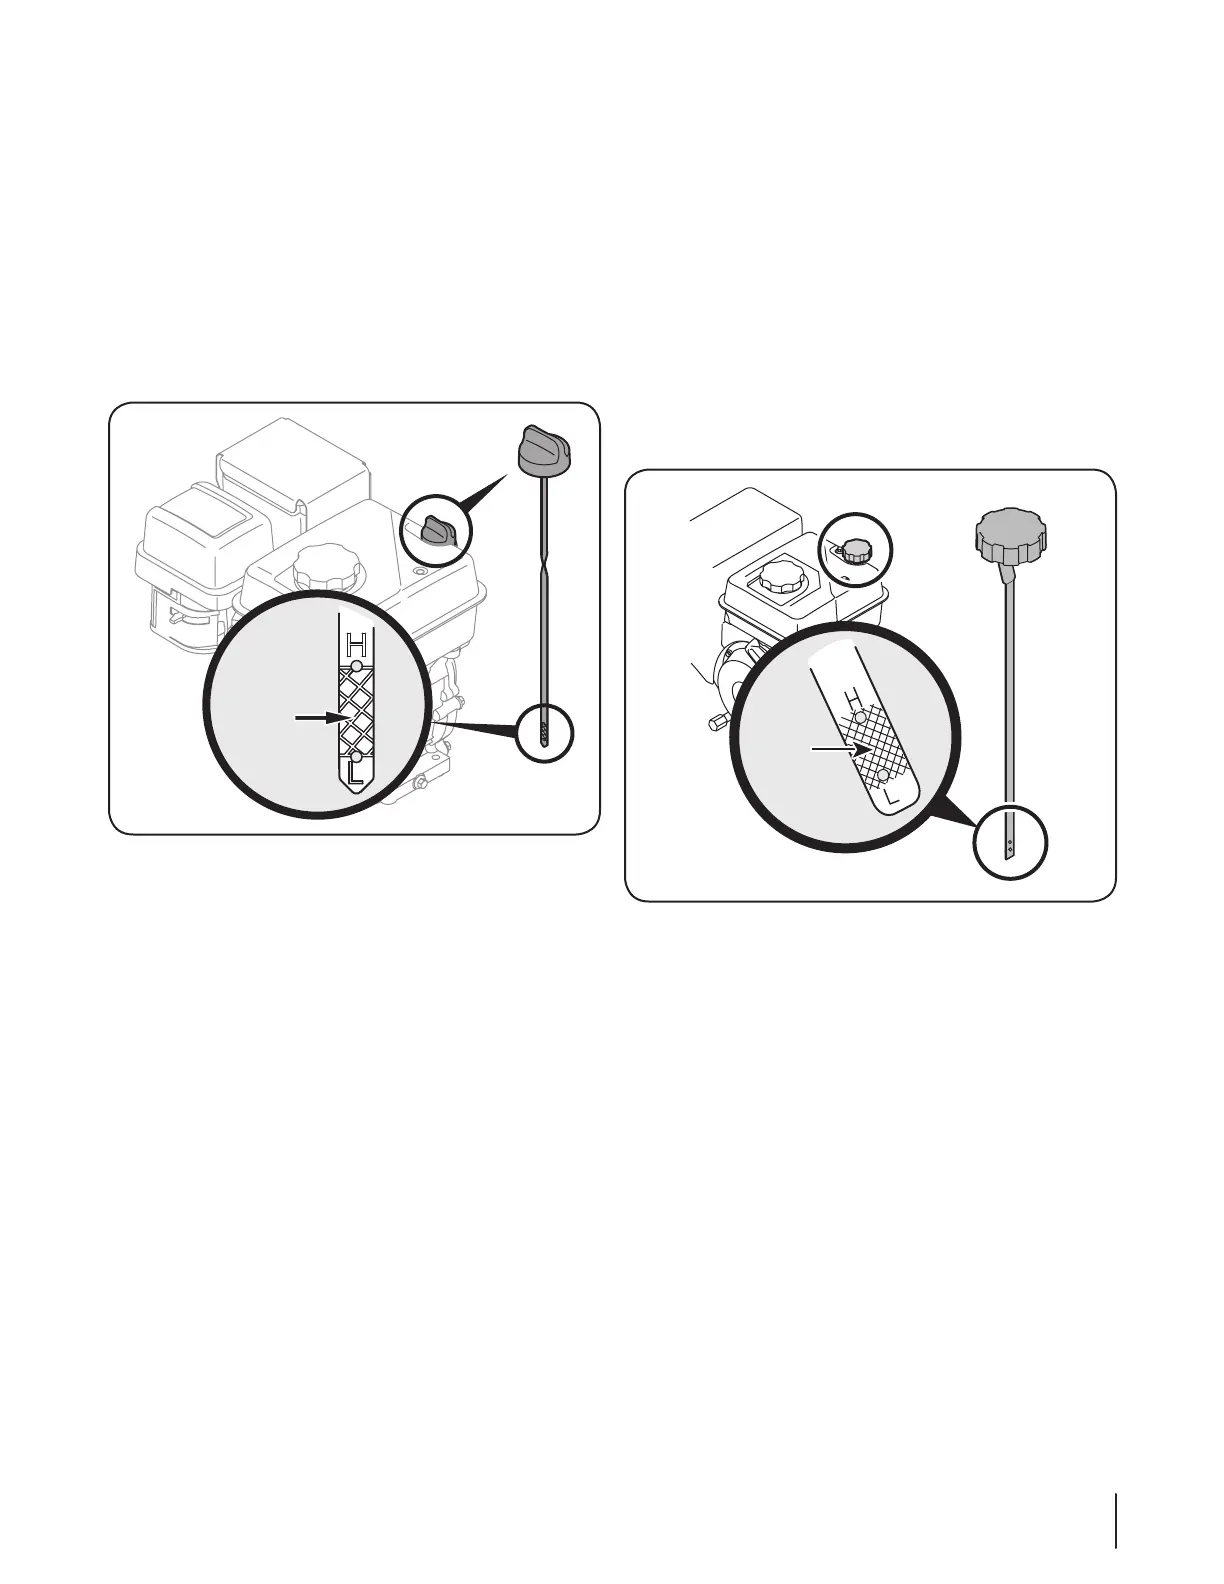
Fill
between
high
and low
marks
Figure 3-3
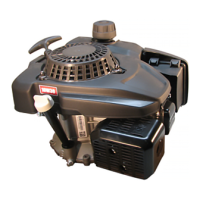
Fill
between
high
and low
marks
Figure 3-4
7se c t i O n 3 — se t -up