Assembly
Standbehindthe tiller
asif youweregoingto
operateit. Yourright hand
correspondsto the right
sideofthe tiller; your left
hand correspondsto the
leftsideof the tiller.
Thisoperator'smanual
maycovervariousmodels
oftillers. The units il-
lustratedmay varyslightly
from your unit.
II[VIPORTANT:This unitis
shippedwithoutgasoline
i oroil inthe engine.Fill
up gasolinean¢loUas
i nstr.ucted n theaccom-
panyingenginemanual
BEFOREoperatingyour
machine.
Assembly
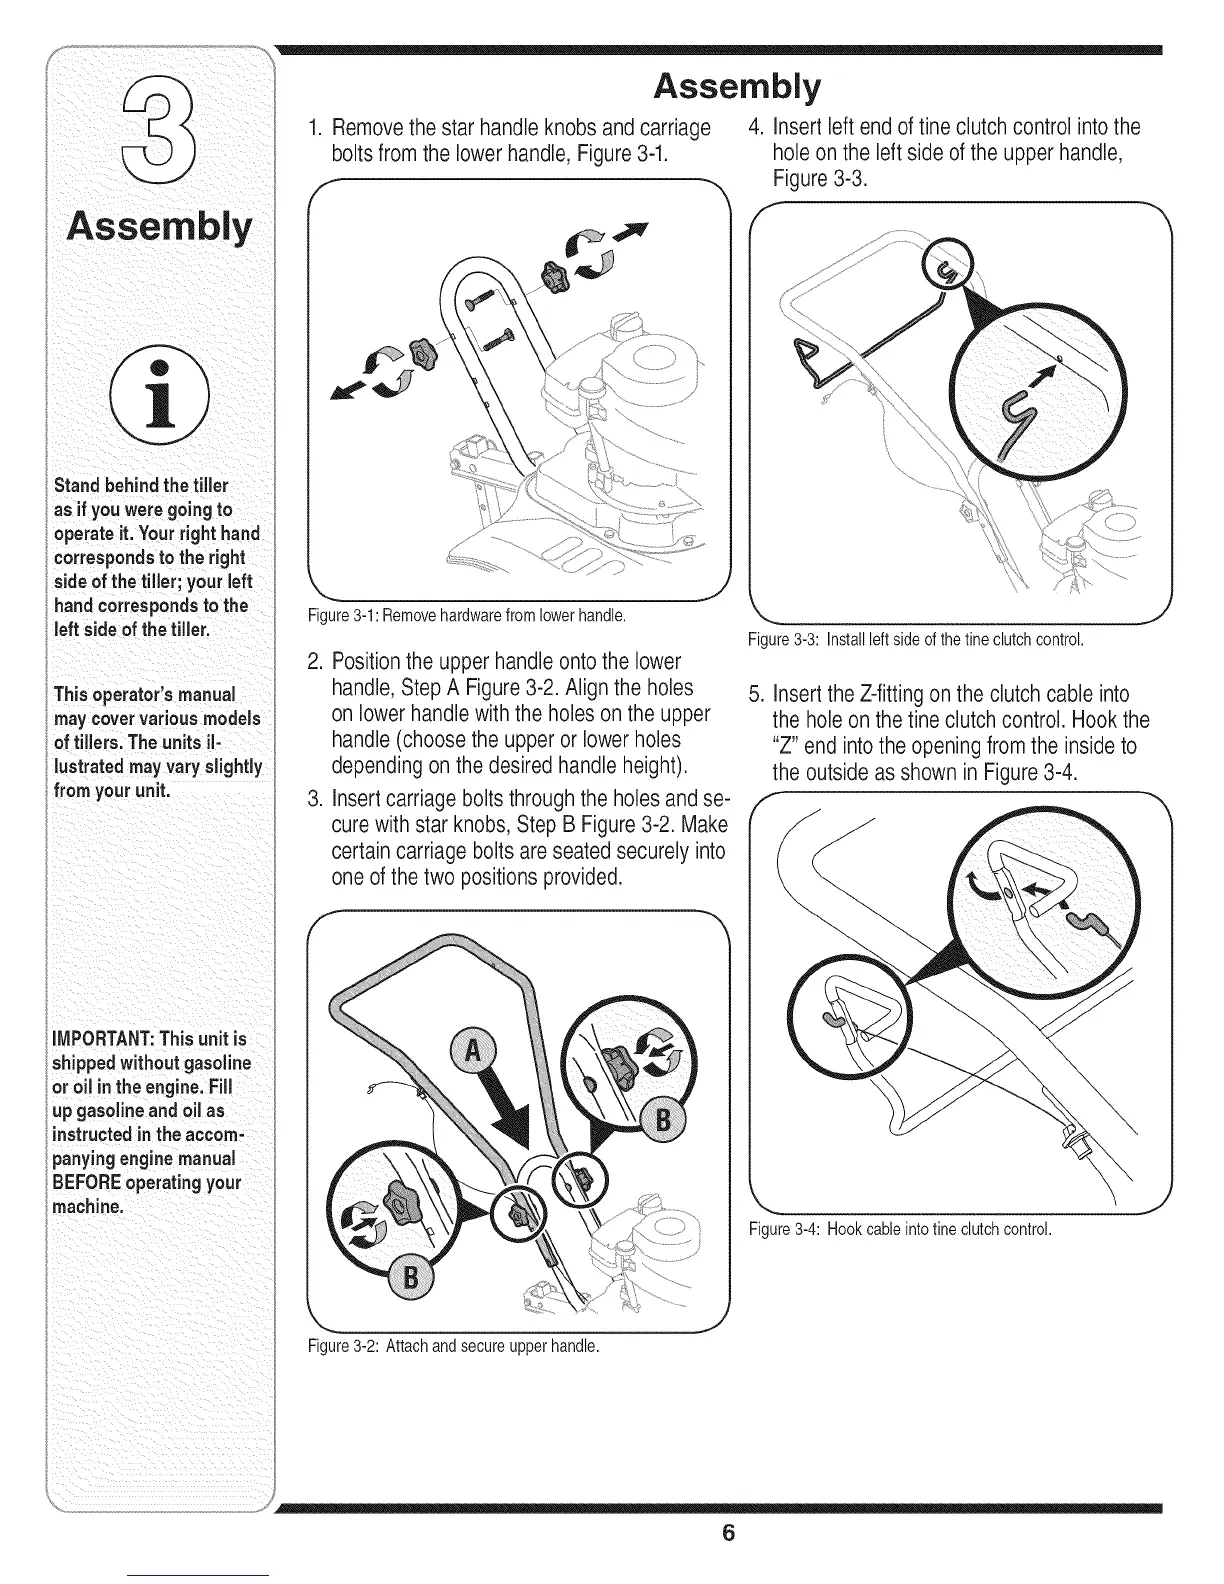
1. Removethe star handle knobs andcarriage
boltsfrom the lowerhandle, Figure 3-1.
Figure3-1:Removehardwarefrom lowerhandle.
J
2. Positionthe upper handle ontothe lower
handle,Step A Figure 3-2. Align the holes
on lower handle with the holes on the upper
handle (choosethe upper or lower holes
dependingon the desired handle height).
3. Insertcarriage bolts through the holes and se-
cure with star knobs,Step B Figure 3-2. Make
certain carriage bolts are seated securely into
one of the two positions provided.
f
4. Insert leftend of tineclutch control into the
hole on the leftside of the upper handle,
Figure3-3.
f
\
Figure3-3: Installleft sideofthe tineclutchcontrol.
J
5. Insert the Z-fittingon the clutch cable into
the hole on the tine clutch control. Hook the
"Z" end into the opening from the inside to
the outside as shown in Figure3-4.
\
....... J
Figure3-4: Hookcableintotineclutchcontrol.
Figure3-2:Attachandsecureupperhandle.
6
 Loading...