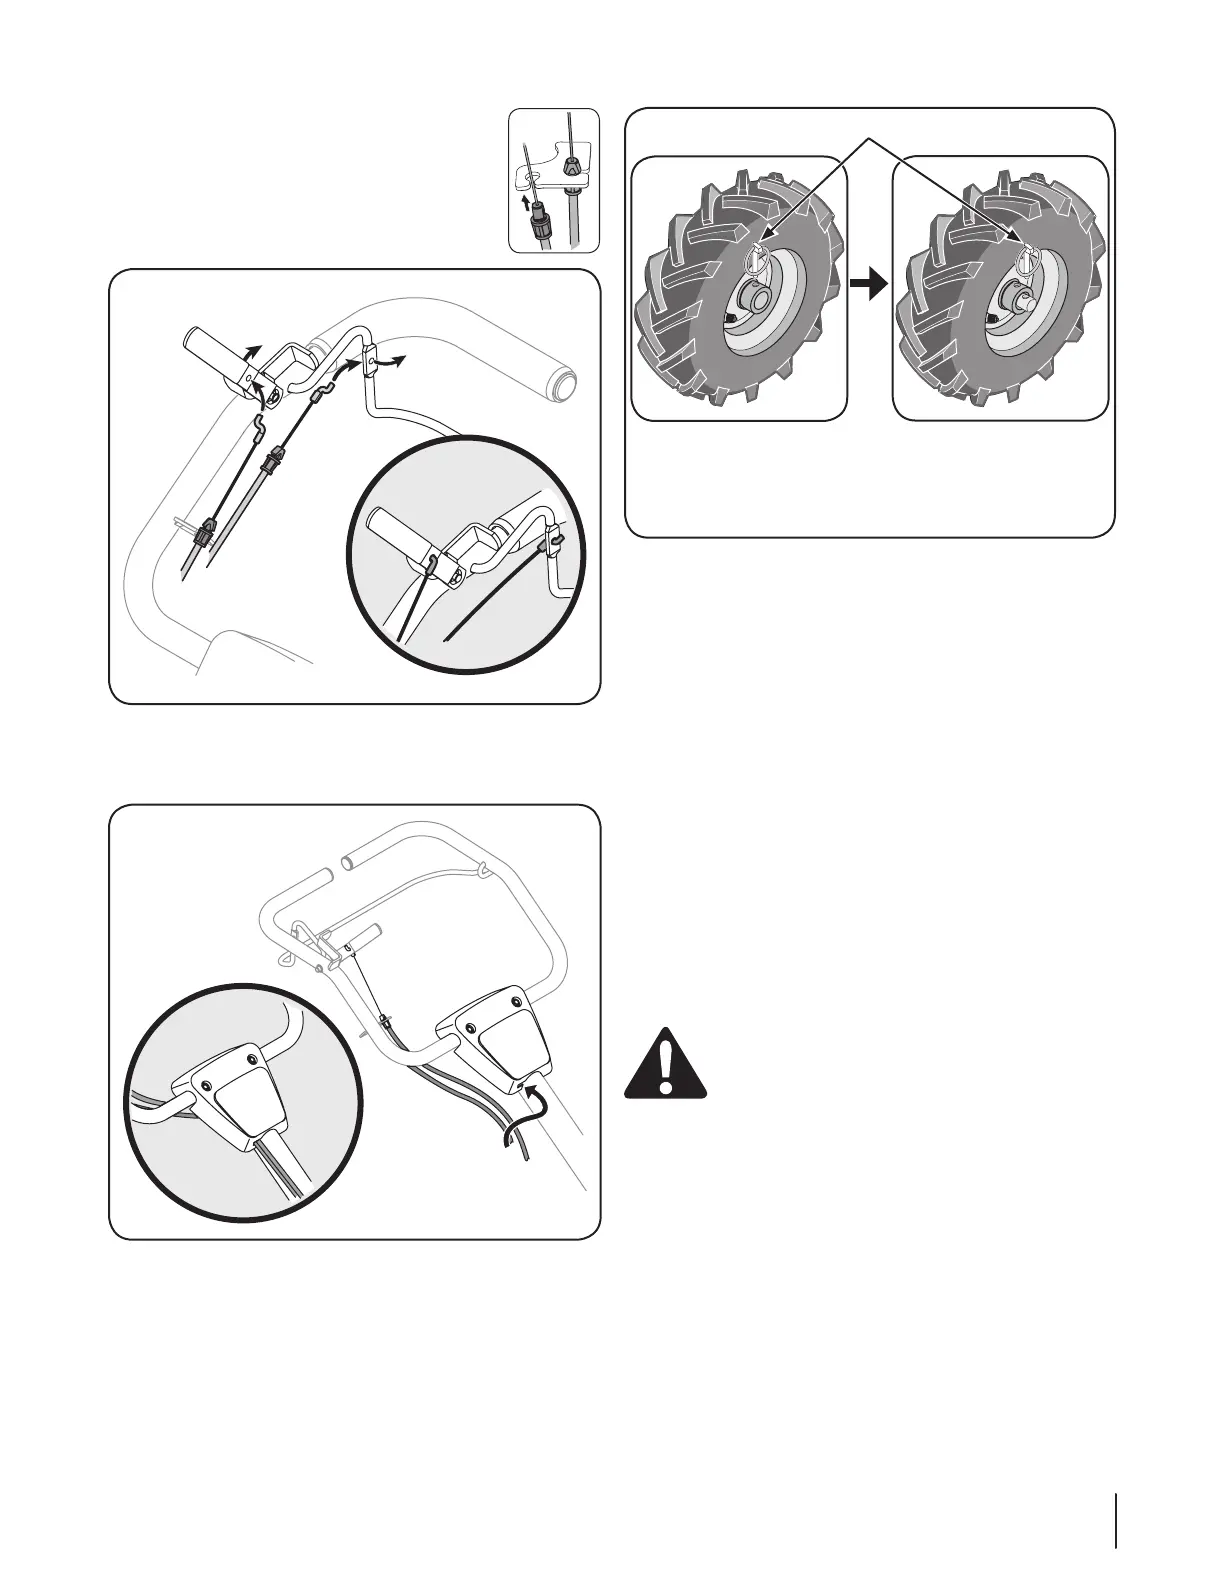
Snap the cable housing clips into the handle 4.
assembly cable mount as seen here. The red
clip (reverse cable) fits into the top position
on the handle assembly, while the black clip
(forward/clutch cable) feeds into the lower
position on the handle assembly. See Fig. 3-2.
Clip the cables into the cable guides located on the handle 5.
assembly panel as seen in Fig. 3-3.
Move Tiller Off Crate
To roll the tiller off the shipping platform, put the wheels in
freewheel, if they are not already from the factory, as follows:
Place a sturdy block under the transmission to raise one wheel 1.
about 1” off the ground. Remove the click pin from the
wheel hub and wheel shaft. See Fig. 3-4.
Slide the wheel fully inward on the wheel shaft . Reinstall the 2.
click pin through the wheel shaft only (not through the
wheel hub). See Fig. 3-4. The wheel should now spin freely
(freewheel) on the wheel shaft. Repeat with the other
wheel.
Use the handlebar to roll the tiller to a flat area.3.
NOTE: Before starting the engine, the wheels must be placed in
the WHEEL DRIVE position (pins through wheel hubs and wheel
shaft). This procedure is described in Wheel Drive Pins on page 10.
Set-Up
Tire Pressure
Check the air pressure with a tire gauge. Deflate or inflate the
tires equally to between 15 and 20 PSI. DO NOT EXCEED 20 P.S.I.
NOTE: Be sure that both tires are inflated equally or the tiller will
pull to one side.
Gas & Oil Fill Up
WARNING! Use extreme care when handling
gasoline. Gasoline is extremely flammable and the
vapors are explosive. Never fuel the machine
indoors or while the engine is hot or running.
Extinguish cigarettes, cigars, pipes and any other
sources of ignition.
This unit was shipped WITHOUT oil or gasoline in the engine.
Oil is included in the plastic literature bag packed with the unit.
Add the oil as instructed in the separate engine manual. Check
oil level before each operation to ensure adequate oil in the
engine. For further instructions, refer to the separate engine
manual packed with your unit.
Figure 3-2
Figure 3-4
Figure 3-3
Remove the click pin
from the wheel hub
Slide the wheel fully
inward on the wheel
shaft . Reinstall the
click pin
7SE c T i O N 3 — AS S E M b L y & SE T -UP