Installation and Operational Manual • Designer Collection • Shower Systems
6 / mtibaths.com
Installation Instructions – Shower Pans
MTI offers several types of shower pans. General shower pan installation instructions provided below.
See pages 6–8 for important product specific installation details. MTI recommends a professional
contractor to determine the best way to achieve the finished product and function desired.
MTI does not warrant leaks associated with improper drain installation and will not be responsible for any costs related to improper
installation. If you need assistance, please call the MTI Service Department at 800.783.8827.
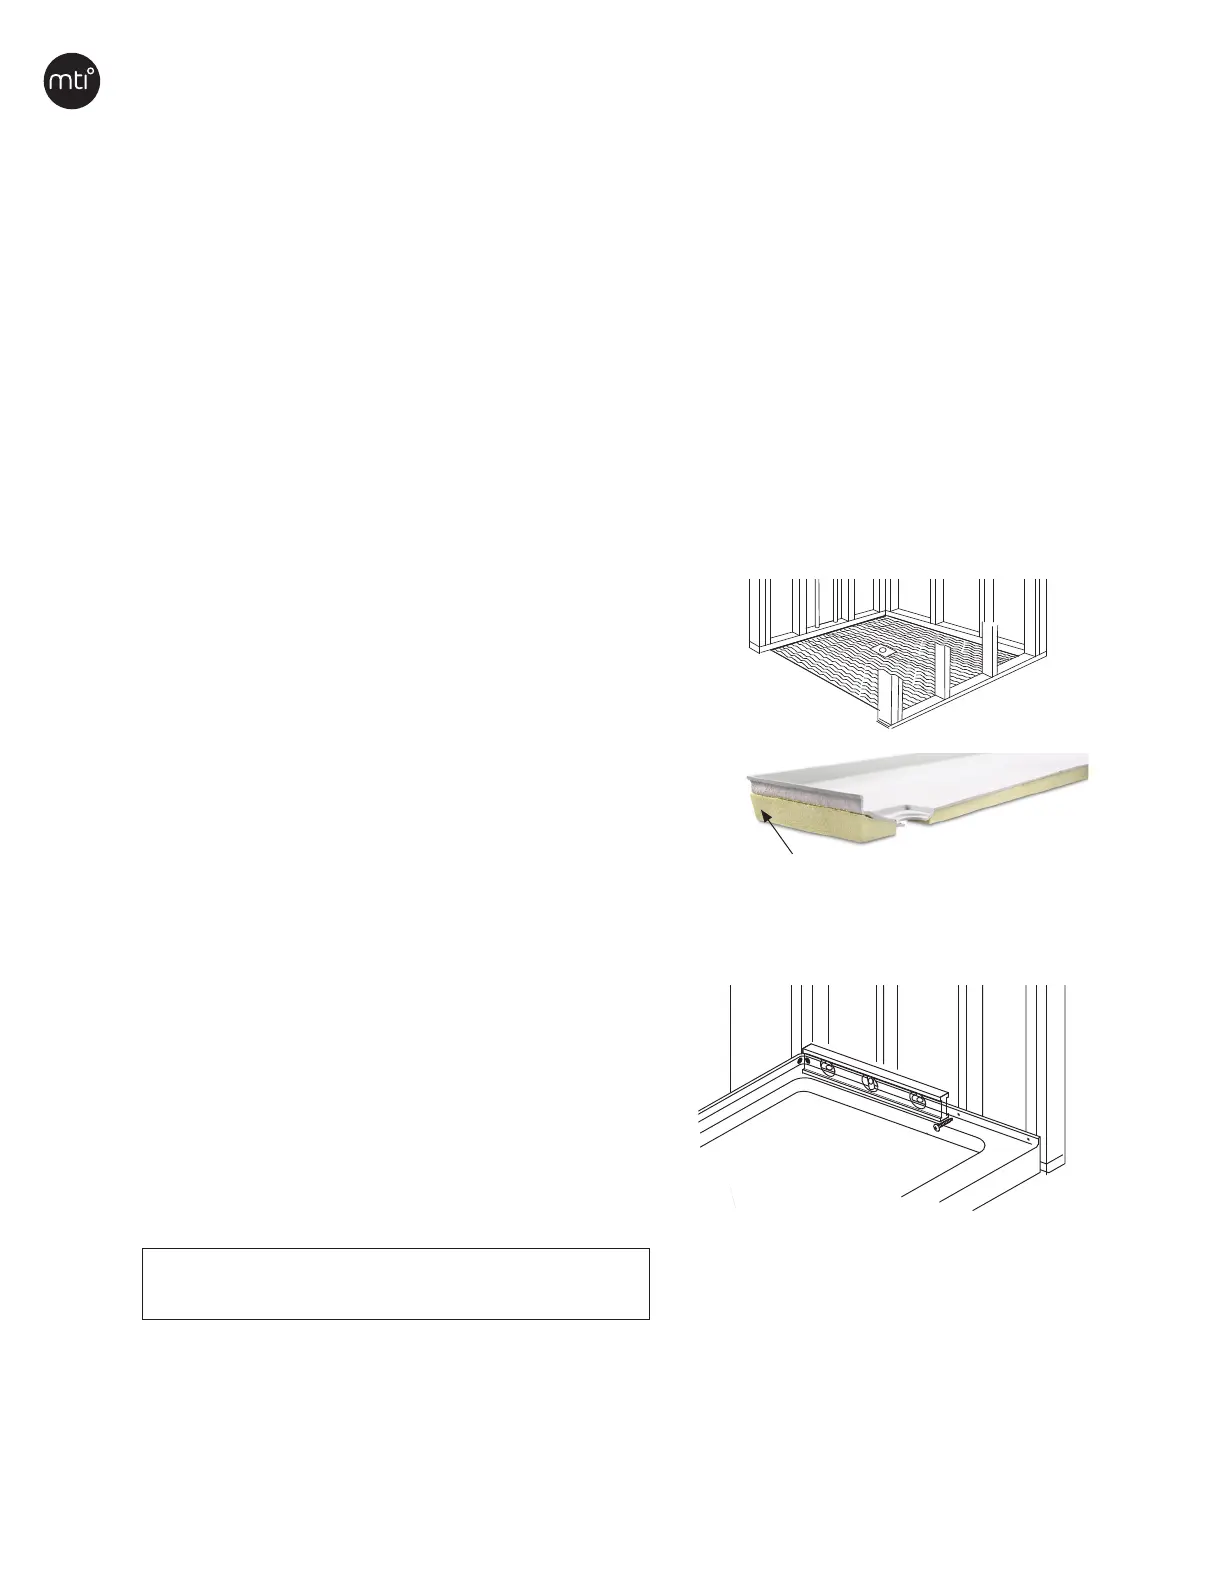
Optional factory installed pre-leveled foam base allows
for ready installation on a flat and level subfloor without
wet bedding. Use floor leveling compound or thin-set to
ensure subfloor is flat and level before installing shower
pan. Note: plastic sheathing recommended between
factory installed foam base and thin-set compound.
GENERAL SHOWER PAN INSTALLATION INSTRUCTIONS
1. Mark flange of shower pan where it aligns with wall studs. Pre-drill a minimum of three ⅛" holes on each
side of the flange on the shower pan to align with selected wall studs. Multi-threshold pans will be slightly
wider at the base. See pg. 7 for additional installation instructions for ABS tile flange.
3. Install drain kit onto the shower pan. Do not use plumber’s putty, MTI recommends clear silicone
where the drain makes contact with DoloMatte
TM
surface.
Optional Factory Installed Pre-leveled Foam Base.
MTI recommends Quickrete Sand Mix #1103 or
equivalent. Sheetrock mud, plaster, wall board, spray
foam and other compounds that are not equivalent to
the sand topping mix recommended are not acceptable
bedding compounds and use of those products will void
the product warranty.
2. Place enough bedding compound to fill the void between the entire bottom of the shower pan and floor,
boxing out an area around the waste pipe for drain installation.
4. Check shower pan for level, front to back and side to
side, before securing tile flange to stud walls.
5. Secure shower pan to stud walls, starting with a front
corner, then working around the entire pan.
Note: Some shower pans may appear to have a very slight
bend or bow. This will correct itself as you make your way
around the pan, securing it to the wall studs.
IMPORTANT: Do not attempt to drive nails
through the tile flange.
Important: always allow bedding compound to dry for 24 hours before using shower system.
Follow product-specific tile flange
installation instructions on pg. 7
MTI shower pans are not equipped with leveling feet and are constructed to install on a flat, level sub-floor
in accordance with manufacturer installation instructions. The pan must be level on a flat and level surface.
Do not begin building any structure for your pan until your pan arrives. All printed specifications for MTI
shower pans have ±½˝ tolerance AND ARE SUBJECT TO CHANGE AT ANY TIME. Take all final installation
dimensions from your shower pan(s).
 Loading...