18
It is essential to observe all the safety notes and tips!
Before completing and ying the model please read through the building instructions and the operating instructions for all
the components included in the set.
1. Check that the set contents are complete by referring to the Parts List.
2. Install the tailplane and n
See paragraphs 2.12 and 2.13 of the building instructions and Figs. 18 - 21. Check that the servos are at neutral (centre)
when you t the tail panels.
3. Assemble the model
See paragraph 5 of the building instructions and Fig. 33.
4. Bind the receiver to the transmitter
See the instructions supplied with the receiver and transmitter.
5. Set the correct control surface travels and Centre of Gravity
See paragraphs 7 and 8 of the building instructions and Fig. 34.
6. Go ying with the EasyGlider 4
See paragraphs 9 and 10 of the building instructions and Figs. 35 - 40.
Parts List RR+ EasyGlider 4
No. Quantity Description
1 1 EasyGlider 4 building instructions
2 1 Complaint processing form
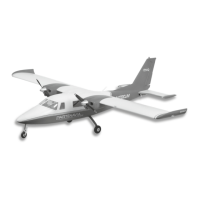
3 1 Fuselage with servos, power set and receiver
4 1 LiPo battery, ROXXY EVO 3-2200 20C (M6)
5 1 L.H. wing with servo
6 1 R.H. wing with servo
7 1 Tailplane
8 1 Fin
9 1 M5 plastic screw
10 1 Allen key, 1.5 mm A/F
11 1 Hook-and-loop tape, hook
12 1 Hook-and-loop tape, loop
13 1 Foam block battery retainer
BRIEF INSTRUCTIONS
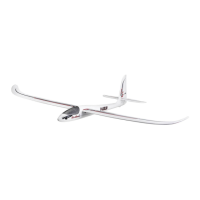
The RR version of the EasyGlider 4 is factory-assembled, and virtually ready to y. Numerous procedures which are described in the
building instructions are already completed for you, with the result that the model can be ready for the air in very short order. To t out
the model completely you will also need a receiver and a ight battery.
Essential / recommended accessories:
Receiver
MULTIPLEX RX-5 light M-Link receiver Order No. 5 5808
or MULTIPLEX RX-5 M-Link receiver (telemetry-capable) Order No. 5 5817
Battery
LiPo battery, ROXXY EVO 3-2200 20C (M6) Order No. 31 6655
Battery charger
Power Peak B6 12V / 230V charger Order No. 30 8561
Tools required
Screwdriver for M5 slot-head screw
It is essential to observe all the safety notes and tips!
Before completing and ying the model please read through the building instructions and the operating instructions for all
the components included in the set.
1. Check that the set contents are complete by referring to the Parts List.
2. Install the tailplane and n
See paragraphs 2.12 and 2.13 of the building instructions and Figs. 18 - 21. Check that the servos are at neutral (centre)
when you t the tail panels.
# 26 4332