ASSEMBLY
ASSEMBLY
This instruction book is for several models. Some parts oraccesso-
ries are not included on all models. Read and follow the assembly
and adjustment instructions for your mower. All fasteners are in the
parts bag. Do not discard any parts or material until the unit is
assembled.
4_b WARNING: Before doing any assembly or mainte-
nance to the mower, remove the wire from the spark
plug,
NOTE: In this instruction book, left and right describe the loca-
tion of a part with the operator on the seat.
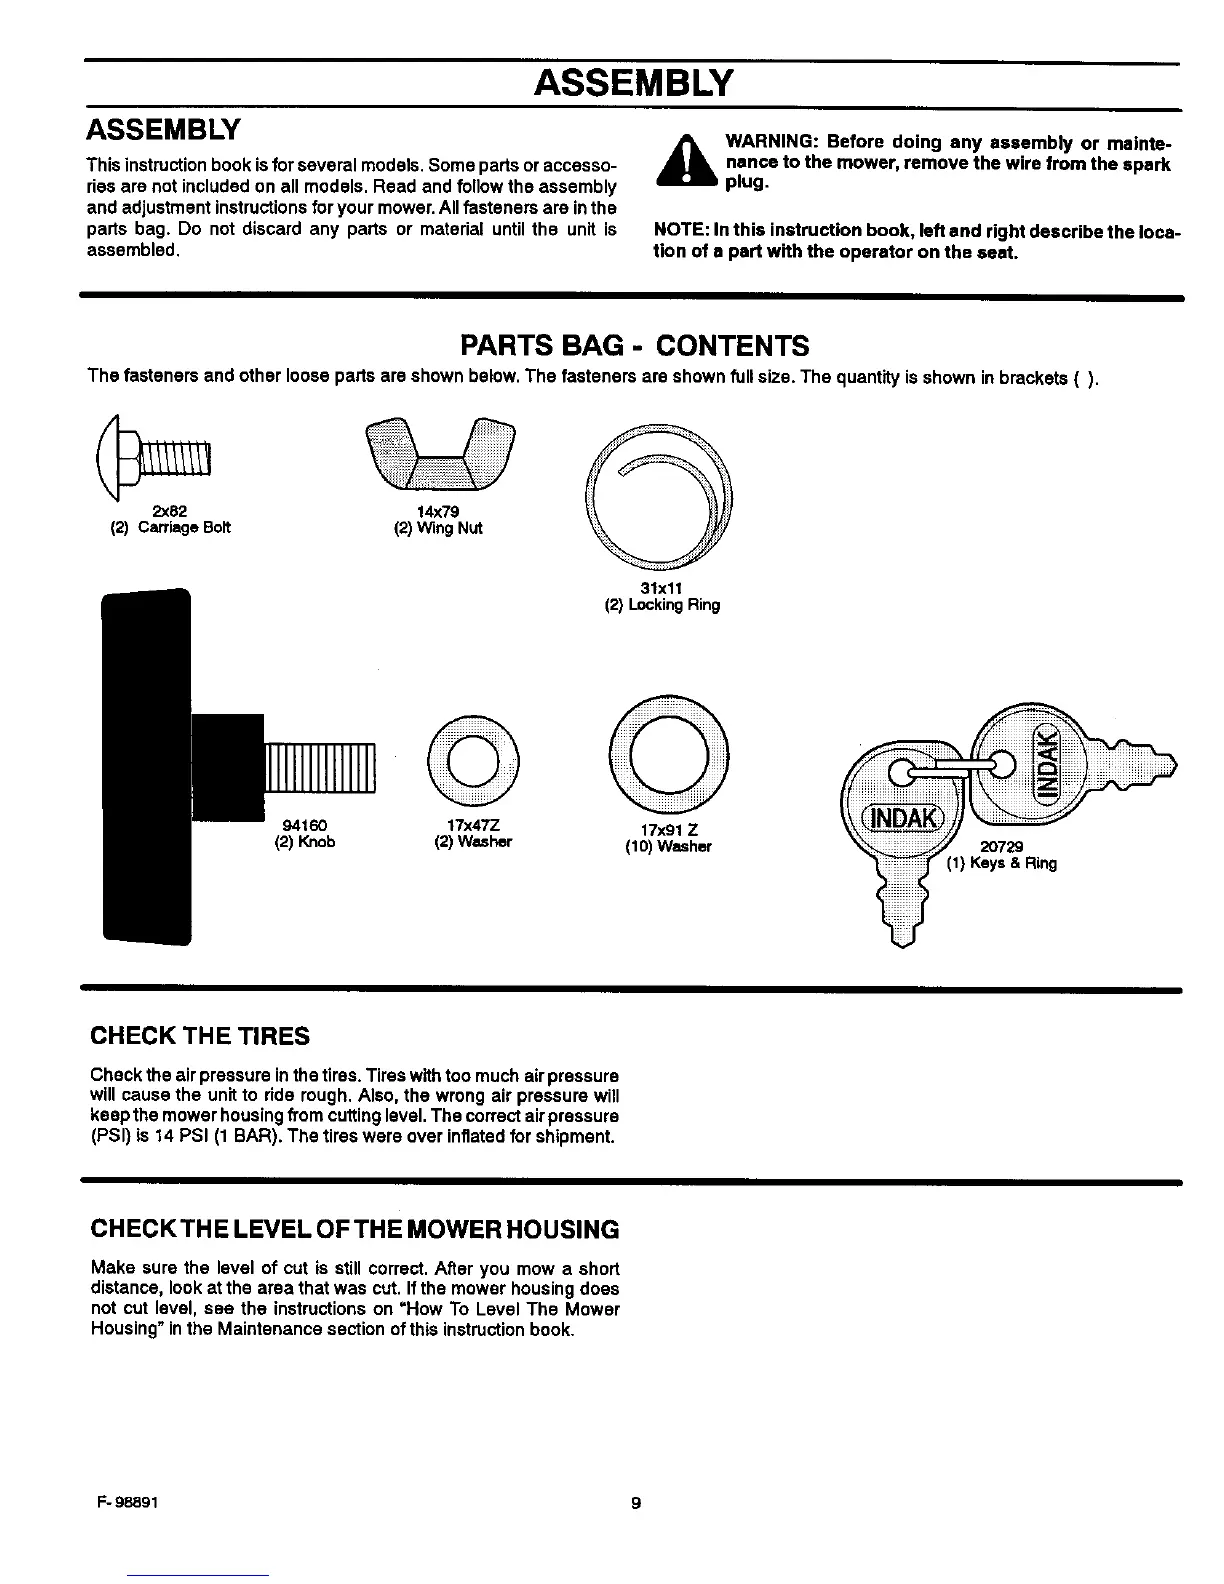
PARTS BAG - CONTENTS
The fasteners and other loose parts are shown below. The fasteners are shown full size. The quantity isshown in brackets ().
2x82 14x79
(2) CarriageBolt (2)WingNut
94160
(2)Knob
©
17x47Z
(2)Washer
31xli
(2) LockingRing
17x91Z
(1O)Washer 20729
(1) Keys& Ring
CHECK THE TIRES
Check the air pressure in the tires. Tires with too much air pressure
will cause the unit to ride rough. Also, the wrong air pressure will
keep the mower housing fTomcuttinglevel. The correct air pressure
(PSI) is 14 PSI (1 BAR). The tires were over inflated for shipment.
CHECKTHE LEVEL OF THE MOWER HOUSING
Make sure the level of cut is still correct. After you mow a short
distance, look at the area that was cut. If the mower housing does
not cut level, see the instructions on =How To Level The Mower
Housing" in the Maintenance section of this instruction book.
F- 98891 9