2.6 Resolution/Scale Calibration
If you were to cut out any particular shape, for example, a 10” x 10” square, you might find that it
actually measures 9-15/16” x 10-1/32”. It will be very close to 10” x 10” but perhaps just slightly smaller or
larger in either or both dimensions. Now this might be perfectly acceptable for the type of cutting you
do. Therefore, it may not even be necessary to do this particular calibration. However, if you do want
to make sure your shapes are cut precisely to scale, the following procedure will allow you to calibrate
your ARTisan cutter.
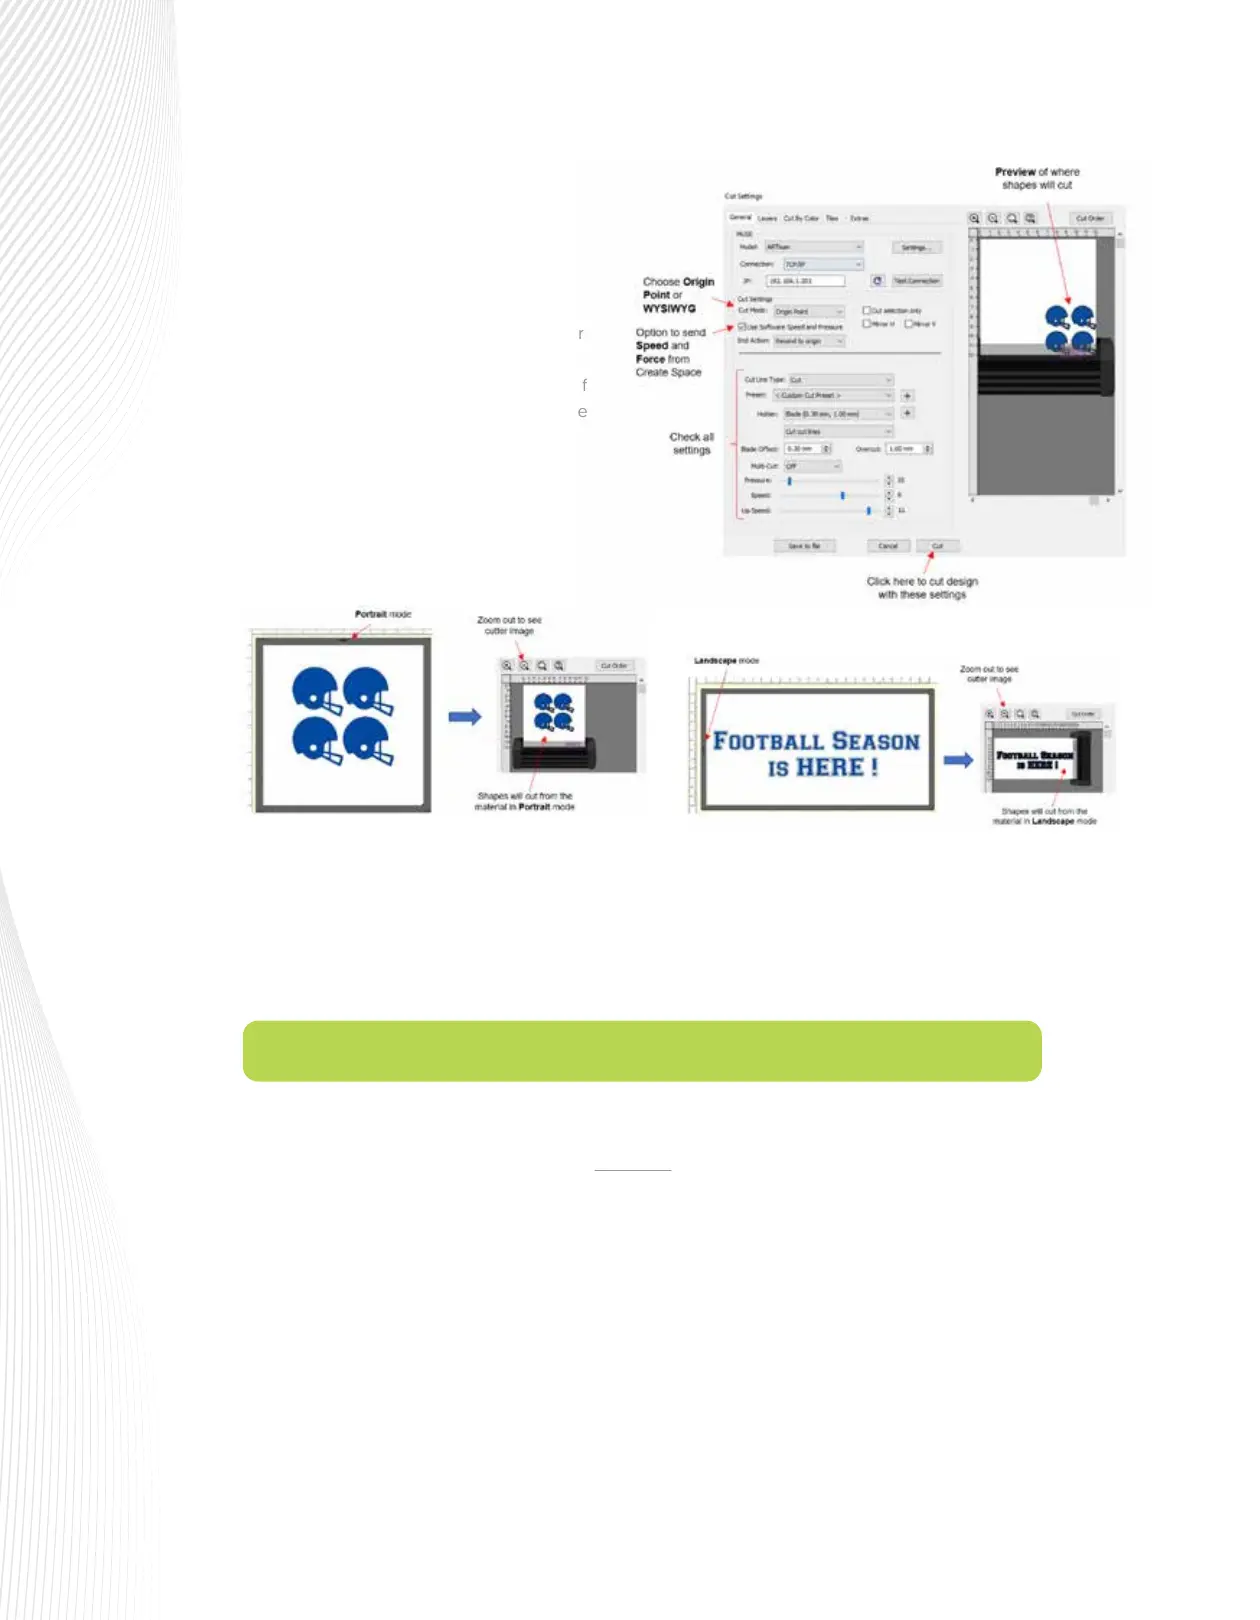
Note that when designing in Create Space,
you can use either Portrait mode (typically
used with the included cutting mat) or
Landscape mode (typically used for longer
projects). These are set on the Document
Panel to the right, along with setting up your
document area under Mat Size. Keep in
mind that the triangle (arrow) on the edge of
the on screen can be used to indicate where
your shapes will cut relative to the direction
the material is fed into the ARTisan. You can
also then verify, based on the preview in the
Cut Settings window where the shapes will
cut relative to the ARTisan itself:
The Cut Settings window provides other functions, such as Cut Order, Cut by Color, Layers (Cut Settings
by Layer), Mirroring, and more.
When you are ready to send the project to the ARTisan, click on Cut.
In your design software, add a square and size it to 10” x 10” or, if using metric units, 250 mm x 250 mm.
On the ARTisan control panel, go to MENU>Scale. The following window opens where you can verify
that the current X and Y Scale values are both set to 1.0000: