EasyManua.ls Logo

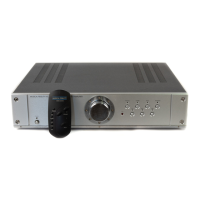
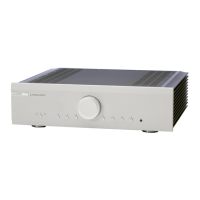
Musical Fidelity A3cr User Manual

Musical Fidelity A3cr
9 pages
To Next Page IconTo Next Page
Page #1 background imageLoading...
Page #1 background image
A3
CR
preamplifier Instructions for Use. Page 1 of 9
INTRODUCTION
INSTRUCTIONS FOR USE
Thank you for purchasing the Musical Fidelity
A3
CR
remote control preamplifier.
Used properly and carefully, it should give you many
years of outstanding musical reproduction.
The A3
CR
preamplifier has been designed to operate
comfortably with the sonic capabilities of the new
SACD format. (Super Audio CD)
Aesthetically, the A3
CR
preamplifier is a perfect match for the
A3
CR
power amplifier, A3 CD player and the A3 Tuner.
Together, they form one of the finest hi-fi systems
that you can own today.
Dust regularly with a soft duster or soft brush but be
careful when using cleaning or polishing agents - they may
harm the surface finish.
If you have any questions about anything in your
audio system, please consult your dealer who is there to
help and advise you.
A3
CR
PREAMPLIFIER
issue 2/12.10.2000
Questions and Answers:

Musical Fidelity A3cr Specifications

General IconGeneral
BrandMusical Fidelity
ModelA3cr
CategoryAmplifier
LanguageEnglish

Summary

INTRODUCTION

SAFETY INFORMATION

EARTHING SAFETY

Appliance must be earthed as per wire colour coding for safety.

RADIO FREQUENCY INTERFERENCE (RFI)

Product tested for RFI, advice for abnormal levels and lightning protection.

GENERAL ADVICE

ENVIRONMENTAL CONDITIONS AND PLACEMENT

Operates within specified temperature/humidity ranges; avoid water, heat, and direct sunlight.

CARE AND MAINTENANCE

Dust with soft cloth; avoid cleaning agents. Refer fuse/service issues to dealer.

GENERAL SAFETY PRECAUTIONS

Keep away from naked flames and children; dispose of batteries per manufacturer instructions.

CONNECTIONS AND FACILITIES

FRONT PANEL LAYOUT

Details of front panel buttons, LEDs, and controls like power, volume, and input selection.

REAR PANEL LAYOUT

Details of rear panel inputs, outputs, earth connection, and power inlet.

CONNECTIONS

INPUT CONNECTIONS

All connections should be made with power OFF. Details MM/MC phono input and 5 line-level inputs.

OUTPUT CONNECTIONS

Connect right and left line outputs to the power amplifier's inputs.

BEFORE YOU SWITCH ON

Routine for making connections and initial power-up: check connections, set volume minimum, switch on, wait for mute.

OPERATION

REMOTE CONTROL

Controls amplifier functions remotely; mute function indicated by red LED status.

PHONO INPUT OPERATION

Details MM/MC phono input and cartridge selection switch. Do not operate switch with volume up.

TAPE RECORDING

Connect tape machine outputs to 'Tape' input and inputs to 'Tape Record' output for recording.

OFF TAPE MONITORING

Allows comparison of recorded sound to original during recording using a 3-head cassette deck.

TROUBLESHOOTING

COMMON TROUBLESHOOTING ISSUES

Addresses common problems like no power, no sound, and remote control malfunctions with causes and remedies.

SPECIFICATIONS

Related product manuals