2200LZJE-HO-C6-N_2013.12.
Chapter 5 Maintenance
Compound 2-stage Screw Compressor 2016**C 5.7 Reassembly
5-56
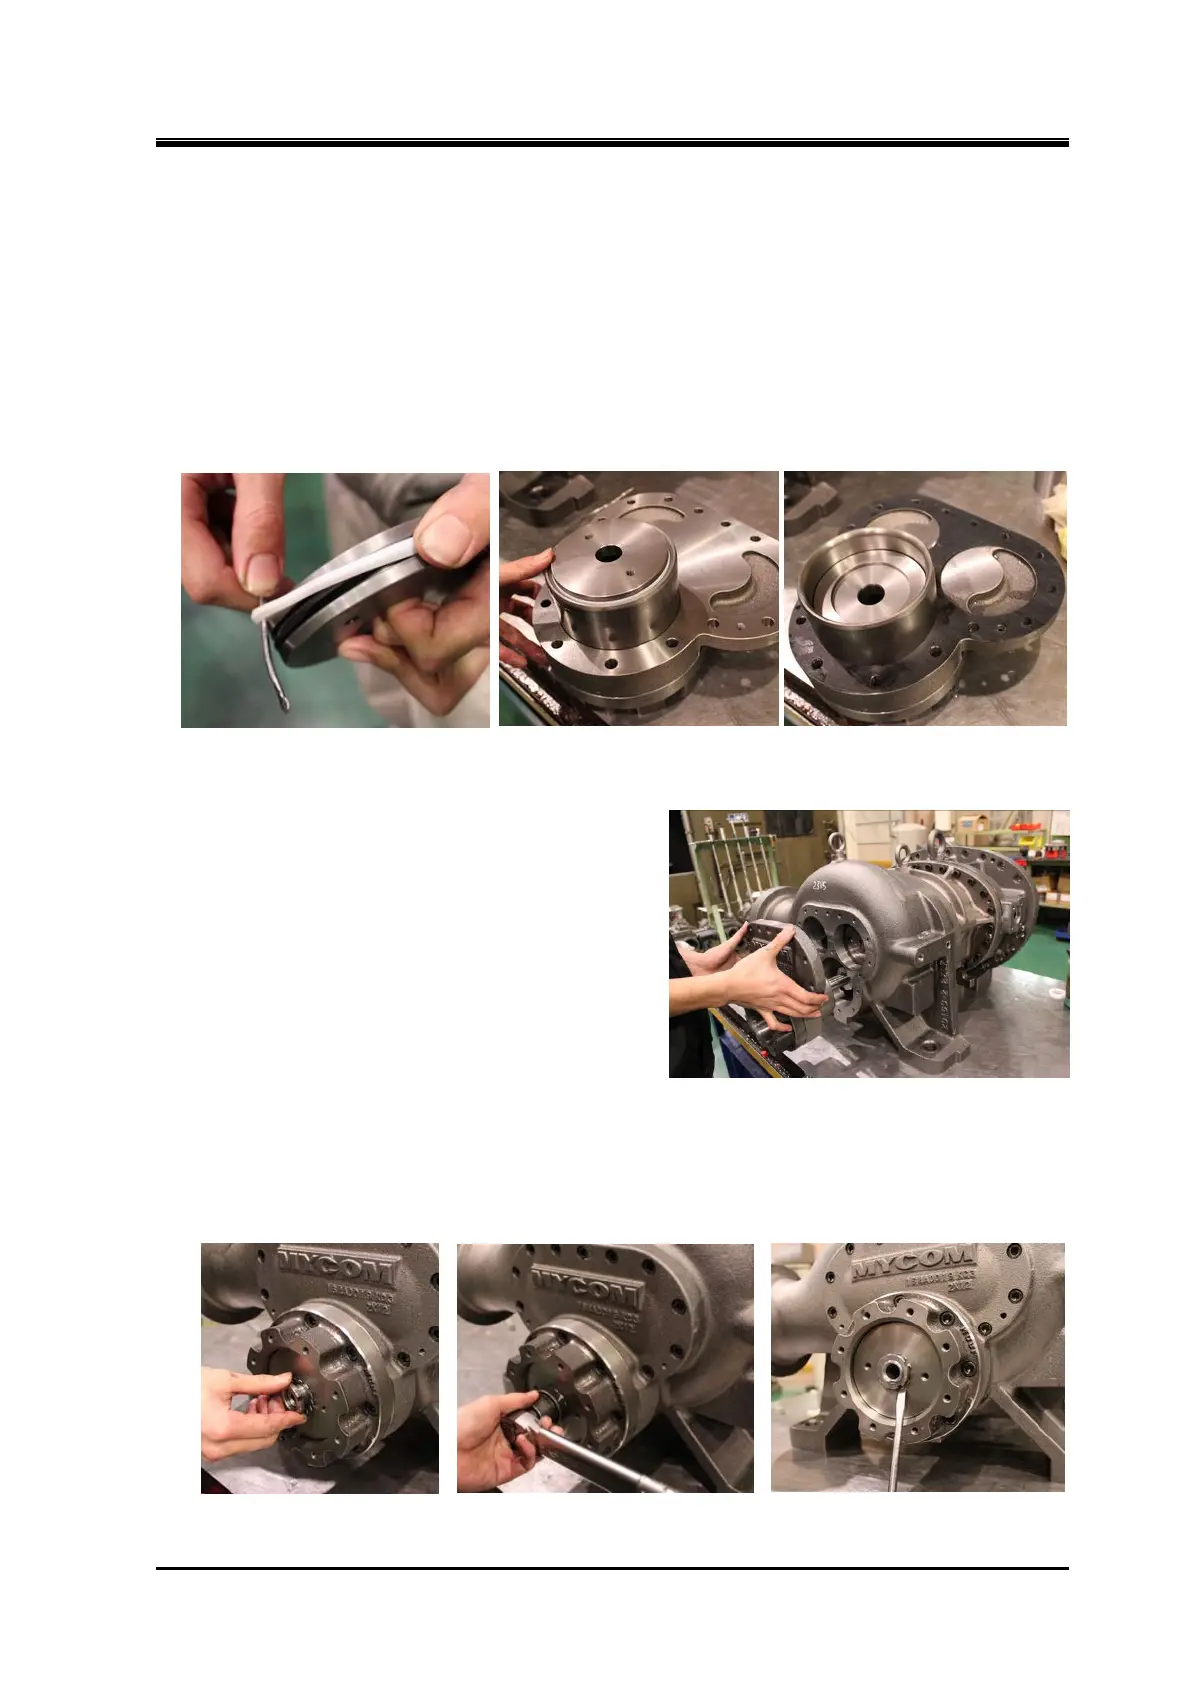
f) Before assembly, apply sufficient lubricant. Attach the O-ring 【65】 to the unloader piston【64-2】,
and then attach the cap seal 【66】 on them. Lightly making a mountain fold in the circumferential
direction of the cap seal will facilitate the work. Use of a small and smooth spatula-shaped tool (as
shown in Photo 104) will aid the assembly.
g) Attach the unloader piston, which has the O-ring and cap seal attached, to the unloader cylinder.
The unloader piston has a surface which has threaded holes for eye bolts and another surface
without such holes. First, while exchanging these surfaces alternately several times using the
chamfer of the unloader piston, press the unloader piston lightly with the palm to settle the cap seal.
Finally, as shown in Photo 106, attach the unloader piston with its surface having threaded holes
faced to the unloader cylinder cover.
After attaching, check that the cap seal is not broken or pinched.
Photo 104 Photo 105 First Fit in Photo 106
Reverse Direction
h) Push the unloader piston into around the midst of
the unloader cylinder. With the unloader push rod
【67-2】 pulled toward you, attach the balance piston
cover with gasket attached (as shown in Photo 106),
onto the high-stage suction cover (Photo 107).
If you push the piston into the push rod and
temporarily tighten it with the lock nut 【69-2】, the
work that follows will be easier.
i) Align the flange surfaces, and tighten the hexagon
socket head cap screws to the specified torque (50
N·m).
j) Pull the piston toward you by using eye bolts, and
remove the temporarily tightened lock nut. As shown
in Photo 108, attach the lock washer 【70-2】 and lock nut 【69-2】 to the push rod, and fasten the
lock nut to the specified torque of 80 N·m (Photo 109).
To stop rotation, bend the lock washer claw aligned with the notch of the lock nut (Photo 110).
Lastly, check the movement of the piston by using eye bolts.
Photo 108 Photo 109 Photo 110
Photo 107