Do you have a question about the Nanoleaf Shapes and is the answer not in the manual?
Detailed steps for enabling the Nanoleaf Shapes hotspot mode and connecting to its Wi-Fi.
Guide to account creation, panel layout, layout assistant use, and power requirements for Android setup.
Instructions for setting up Nanoleaf Shapes with iOS, including HomeKit pairing, NFC, and orientation.
This document outlines the process for enabling Hotspot Mode and setting up Nanoleaf Shapes, specifically Hexagons panels, on both Android and iOS devices.
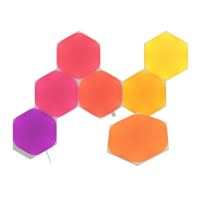
The Nanoleaf Shapes are modular smart lighting panels that can be arranged in various designs to create custom lighting experiences. They connect to a mobile device via Wi-Fi, allowing users to control their lighting, set scenes, and integrate with other smart home platforms. Hotspot Mode is a specific operational state where the Nanoleaf Shapes controller broadcasts its own Wi-Fi network, primarily for initial setup and pairing, without providing internet access. This mode facilitates a direct connection between the mobile device and the Shapes for configuration purposes.
To activate Hotspot Mode on the Nanoleaf Shapes, users need to press and hold both the rhythm and power buttons on the controller for 30 seconds. Upon successful activation, all six buttons on the controller will flash five times, indicating that the hotspot mode is active and broadcasting its Wi-Fi network.
Before setup, it's recommended to lay out the Hexagons panels on a flat surface (floor or table) to ensure each panel is properly connected to a linker. The Nanoleaf Smarter Series App will prompt users to create an account upon first opening, which is used for integrations with platforms like Amazon Alexa, Google Assistant, and IFTTT. Users should arrange the Hexagons panels so that each connects to at least one adjacent panel. The Layout Assistant feature within the app helps verify the layout and map out panel placement. It's important to ensure at least one power supply is used for every 21 Hexagons.
Once the Hexagons are cycling through colors, the power button LED will remain on and steady, indicating readiness for pairing. Users initiate pairing by pressing the "Start Pairing" button in the app and selecting the desired 2.4GHz Wi-Fi network. After successful connection, the panels will flash green. Users will then be prompted to input a pairing code, found on the user guide booklet or the back of the controller. NFC pairing is also an option, provided NFC is activated on the mobile device. An "Add Accessory" window will appear for renaming the device and assigning it to a specific room. The "Setup Orientation" screen confirms the installation's orientation, which is vital for scene direction and gesture functionality.
Similar to Android, users should lay out the Hexagons panels on a flat surface to ensure proper linker connection. Arrange panels so each connects to at least one adjacent panel, using the Layout Assistant to verify the layout and map placement. Ensure one power supply per 21 Hexagons. After pressing the power button, the Hexagons will power up within one to two minutes. Once they are cycling through colors, and the power button light remains on, the pairing process can begin.
Users press the "Start Pairing" button in the app. The "Add Accessory" window will appear, prompting a scan of the HomeKit Setup Code (QR code), found on the user guide booklet. Alternatively, NFC pairing can be used if the mobile device supports and has NFC activated. After scanning or manually entering the HomeKit Setup Code, the app searches for the accessory. Upon successful pairing, the Hexagons will flash green, then white, indicating identification by the app. The "Add Accessory" window allows renaming the device, assigning it to a room, and including it in HomeKit's Favorites list. The "Setup Orientation" screen confirms the installation's orientation, which is necessary for correct scene direction and proper functioning of touch and swipe gestures.
The document does not explicitly detail maintenance features. However, the emphasis on proper panel connection, power supply allocation, and orientation setup suggests that correct initial installation is key to the longevity and optimal performance of the Nanoleaf Shapes. The app's ability to verify layout and map placement can be considered a preventative maintenance feature, ensuring the physical setup aligns with the digital configuration for a seamless user experience.
| Connectivity | Wi-Fi (2.4GHz b/g/n) |
|---|---|
| Colors | 16 million colors |
| Brightness | 100 lumens per panel |
| Lifespan | 25, 000 hours |
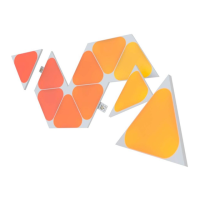
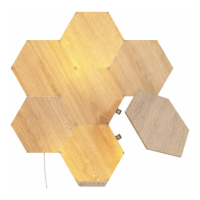
| Shape Options | Triangles, Mini Triangles, Hexagons |
| Dimmable | Yes |
| Type | LED Panels |
| Control | App, Voice, Touch |
| Compatibility | Apple HomeKit, Amazon Alexa, Google Assistant, IFTTT, SmartThings |
| Power Supply | 120VAC to 240VAC |
| Expansion | Modular, Connect Multiple Panels |
| Communication Protocol | Wi-Fi |
| Power Consumption per Panel | 1.5W |
| Max Panels per PSU | Up to 21 Panels |