NAPCO Gemini C-Series Control Panel Installation Instructions--Volume 2
Page 50 Installation Instructions, Volume 2
off. If there is an Aux. Relay timeout programmed, it will follow this timeout unless toggled off by the keyfob. To provide key-
fob-only control, program no timeout. Program Disable Burg PGM1 Clear on Disarm to prevent a disarm from resetting the
Aux. Relay.
Associated Keyfob users must be programmed to report openings and/or closings. Keyfobs 1–16 report as Users 180–195,
respectively.
Keyfob Zone Assignment
Keyfobs can be assigned to zones to allow individual reporting. Each of the 4 keyfob buttons can be assigned to a zone. For
example, On button = point 1; Off button = point 2; A1 = point 3; A2 = point 4. Up to 255 keyfobs can be assigned to the
Gemini GEMC C-Series control panels, providing multiple wireless panic buttons on a system, each reporting to the Central
Station and/or annunciating on a keypad the keyfob zone number with description/location. To assign a keyfob to a zone,
program the keyfob as you would a transmitter, entering the keyfob's ID code, check sum and point number at the appropriate
zone.
Keyfob or Keypad Activation of Relay
The Auxiliary Relay can be programmed to activate for a programmable period of time. This is achieved through a new key-
fob option, Access control, by programming (Access Control on Burg Module PGM1 Output) into the Aux-1 Function or
Aux-2 Function locations. Also program the option Burg Module PGM1 Output Access Control, and a time into the Burg
PGM1 Access Control Timeout. If an Access Control from the keypad is desired, also program a Panel Access Code.
Keyfob Disarm Activates Entry Lighting
Disarming with a keyfob can activate Remote Relays or X-10 Devices by programming the event Ext Burg Rel 1, or Ext Burg
Rel 2 on the NAC/Output Assignment screen (NAC/Output Events tab) in PCD-Windows Quickloader. This event will
cause the programmed outputs to activate on either a Keyfob Disarm OR the opening of the Exit Entry zone while the system
is armed.
Keypad Assignment
Keypad Auxiliary, Keypad Panic and Keypad Ambush
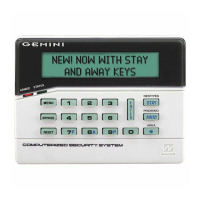
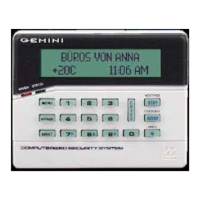
Check these boxes to enable the desired keypad button functionality. For Auxiliary functionality, the user presses 8 and *
simultaneously; for Panic, the user presses 9 and * simultaneously; for ambush, see Ambush Glossary entry.
EZ Arm
See Easy Arming entry.
Entry Sounder
(Burglary Only). If enabled, a sounder will turn on during Entry Delay time (system armed and an entry delay zone acti-
vated).
(also see Fire Glossary)
Keypad Configuration screen (see Fire Glossary)
Keypad Digital Dialer Test
A Digital Dialer Test (Central Station Comm. Test) can be initiated from the function menu. Press R until "DIGITAL DI-
ALER TEST Y/N" is displayed and then press [NEXT/YES] to initiate the transmission of a Test Timer signal. Note: Test
Timer reporting codes and Report Test Timer on Telco1 or Telco 3 must be programmed.
Keypad Jumpers: Refer to label on the keypad circuit board fishpaper for jumper locations and a summary of settings.
Keypad Access See Access Control
Keypad Area Assignments
In multiple-area systems, assign an Area Number ("1"– "8") to each keypad.
Keypad Features
The following programmed system features will activate only if they have also been enabled at the keypad.
• Ambush
• Easy Arming
• Access Control
• Keypad (Police) Panic
• Keypad Auxiliary Panic
BURGLARY GLOSSARY
 Loading...


